Tutorial 1: Create and manage databases, schemas, and tables
Introduction
In this tutorial, you learn how to submit REST queries to create and manage databases, tables, and schemas.
Prerequisites
Note
If you have already completed the steps in Common setup for Snowflake REST APIs tutorials, you can skip these prerequisites and proceed to the first step of this tutorial.
Before you start this tutorial, you must complete the common setup instructions, which includes the following steps:
- Import the Snowflake REST APIs Postman collections.
- Authenticate your connection by setting the bearer token in Postman.
After completing these prerequisites, you are ready to start using the API.
Create a database and list available databases
You can use Postman to create a database and list available databases.
-
To create a database, send a
POSTrequest with the following request body to the/api/v2/databasesendpoint, as shown.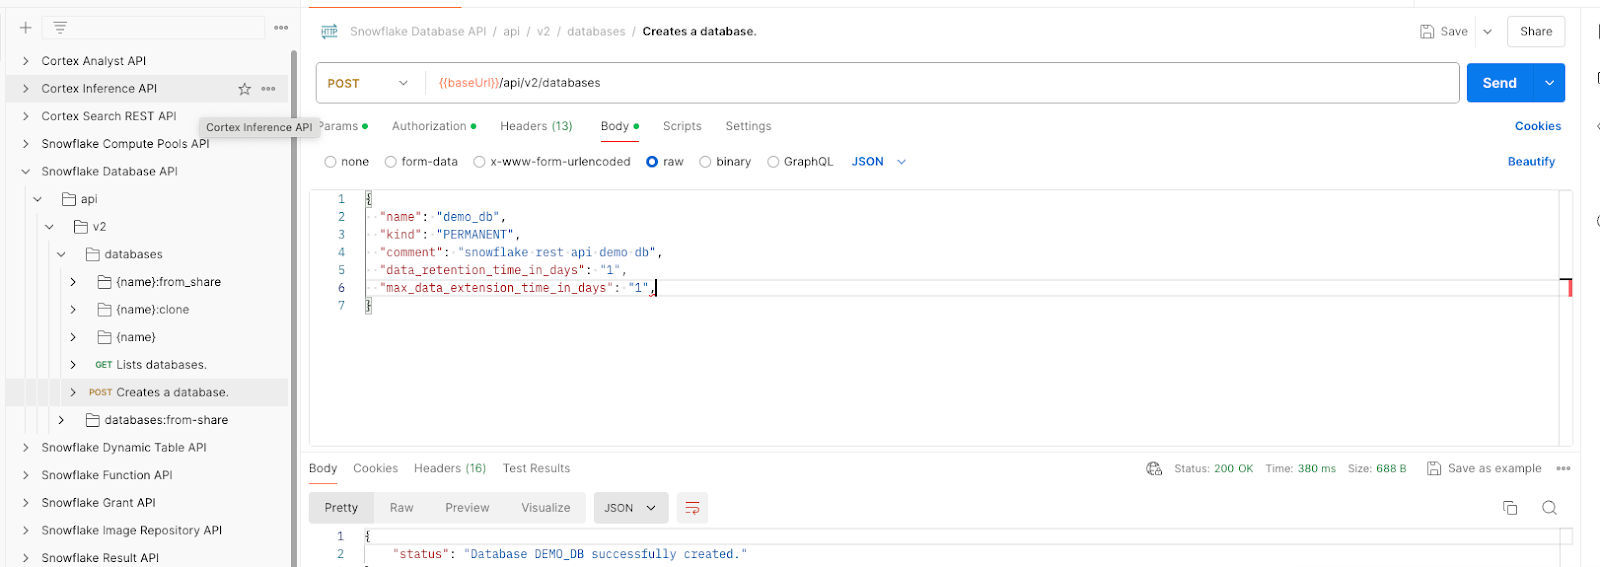
-
To list available databases, send a
GETrequest to the/api/v2/databasesendpoint, as shown in the following examples:-
To find databases whose name contains the string,
demo, specify%25demo%25in the like query parameter.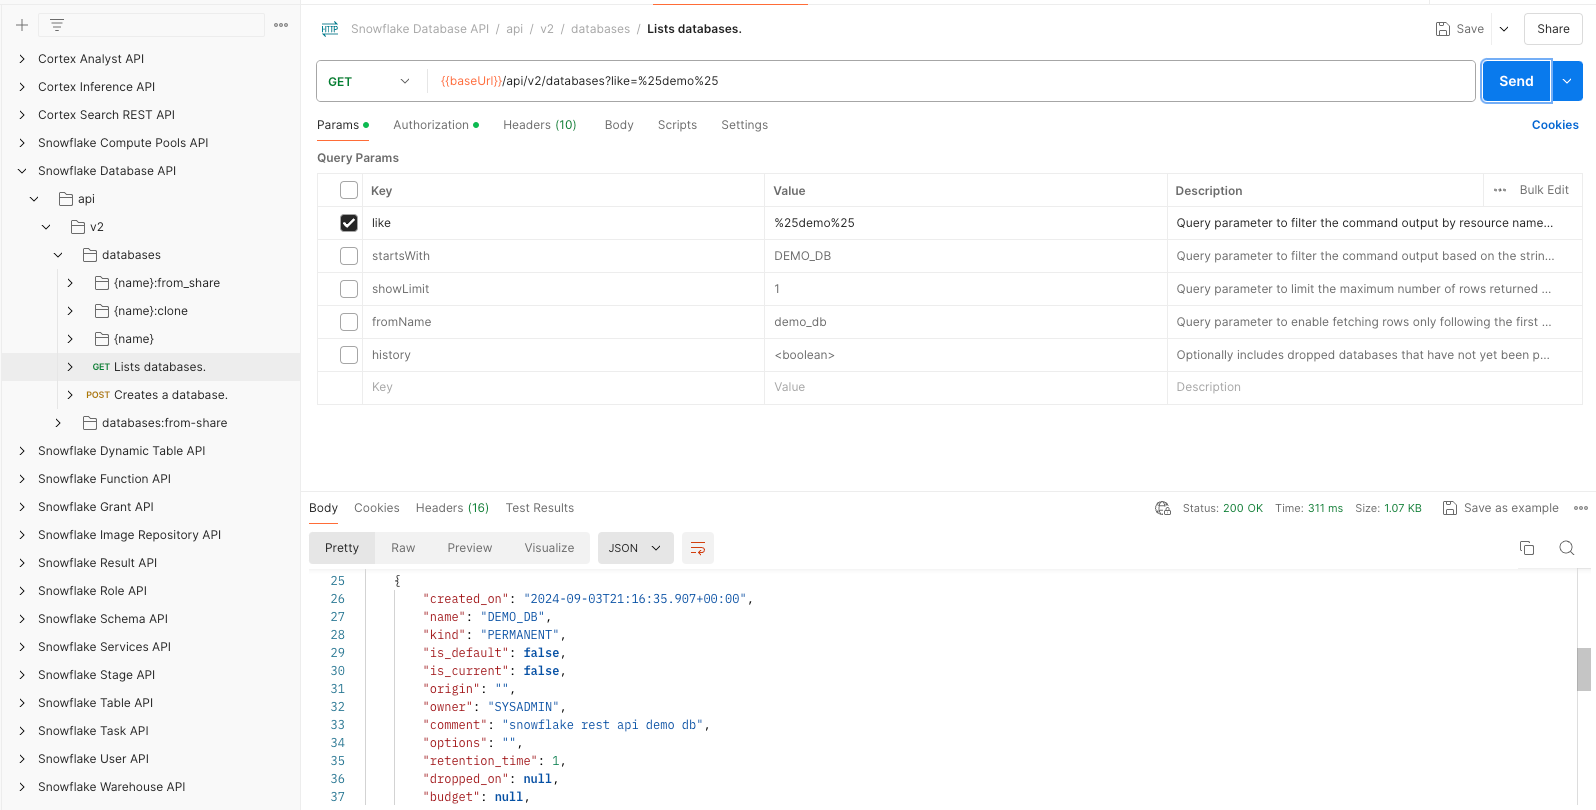
-
To return the first database whose name starts with the string,
DEMO_DB, specifyDEMO_DBand1in the startsWith and showLimit query parameters, respectively.
-
For more information, see the Snowflake Database API reference.
Create a schema and list available schemas
You can use Postman to create a schema and list available schemas.
-
To create a schema, send a
POSTrequest to the/api/v2/databases/{database}/schemasendpoint, as follows:-
Add the database name (
demo_db) to the database path variable in the request header.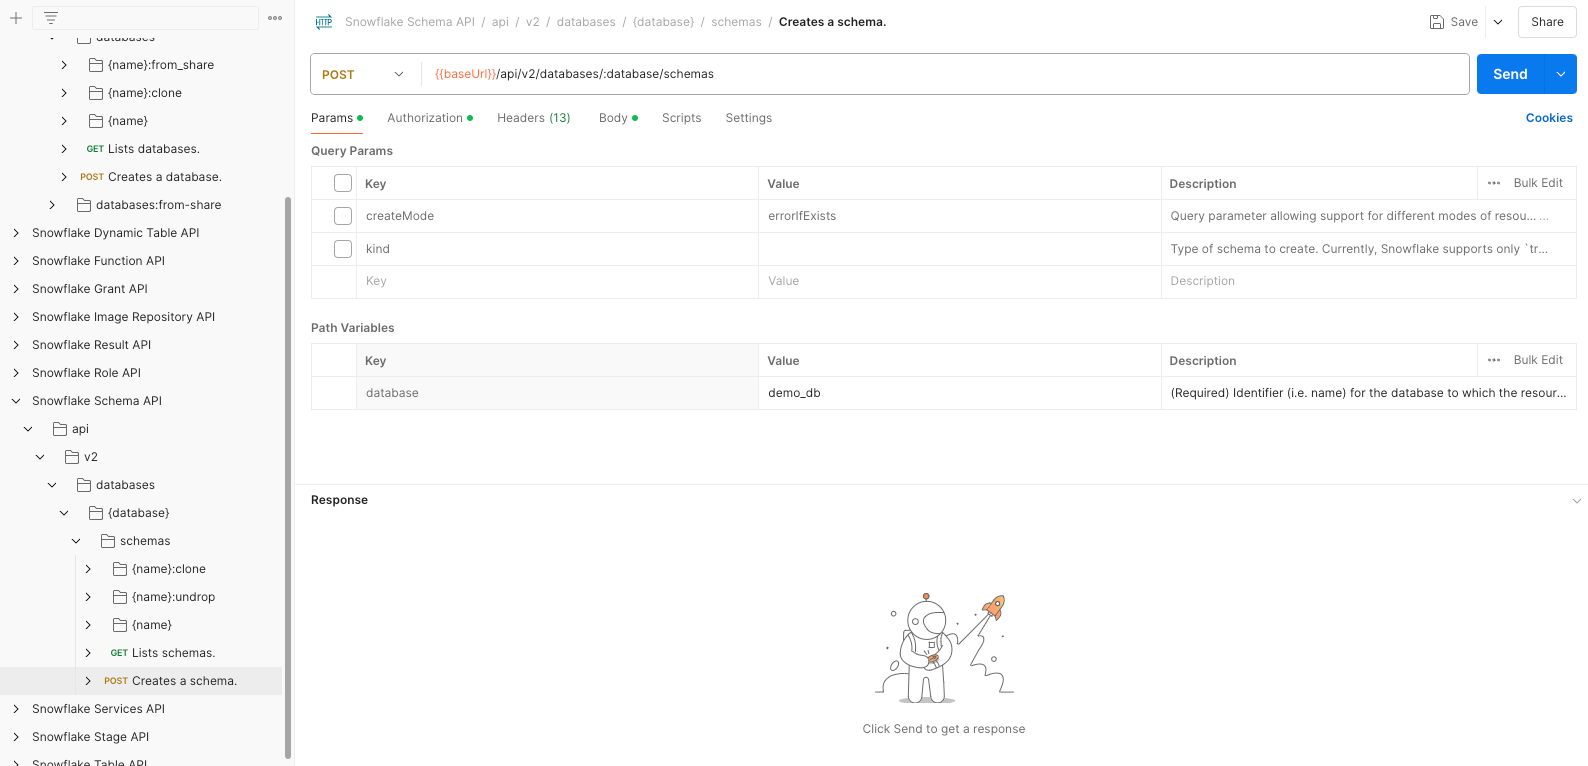
-
Add the schema name (
demo_sc) to the request body.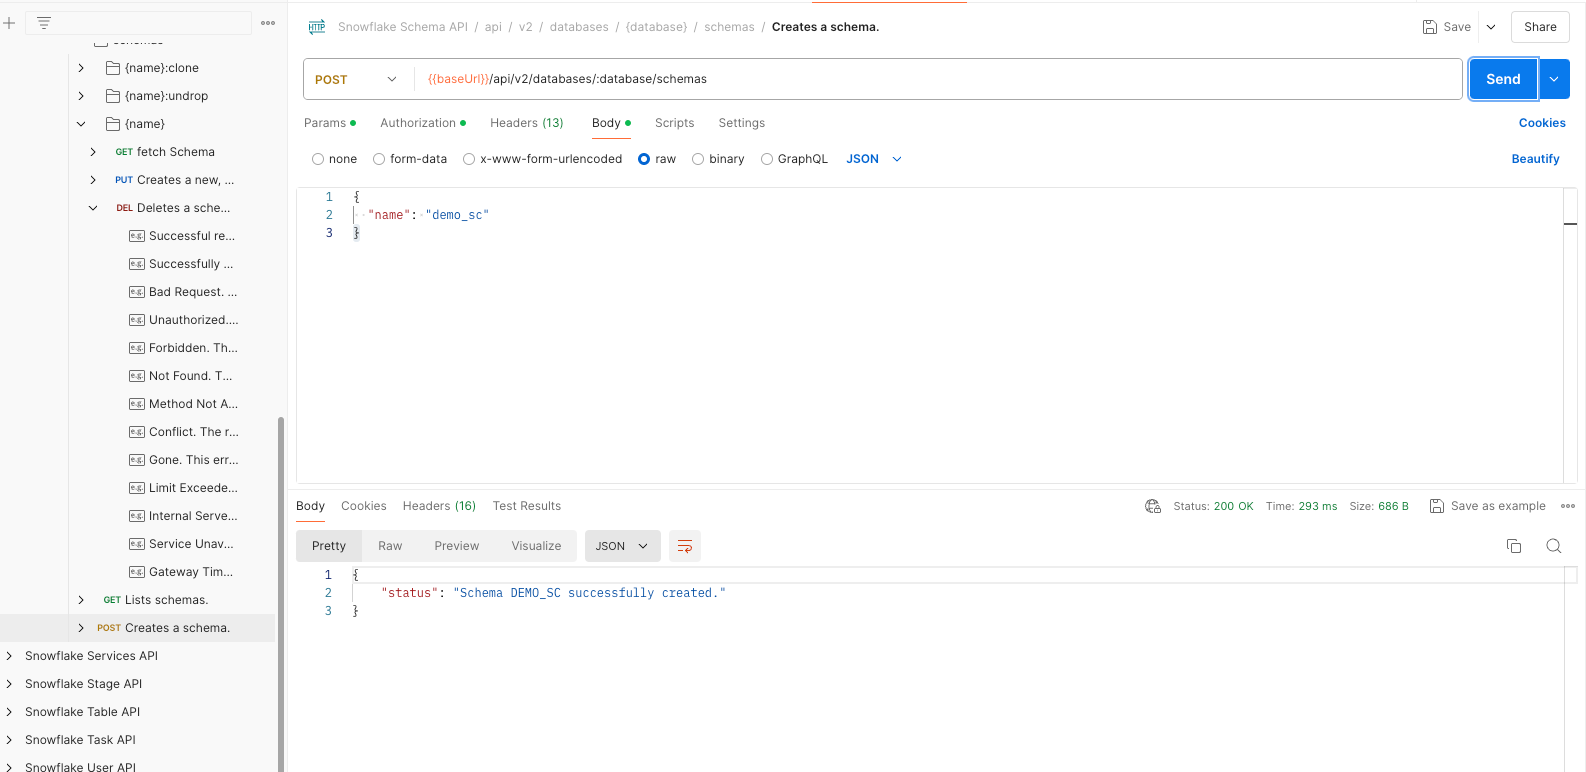
-
-
To list available schemas, send a
GETrequest to the/api/v2/databases/{database}/schemasendpoint. In this example, you return the first schema whose name starts with the string,DEMO_SC, by specifyingDEMO_SCand1in the startsWith and showLimit query parameters, respectively.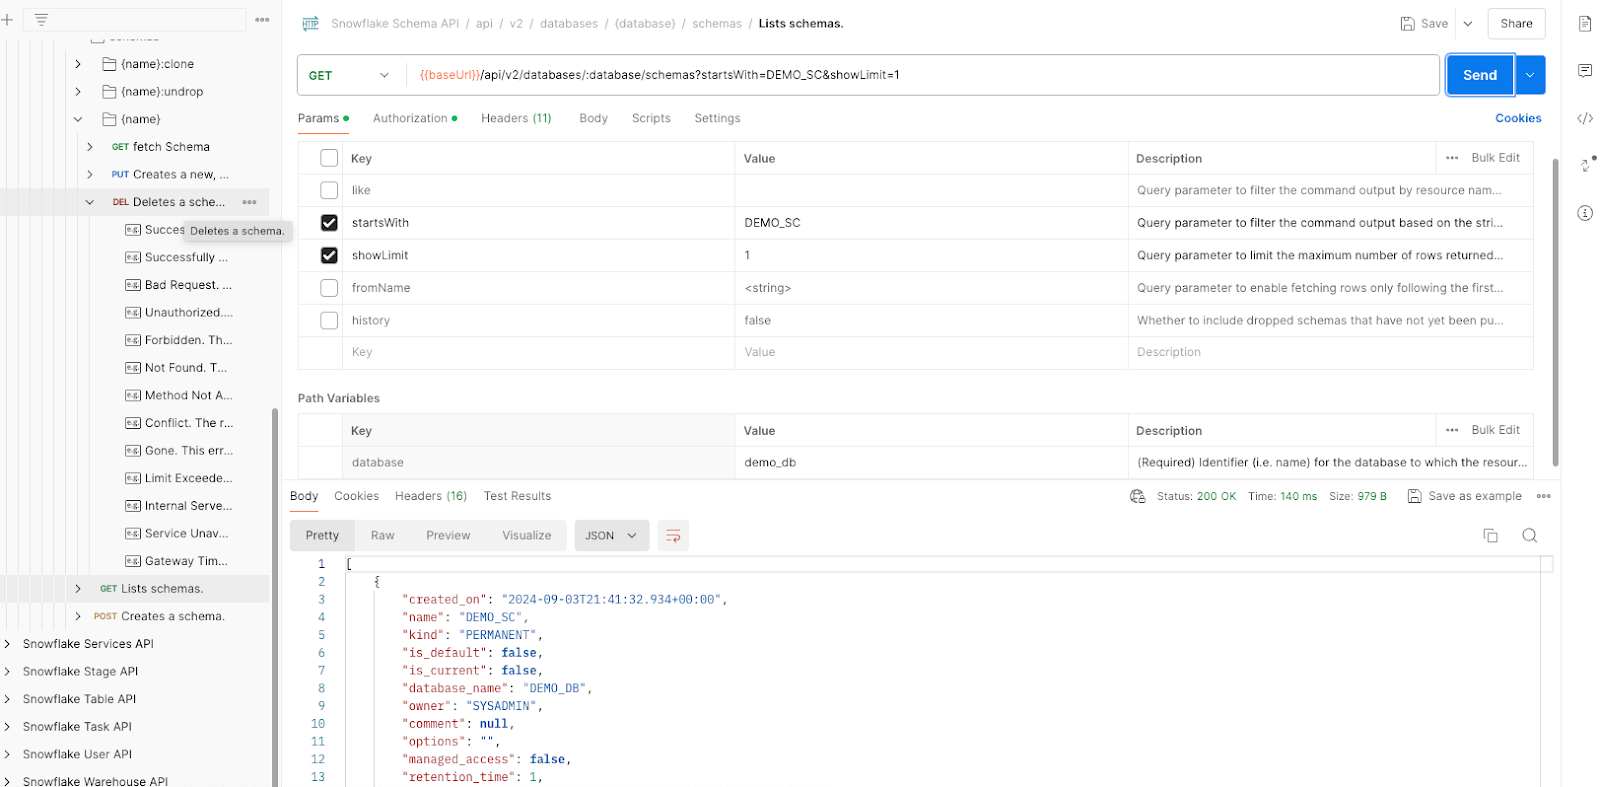
For more information, see the Snowflake Schema API reference.
Create a table and fetch the table details
You can use Postman to create a table and list available tables.
-
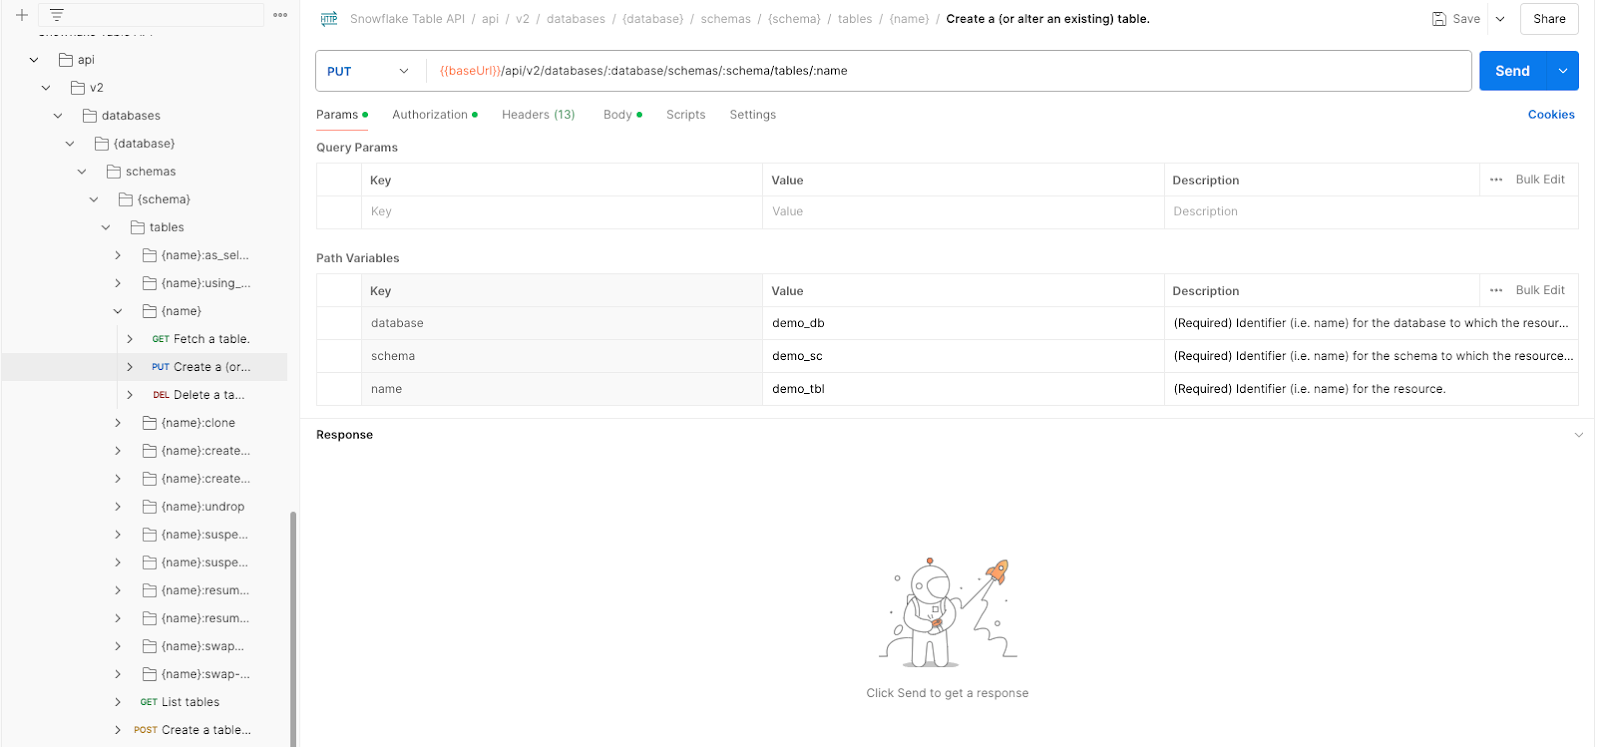
To create a table, send a
POSTrequest to the/api/v2/databases/{database}/schemas/{schema}/tablesendpoint, as follows:-
Add the database name (
demo_db) and the schema name (demo_sc) in the database and database path variables, respectively, in the request header.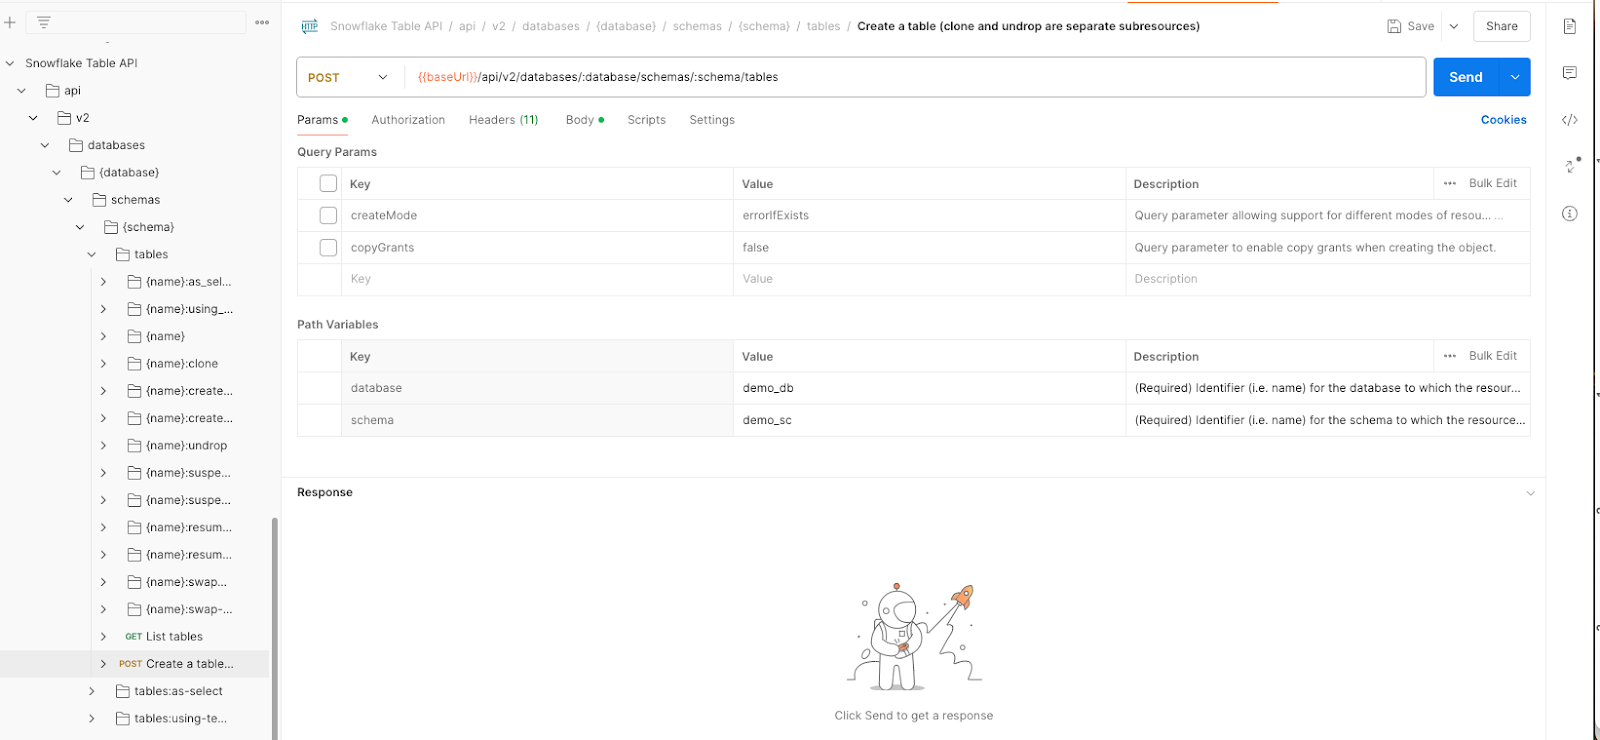
-
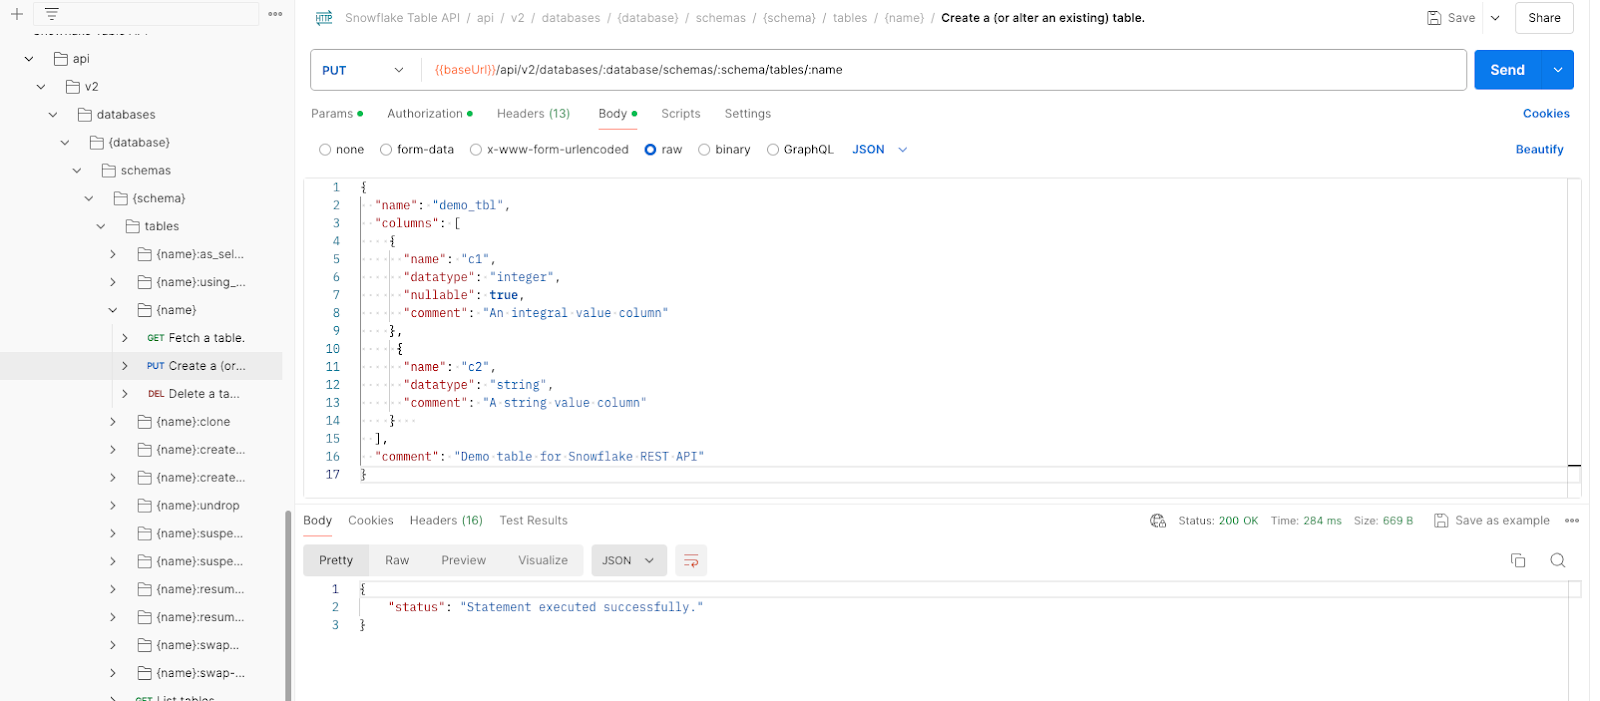
Add the table name (
demo_tbl) and the table columns to the request body. In this case, you added one column namedC1.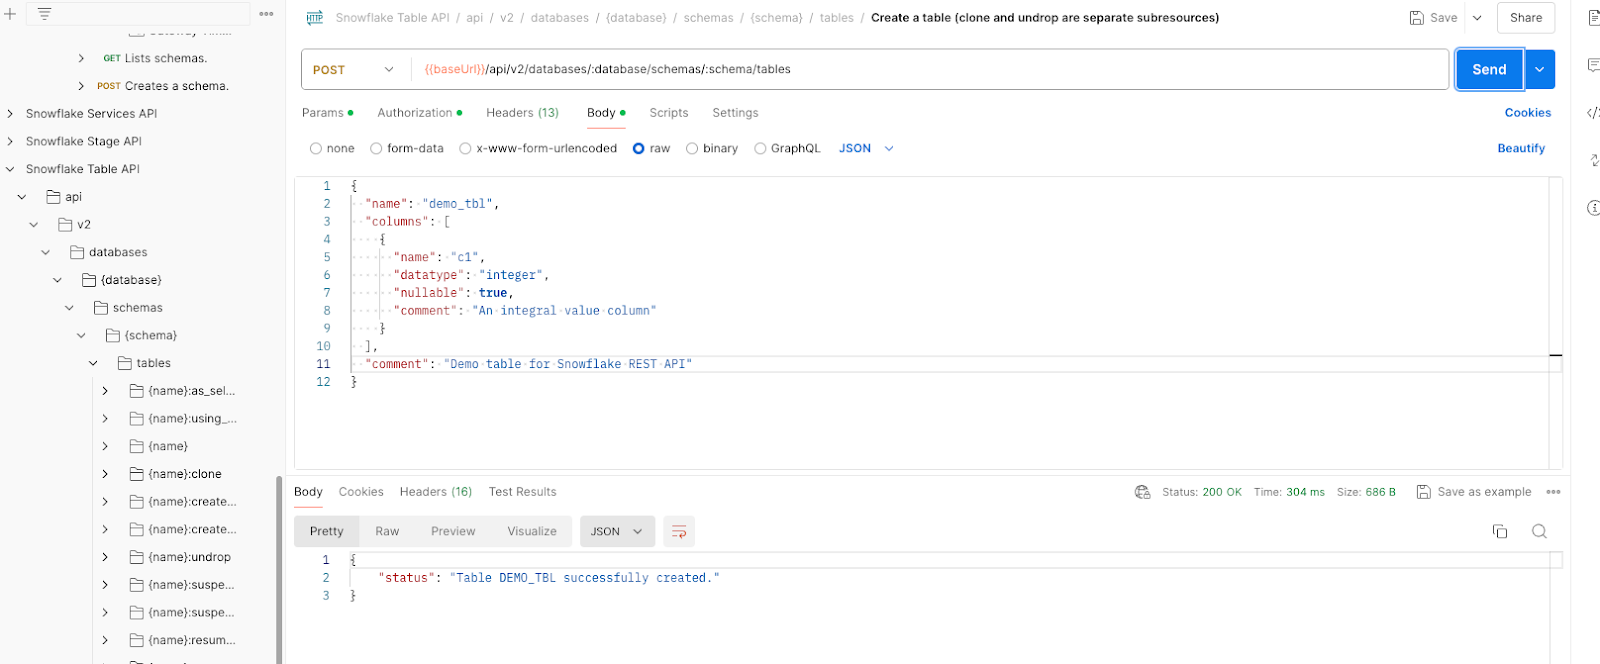
-
-
To fetch the table you just created, send a
GETrequest to the/api/v2/databases/{database}/schemas/{schema}/tables/{name}endpoint. In this case, you specifydemo_db,demo_sc, anddemo_tblin the database, schema and name path variables, respectively.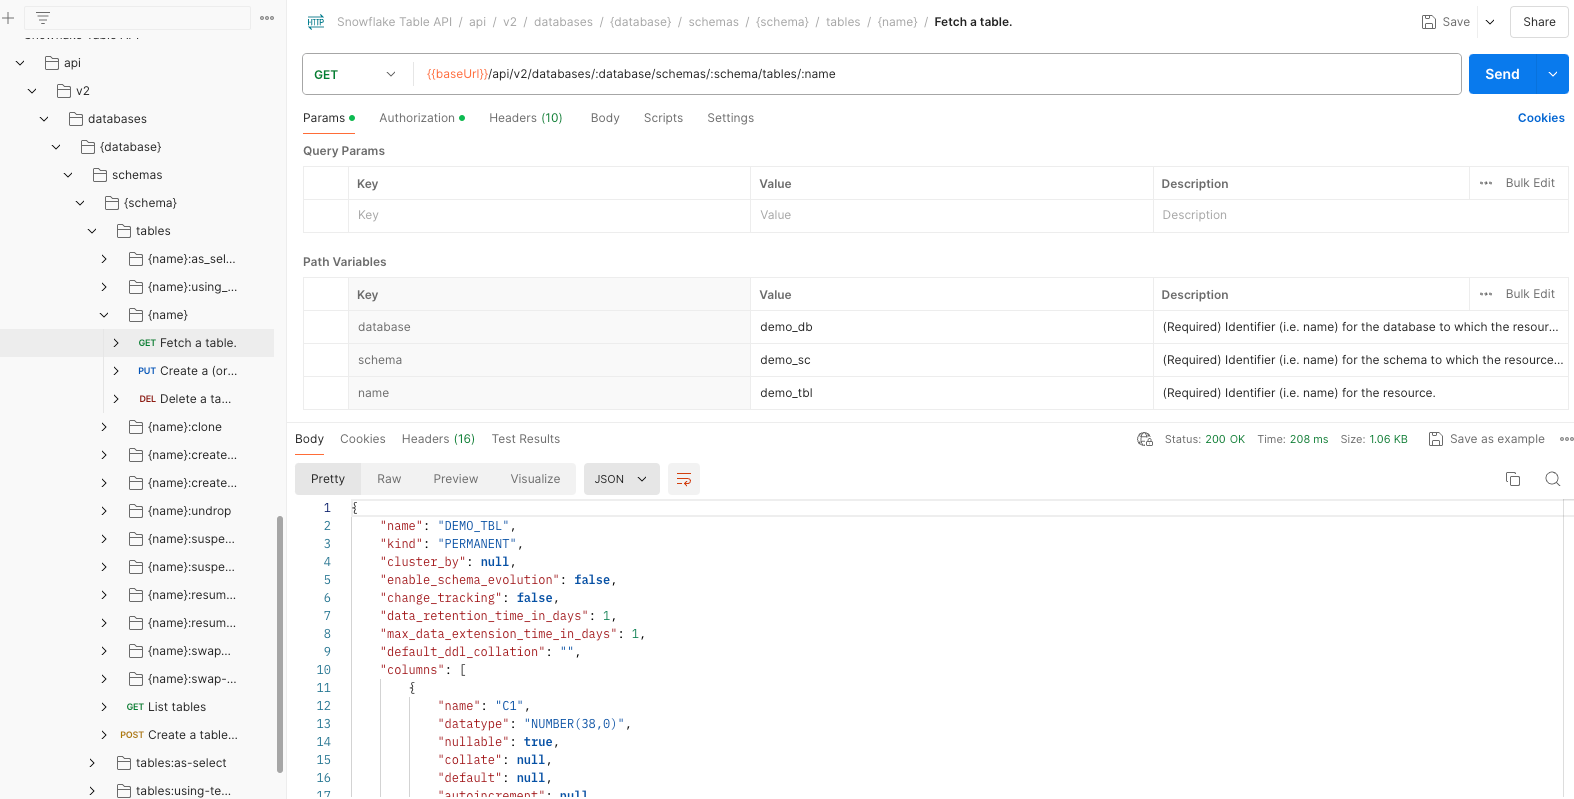
For more information, see the Snowflake Table API reference.
Alter a table and fetch the table details
You can use Postman to alter a table.
-
To alter the table you created in the last tutorial, send a
PUTrequest to the/api/v2/databases/{database}/schemas/{schema}/tables/{name}endpoint, as follows:-
Specify the names of the database, schema, and table you created in the corresponding path variables.
-
In the request body, enter the new table definition. In this case, you add a new column to the table.
-
-
Verify the change by fetching the table details by sending a
GETrequest to the/api/v2/databases/{database}/schemas/{schema}/tables/{name}endpoint. In this case, you specifydemo_db,demo_sc, anddemo_tblin the database, schema and name path variables, respectively.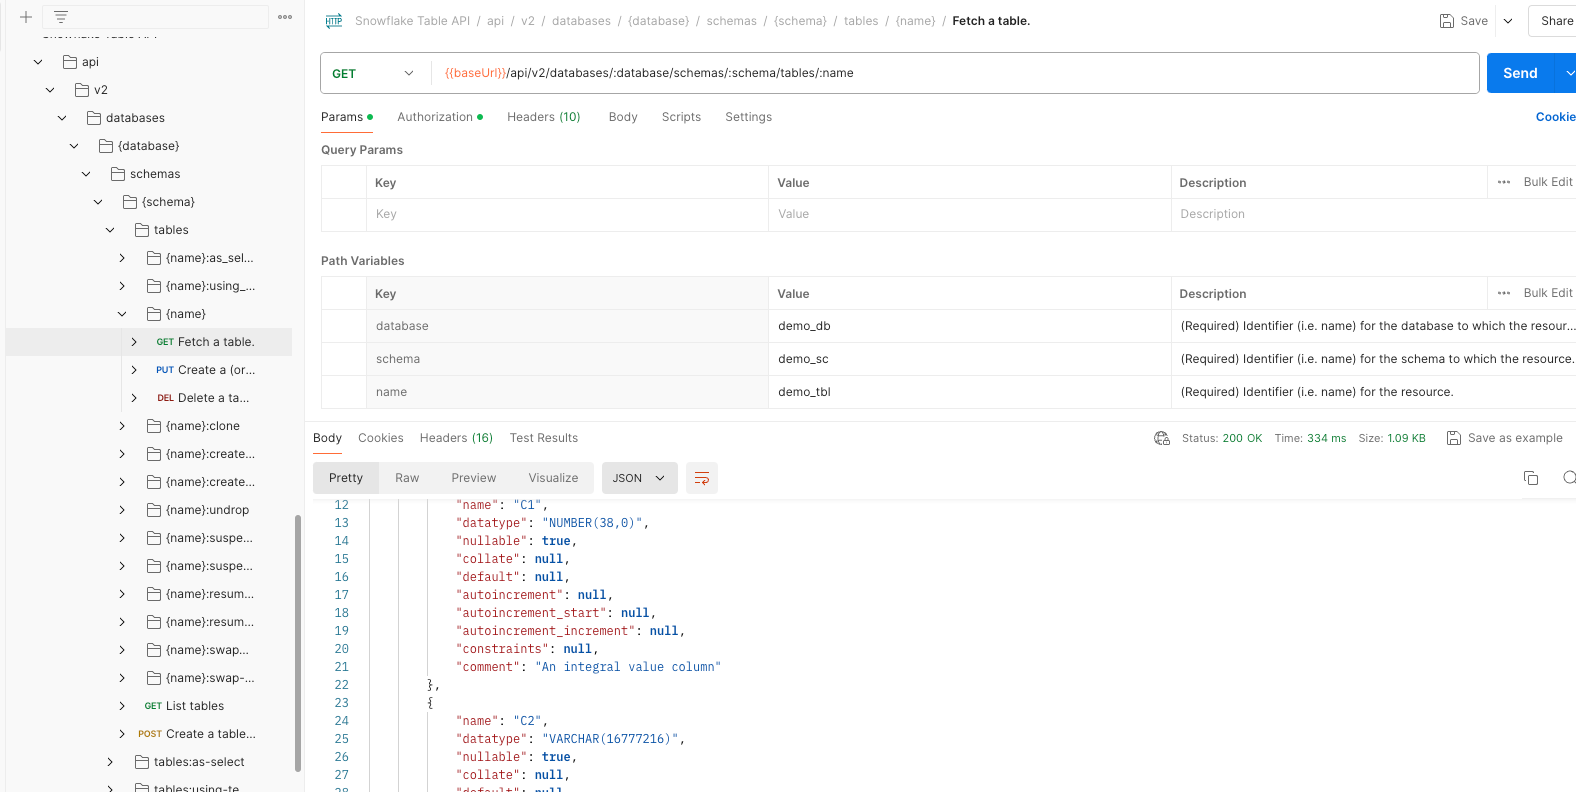
Notice the table now contains a new
C2column.
For more information, see the Snowflake Table API reference.
List available tables
You can use the /api/v2/databases/{database}/schemas/{schema}/tables endpoint to return lists of all tables available to you.
-
To list all available tables, send a
GETrequest to the/api/v2/databases/{database}/schemas/{schema}/tablesendpoint with no query parameters, as follows. In this case, you specifydemo_dbanddemo_sc, anddemo_tblin the database, schema and name path variables, respectively.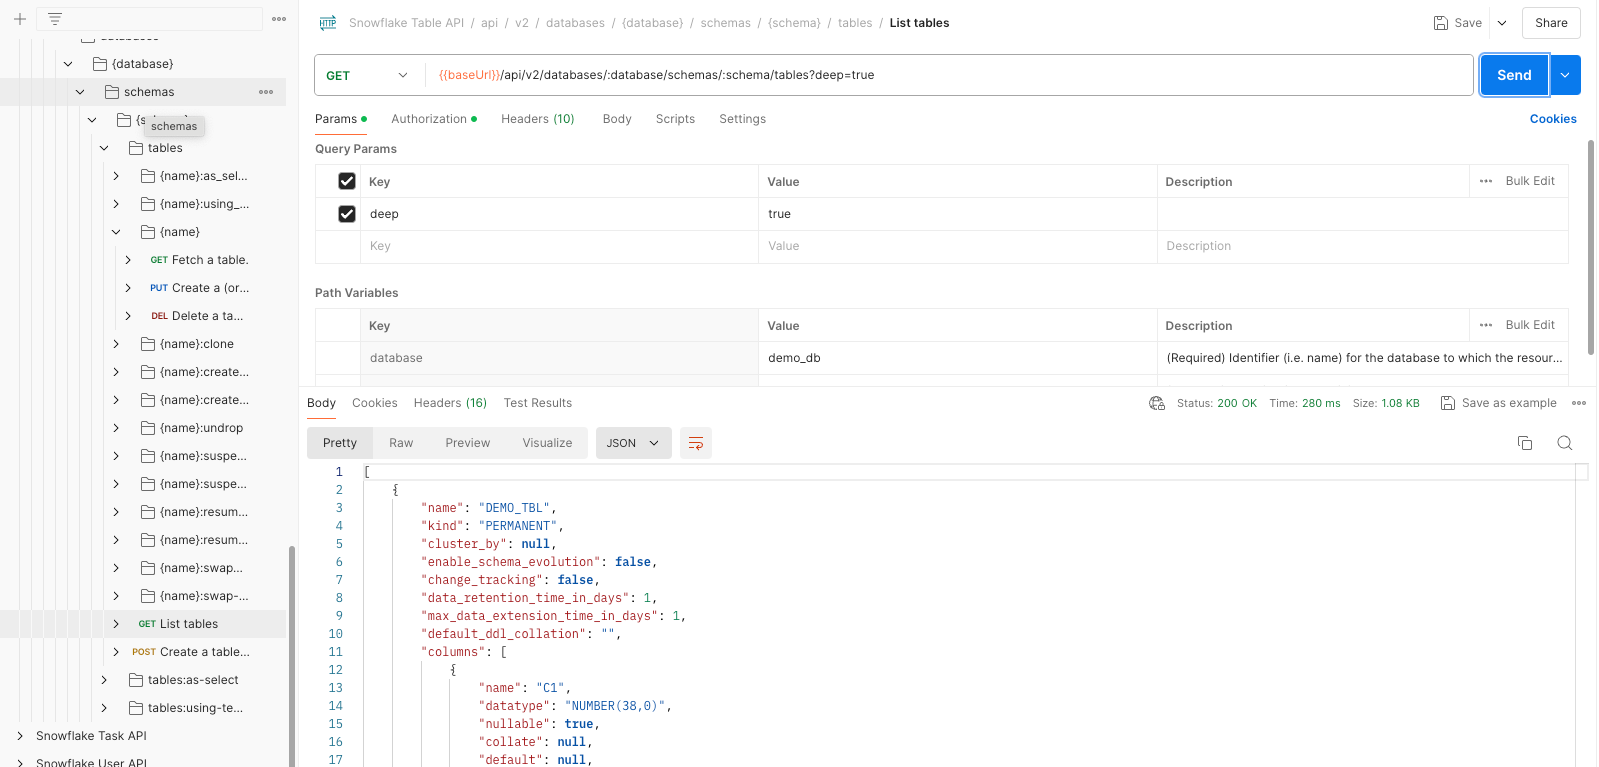
-
To list full details of the columns and constraints in every table, add the recursive query parameter and set the value to
true, as shown. Be aware that enabling this query parameter can overwhelm your connection if you have multiple complex tables.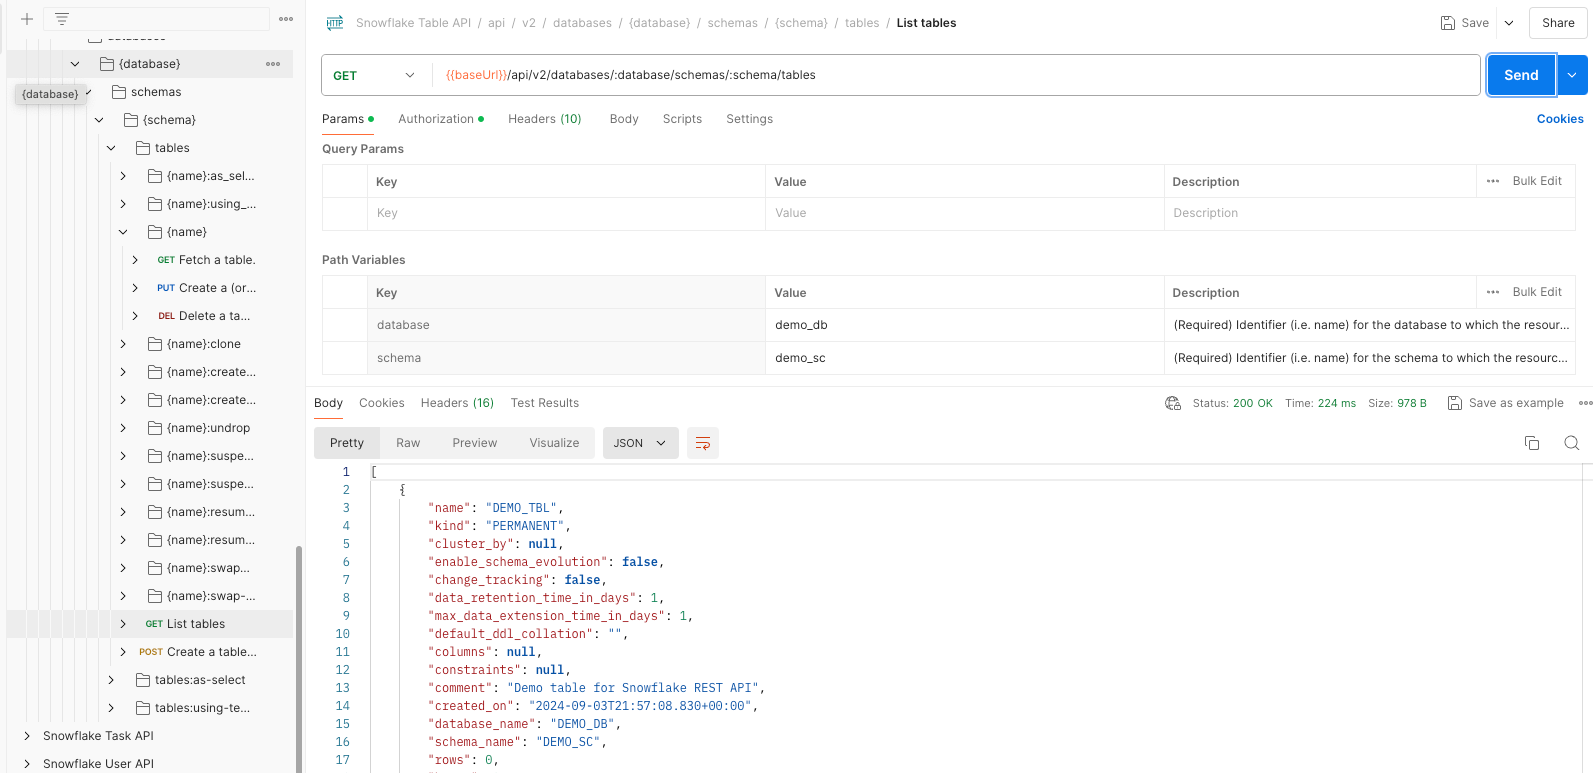
For more information, see the Snowflake Table API reference.
What’s next?
Congratulations! In this tutorial, you learned the fundamentals for managing Snowflake database, schema, and table resources using the Snowflake REST APIs.
Summary
Along the way, you completed the following steps:
- Create and list databases.
- Create and list schemas.
- Create a table and fetch the table details.
- Alter a table and fetch the table details.
- List available tables.
Next tutorial
You can now proceed to Tutorial 2: Create and manage tasks, which shows you how to create and manage Snowflake tasks.