Tutorial 3: Add a CKE to Snowflake Intelligence
Step-by-step instructions
It’s easy to add a Cortex Knowledge Extension to Snowflake Intelligence. Once you have a CKE in your account, you can add it to Snowflake Intelligence by adding the CKE to an Agent in Snowsight.
Important
Before you get started, make sure the Snowflake Intelligence has access to the CKE:
-
Sign in to Snowsight.
-
In the navigation menu, select AI & ML » Agents.
-
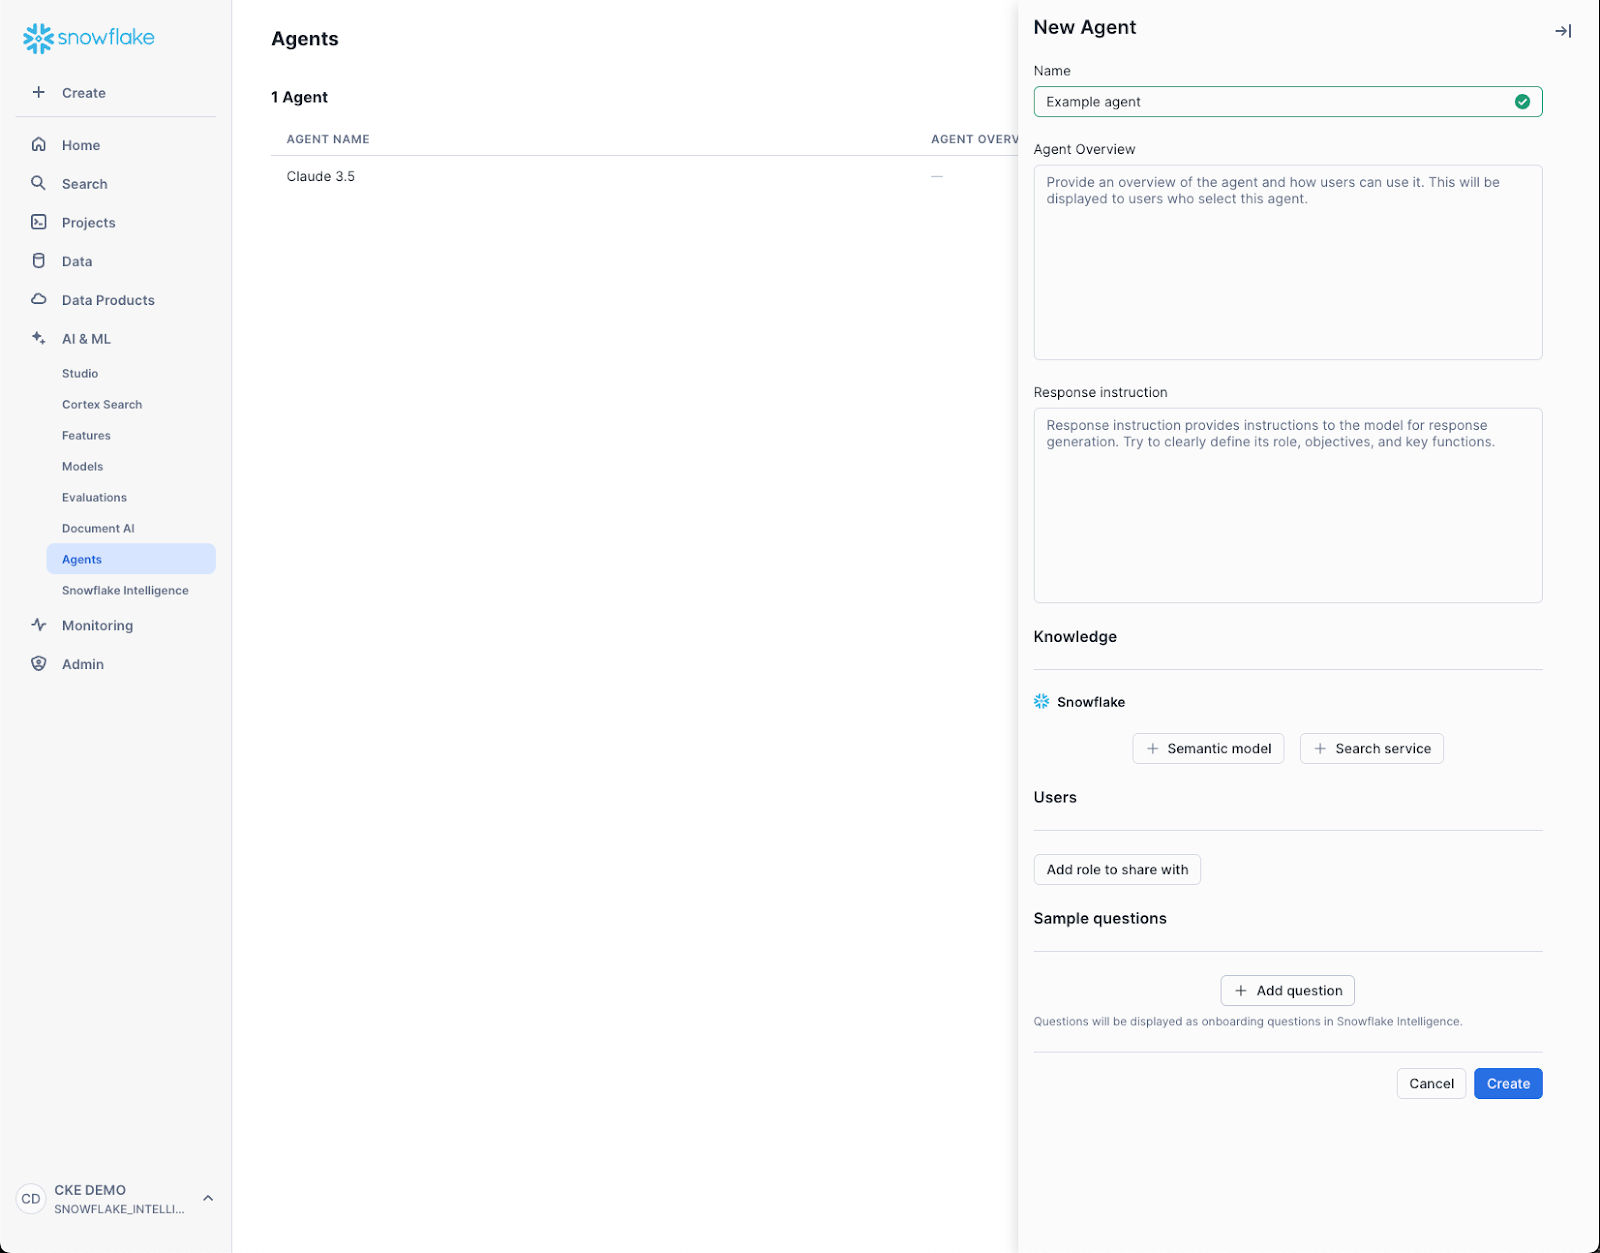
In the Agents screen, select Create Agent and give the Agent a name.
-
Under Knowledge, click + Search service.
-
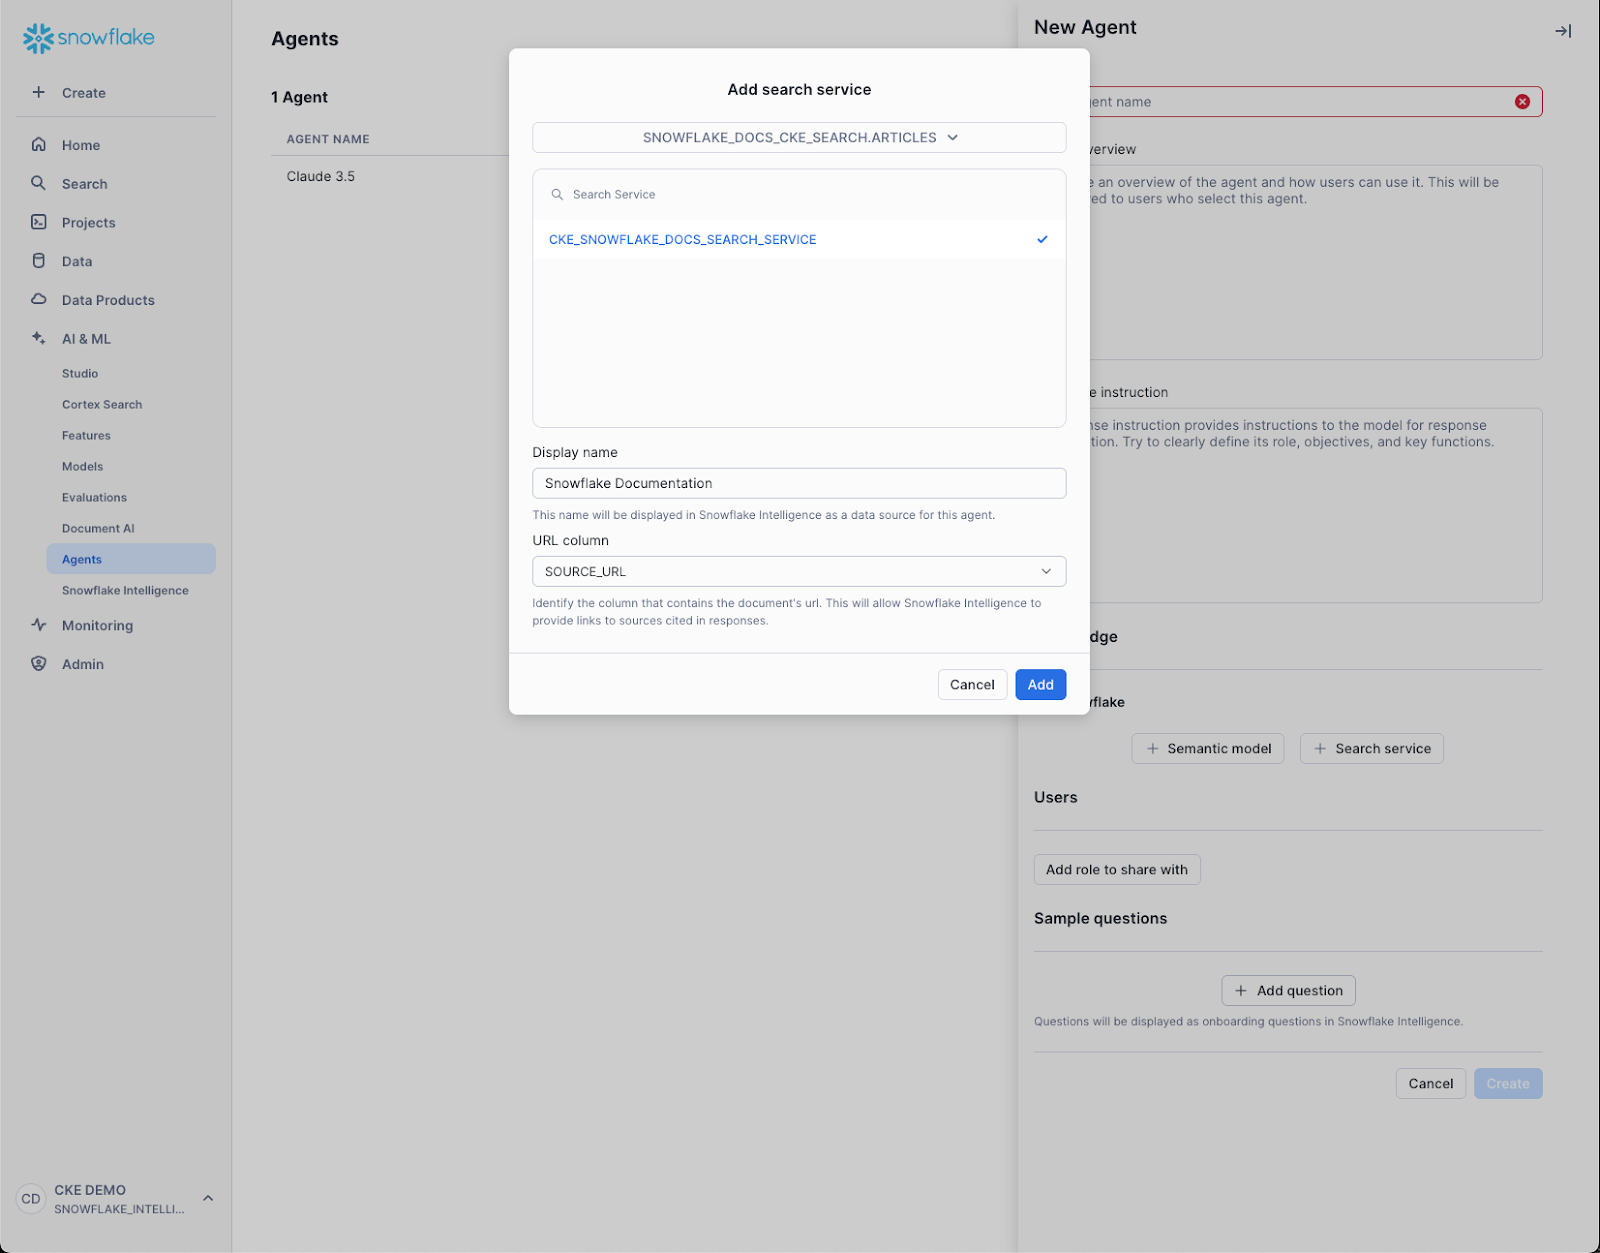
Select the Database that has the CKE, and select the Search Service for the CKE.
-
Give the CKE a display name.
-
Indicate the column in the CKE that references the URL of the underlying content. This is useful for giving users additional context and an opportunity to dig deeper into attribution.
-
Click Create.
-
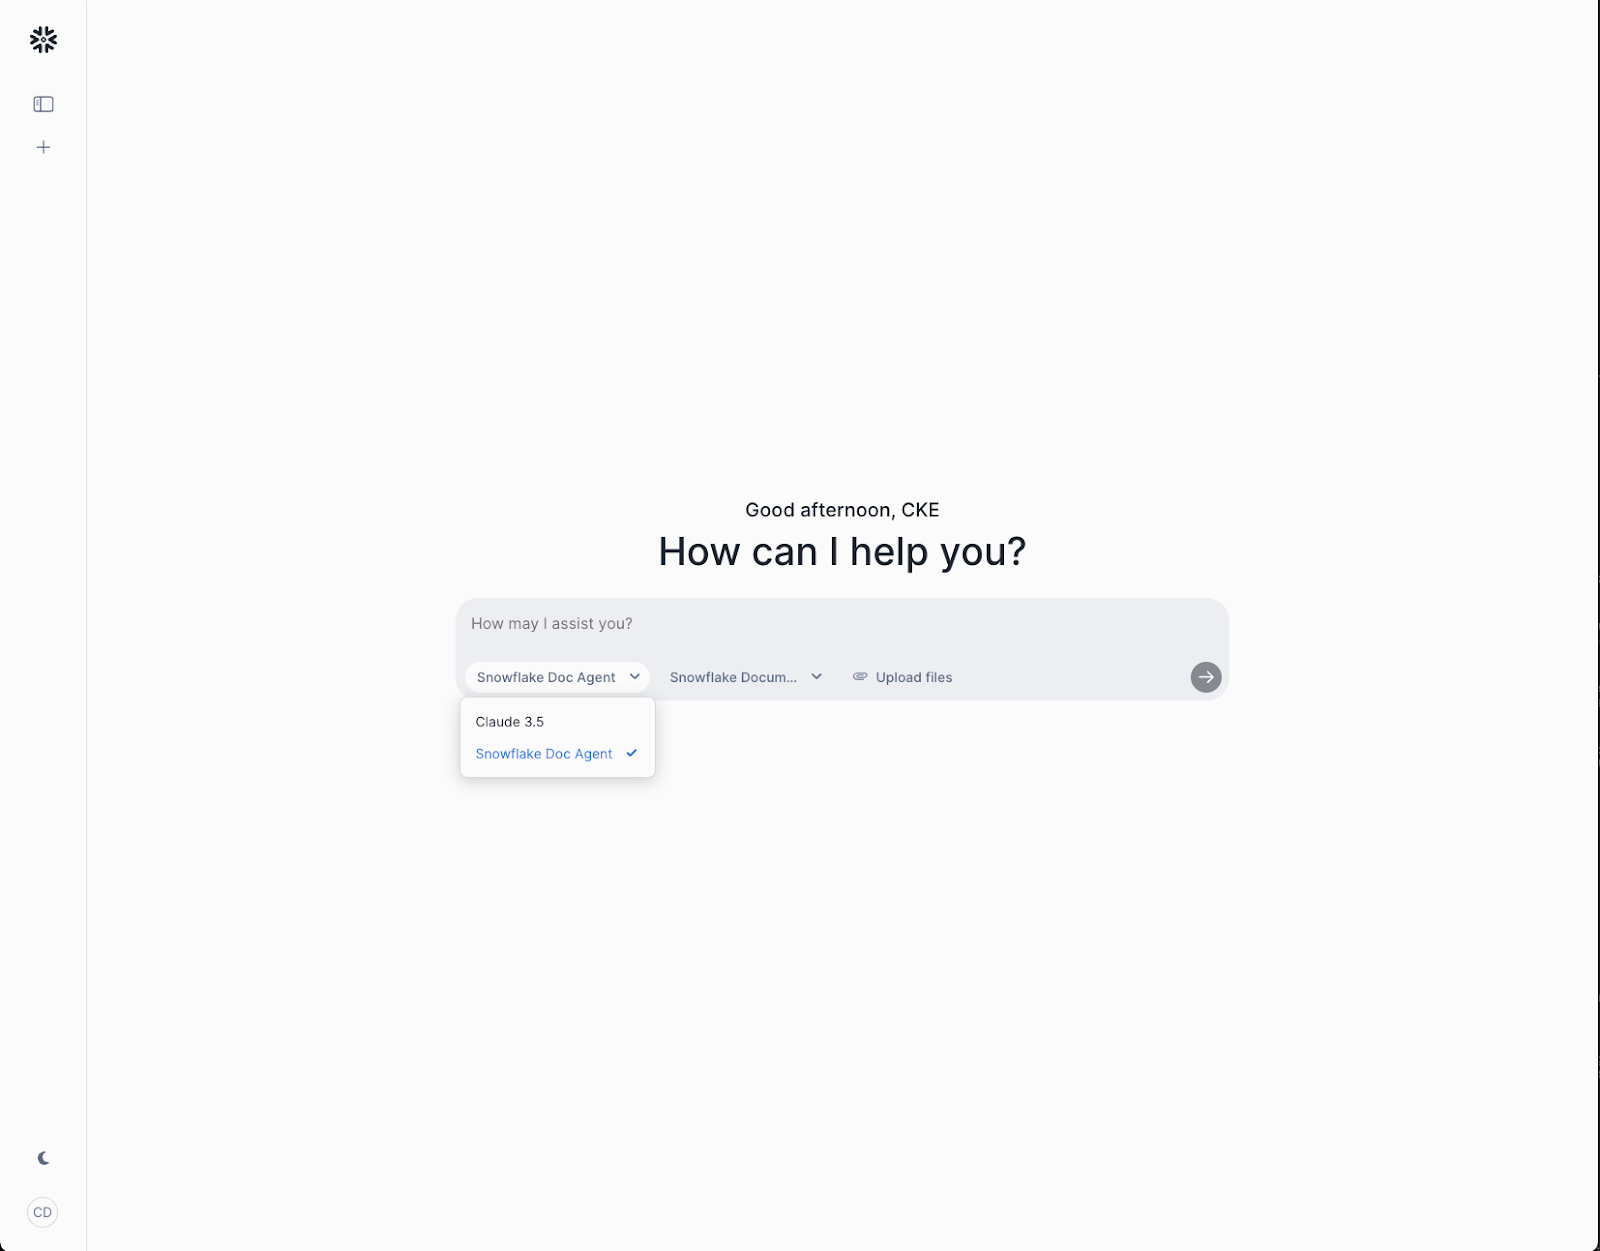
Navigate to Snowflake Intelligence on the left side.
-
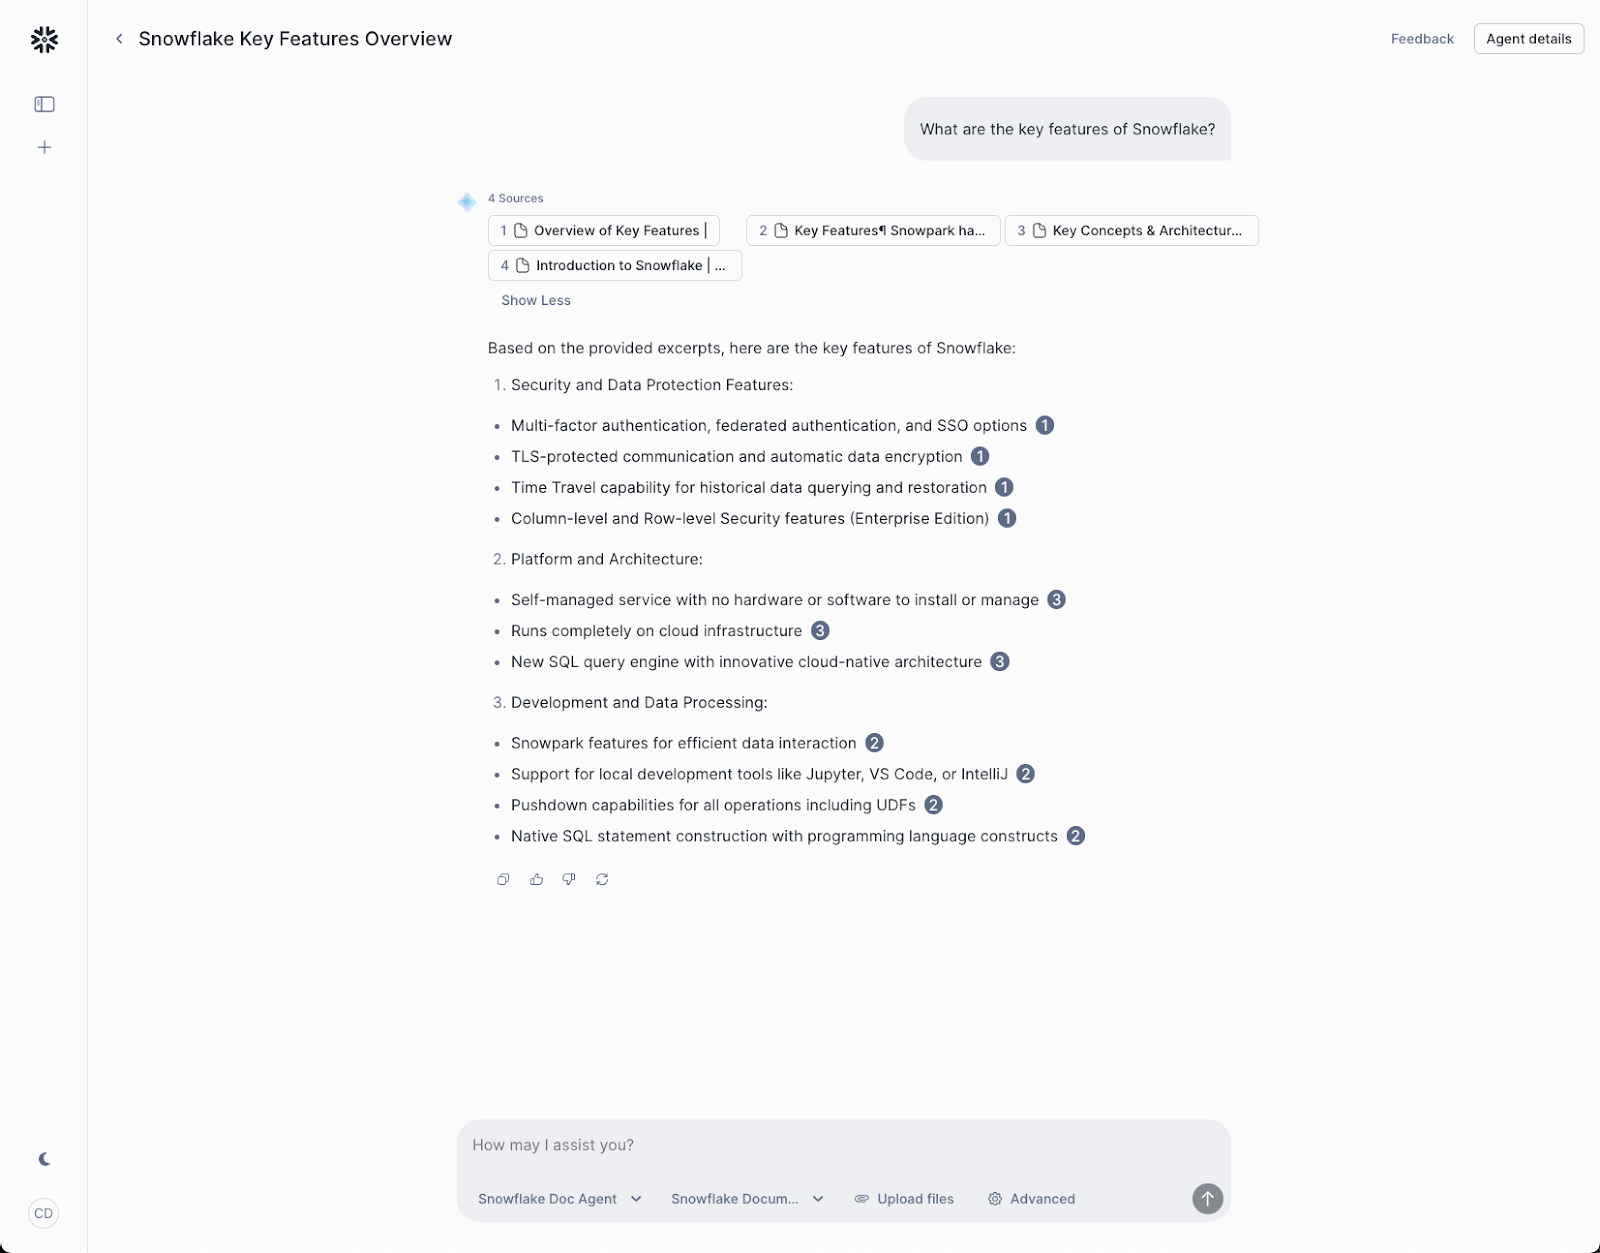
Select on the drop down under the textbox to select the new Agent with your CKE tied to it.
- Ask a question with the selected Agent and see the cited answers with links back to the source content via the CKE.