Tutorial 2: Build a simple chat application with Cortex Search
Introduction
This tutorial describes how to use Cortex Search and the COMPLETE (SNOWFLAKE.CORTEX) function to set up a Retrieval-Augmented Generation (RAG) chatbot in Snowflake.
What you will learn
- Create a Cortex Search Service based on a dataset downloaded from Kaggle.
- Create a Streamlit in Snowflake app that lets you query your Cortex Search Service.
Prerequisites
The following prerequisites are required to complete this tutorial:
- You have a Snowflake account and user with a role that grants the necessary privileges to create a database, tables, virtual warehouse objects, Cortex Search services, and Streamlit apps.
Refer to the Snowflake in 20 minutes for instructions to meet these requirements.
Step 1: Setup
Getting the sample data
You will use a sample dataset hosted on Kaggle for this tutorial. The Books dataset is a collection of titles and descriptions. The complete dataset can be found on Kaggle.
Note
In a non-tutorial setting, you would bring your own data, possibly already in a Snowflake table.
Creating the database, schema, and warehouse
Run the following SQL code to set up the necessary database, schema, and warehouse:
Note the following:
- The
CREATE DATABASEstatement creates a database. The database automatically includes a schema named PUBLIC. - The
CREATE WAREHOUSEstatement creates an initially suspended warehouse.
Step 2: Load the data into Snowflake
First create a stage to store the files downloaded from Kaggle. This stage will hold the books dataset.
Now upload the dataset to Snowsight:
-
Sign in to Snowsight.
-
In the navigation menu, select Catalog » Explorer.
-
Select your database
cortex_search_tutorial_db. -
Select your schema
public. -
Select Stages and select
books_data_stage. -
On the top right, select the + Files button.
-
Drag and drop files into the UI or select Browse to choose a file from the dialog window.
-
Select Upload to upload your file,
BooksDatasetClean.csv. -
Select the three dots on the right of the file and select Load into table.
-
Name the table
BOOKS_DATASET_RAWand select Next.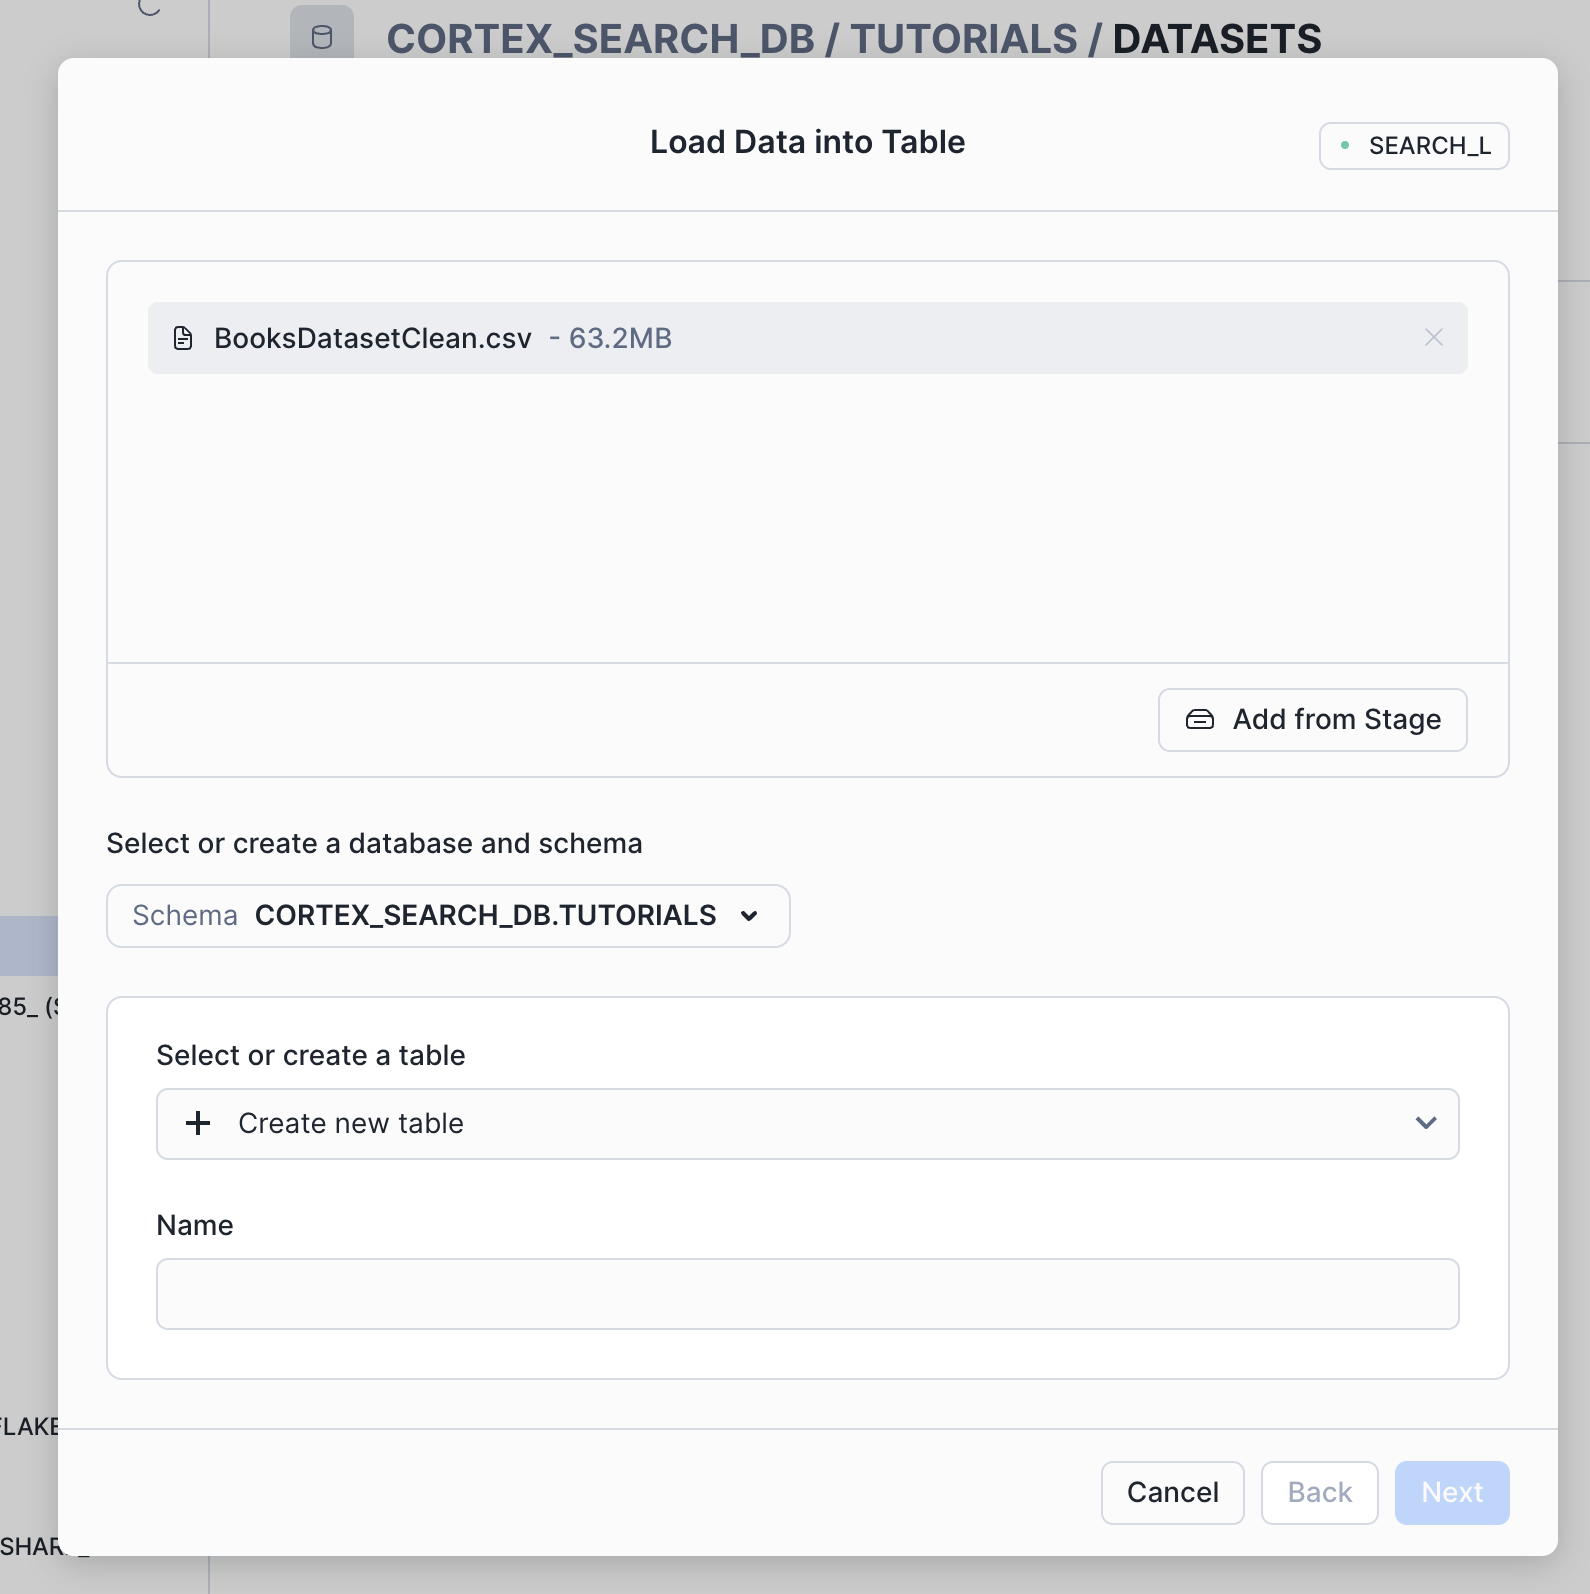
-
In the left panel of the load data dialog, choose First line contains header from the Header menu.
-
Then select Load.
Step 3: Build the chunks table
Retrieval accuracy with Cortex Search tends to be higher when documents are shorter. For more information, see Tokens, model context windows, and text splitting.
Now, create a table to store the chunks of text extracted from the book descriptions using the SPLIT_TEXT_RECURSIVE_CHARACTER (SNOWFLAKE.CORTEX) function. Include the title and authors in the chunk to provide context:
Verify the table contents:
Step 4: Create a Cortex Search Service
Create a Cortex Search Service on the table to allow you to search through the chunks in the book_description_chunks:
Step 5: Create a Streamlit app
You can query the service with the Python SDK (using the snowflake Python package). This tutorial
demonstrates using the Python SDK in a Streamlit in Snowflake application.
First, ensure your global Snowsight UI role is the same as the role used to create the service in the service creation step.
- Sign in to Snowsight.
- In the navigation menu, select Projects » Streamlit.
- Select + Streamlit App.
- Important: Select the
cortex_search_tutorial_dbdatabase andpublicschema for the app location. - In the left pane of the Streamlit in Snowflake editor, select Packages and add
snowflake(version >= 0.8.0) to install the package in your application. - Replace the example application code with the following Streamlit app:
Step 6: Try out the app
Enter a query in the text box to try out your new app. Some sample queries you can try are:
I like Harry Potter. Can you recommend more books I will like?Can you recommend me books on Greek Mythology?
Step 7: Clean up
Execute the following DROP <object> commands to return your system to its state before you began the tutorial:
Dropping the database automatically removes all child database objects such as tables.
Next steps
Congratulations! You have successfully built a simple search app on text data in Snowflake. You can move on to Tutorial 3 to see how to build an AI chatbot with Cortex Search from a set of PDF files.
Additional resources
Continue learning using the following resources: