Getting started with Snowsight
This topic describes how to get started with Snowsight, the Snowflake web interface.
Note
Some Snowsight features require a warehouse to run SQL queries for retrieving data, such as Task Run History or Data Preview for a table. An X-Small warehouse is recommended and generally sufficient for most of these queries. For information, see Warehouse considerations. Features that execute queries against a warehouse incur compute costs. For strategies to reduce usage credits, see Optimizing cost.
Signing in to Snowsight
You can access Snowsight over the internet or through private connectivity to the Snowflake service:
After signing in to Snowsight, you see your recently updated worksheets. See Getting started with worksheets.
Using the internet
To access Snowsight over the public internet, complete the following steps:
- In a supported web browser, navigate to https://app.snowflake.com.
- Provide your account identifier or account URL. If you previously signed in to Snowsight, you might see an account name that you can select.
- Choose your authentication method, and then sign in.
Using private connectivity
After completing the configuration to use private connectivity, sign in to Snowsight with private connectivity directly:
-
In the browser location bar, enter either of the following URLs:
https://app-orgname-account_name.privatelink.snowflakecomputing.comhttps://app.cloud_region_id.privatelink.snowflakecomputing.com
Where:
orgnameis the name of your Snowflake organization.account_nameis the unique name of your account within your organization.cloud_region_idis the identifier for the cloud region, which is controlled by the cloud platform.
After signing in, you can find these details in the account selector in Snowsight.
For details, see Locate your Snowflake account information in Snowsight and Format 1 (preferred): Account name in your organization.
Note
If you are unsure of the values to enter, contact your internal Snowflake administrator before contacting Snowflake Support.
-
Choose your authentication method, and then sign in.
Snowsight and MFA
Snowflake takes security seriously and strongly encourages all users to configure multi-factor authentication (MFA). Users signing in to Snowsight who have not yet configured MFA will be prompted to do so. You can dismiss the request, however you will be re-prompted every three days. You will also receive Trust Center notifications until your account is enrolled. For more information, see Enable notifications from Trust Center.
To configure MFA:
- Select your username, and then select My Profile.
- In the Multi-factor authentication section, select Enroll.
- Follow the prompts to configure MFA for your device type.
For more information see Enroll in multi-factor authentication (MFA).
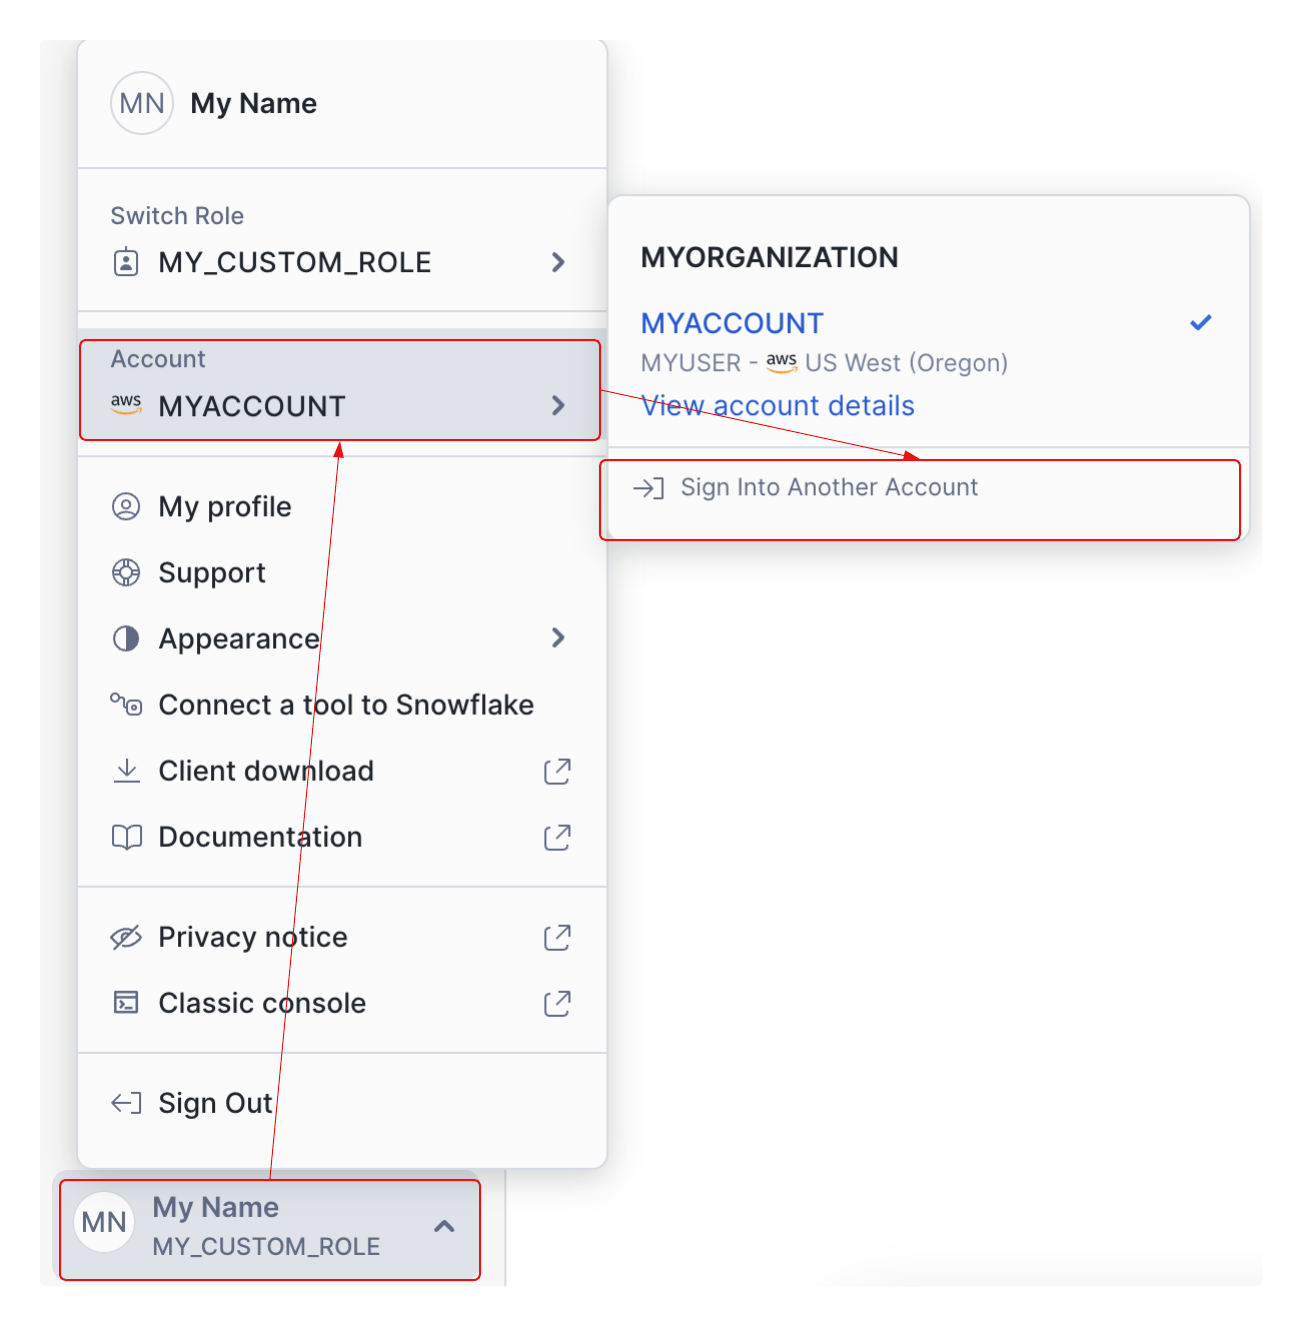
Switch to a different Snowflake account
You can sign in to a different Snowflake account by following these steps:
-
While signed in to Snowsight, select your username at the bottom of the navigation bar.
-
Select an account that you have previously signed in to, or select Sign Into Another Account.
You’re prompted to sign in to the selected account.
Supported browsers for using Snowsight
Snowsight supports the latest three major versions of the following browsers:
- Apple Safari for macOS
- Google Chrome
- Microsoft Edge
- Mozilla Firefox
Access Snowsight through a proxy or firewall
To access Snowsight through a proxy or firewall, you might need to add the fully qualified URL and port values to the proxy servers or firewall configuration.
To determine the fully qualified URL and port for Snowsight, run the SYSTEM$ALLOWLIST function
and review the SNOWSIGHT_DEPLOYMENT entry in the return value.
Locate your Snowflake account information in Snowsight
To locate account information, such as the account identifier or URL, for either your current account or one that you have previously signed in to, follow these steps:
-
Open the account selector and review the list of accounts that you previously signed in to.
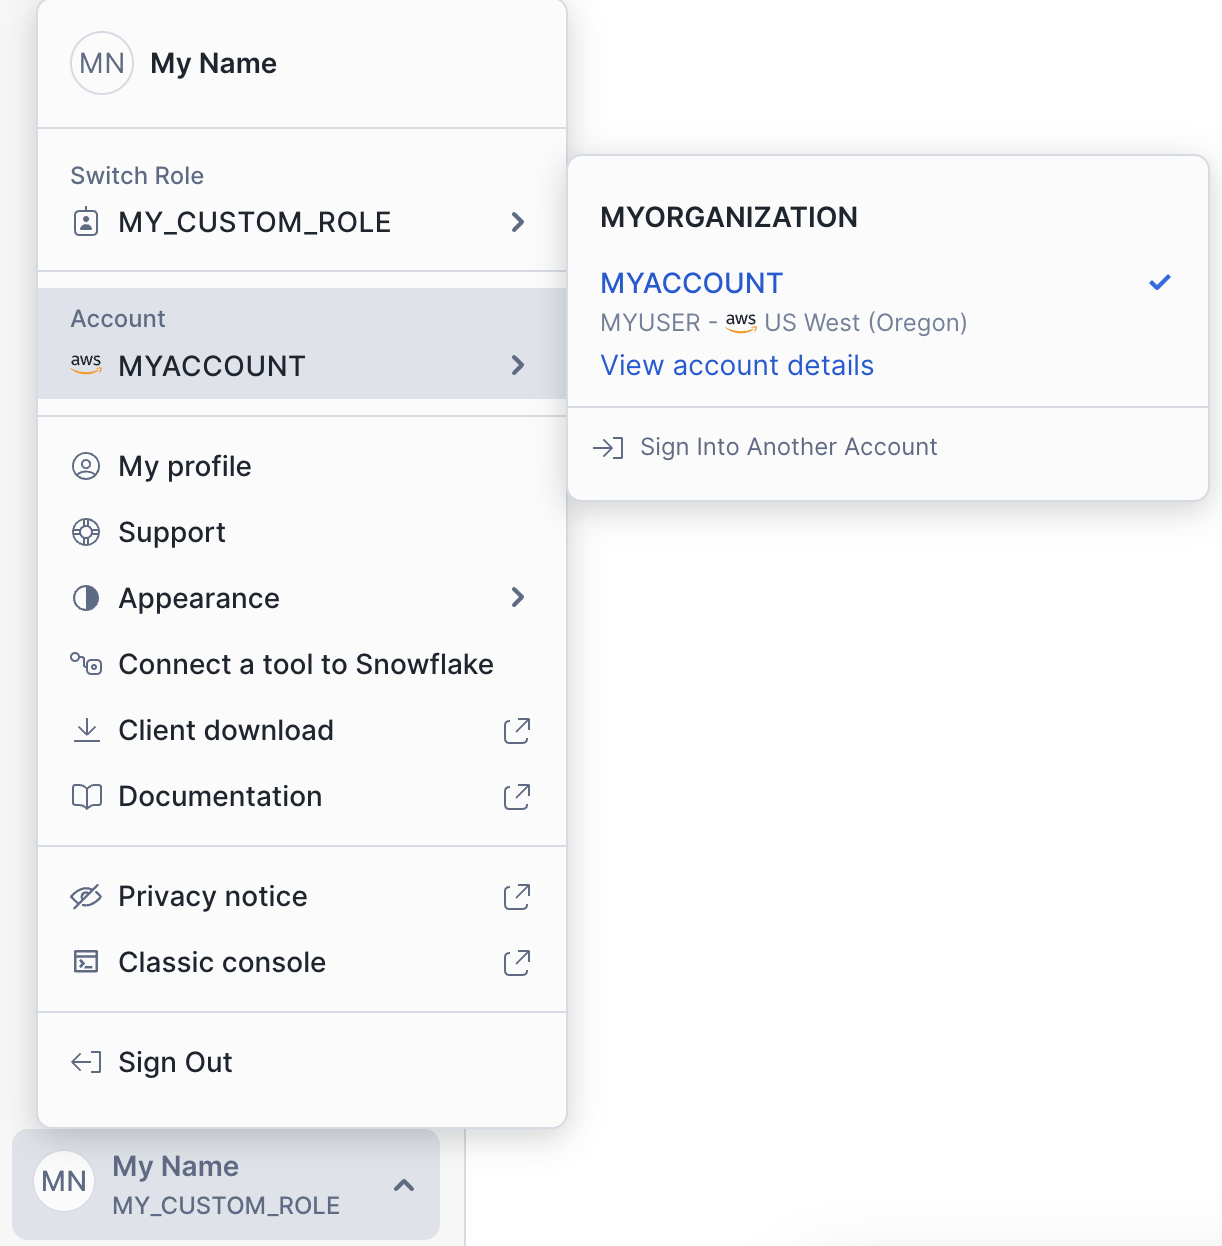
-
Select View account details.
The Account Details dialog displays information about the account, including the account identifier and the account URL.
Switch your primary role
While using Snowsight, you can change the primary role in your current session. Your primary role, along with any activated secondary roles, determines which pages in Snowsight you can access, as well as which databases, tables, and other objects you can see and the actions you can perform on them (excluding object creation, which is tied to your primary role).
To switch your primary role:
-
To open the user menu, in the navigation menu, select your username.
-
Select your current primary role. For example, PUBLIC.
The role selector appears.
-
Select the role that you want to use as your new primary role. For example, ACCOUNTADMIN.
To learn more about roles and privileges, see Overview of Access Control.
Configuring private connectivity for Snowsight
Before you can set up private connectivity for Snowsight, you must set up private connectivity for your Snowflake account. Follow the guide specific to the cloud platform that hosts your Snowflake account:
To use private connectivity with Snowsight, configure your DNS and ensure firewalls allow access to the relevant values:
-
Using the ACCOUNTADMIN role, call the SYSTEM$GET_PRIVATELINK_CONFIG function in your Snowflake account and identify the values for the following:
privatelink-account-urlsnowsight-privatelink-urlregionless-snowsight-privatelink-url
-
Confirm that your DNS settings can resolve the values.
-
Confirm that you can connect to Snowsight using each of these URLs from your browser.
-
By default, changing the value of
regionless-snowsight-privatelink-urlonly updates the connection URL used internally by Snowsight to connect to your Snowflake account. It does not automatically update the primary Snowsight access URL or change URL redirects.If you want to use the account name URL (the value for
regionless-snowsight-privatelink-url) as your primary URL to access Snowsight and have all URL redirects point to it, contact Snowflake Support and request this configuration change.When contacting Support, provide:
- The exact URL you want to use as your primary Snowsight access URL.
- A reference to Private connectivity URLs.