Create and manage agents
You can build an agent with the following methods:
- In Snowsight
- Using the Agents REST API
- With the Cortex Agents SQL commands
You can then integrate the agent into your application to perform tasks or respond to queries. You must first create an agent object that contains information such as the metadata, tools, and orchestration instructions that the agent can use to perform a task or answer questions. You can then reference the agent object in your application to integrate the agent’s functionality. You can configure a thread to maintain the context in memory, so that the client does not have to send the context at every turn of the conversation.
Note
Before you create and call agents, set up the required roles, privileges, and authentication. For details, see Access control and authentication.
Create an agent
Create an agent object by specifying the database and schema where the agent should be located, along with a name and description for the agent. In addition, specify the display name, avatar, and the color. These attributes are used by the client application to display the agent. The display name is also used as the handle to reference the agent in conversations.
For best practices when creating an agent, see Best Practices for Building Cortex Agents.
The following examples show how to create an agent object from Snowsight or using the REST API:
- Sign in to Snowsight.
- In the navigation menu, select AI & ML » Agents.
- Select Create agent.
- For Agent object name, specify a name for the agent that is displayed to users in the UI.
- For Display name, specify a name for the agent that is displayed to admins in the agent list.
- Select Create agent.
- Prompt the agent with general knowledge requests.
- Create an agent object by specifying the database and schema where the agent will be created, as well as the parameters needed for the agent. You can also specify tool fields when creating the agent object.
Create an agent object in the database and schema where the agent will be created. You can specify the agent properties and specification using the
FROM SPECIFICATIONclause in the CREATE AGENT command. For more information, see CREATE AGENT.
Add tools
After you’ve created the agent, add the tools it can use and provide instructions on how to orchestrate across them. For a description of what each tool does, see Tools.
When you add a tool, you also specify the resources it uses:
Cortex Analyst: Provide one or more semantic views for the agent to retrieve structured data from, along with the warehouse and the query timeout. The agent can route across multiple semantic views to answer a request.
Note
When Cortex Analyst is invoked by an agent, it does not have access to open source LLM models. For a list of the models that Cortex Analyst can use when invoked by an agent, see the Snowflake Service Consumption Table.
Cortex Search: Provide the Cortex Search services, along with the filters, the columns and column descriptions for filterable and searchable columns, and the maximum number of results to return.
Analytical search: Enables the agent to run extensive analytics over large document collections, producing lists, counts, aggregates, and trends. Analytical search extends Cortex Search by orchestrating multi-index queries with configurable limits and using AISQL on the full result set. For more information, see Analytical search.
Code execution: Enable the built-in tool so the agent can run Python in a secure, isolated sandbox. No additional resources are required. See Cortex Agent code execution tool.
Data to Chart: Enable the tool so the agent can generate visualizations from data returned by other tools. No additional resources are required.
Custom tools: Provide the stored procedure or user-defined function (UDF) that implements your logic, along with the warehouse used to run it.
Agent skills: Add a packaged agent skill to give the agent repeatable, task-specific capabilities.
MCP connectors: Provide the connection to a remote MCP server so the agent can use the tools that server hosts, such as those from Atlassian Jira or Salesforce.
Web search: Enable the web search tool on the agent. Web search must first be enabled at the account level. See Enable web search.
Note
Tool names must be between 1 and 64 characters. If you’re using a semantic view as a tool, the semantic view name is used as the tool name.
To modify the configuration for an existing agent, follow these steps:
In the navigation menu, select AI & ML » Agents.
- From the list of agents, select the agent that you want to modify.
The configuration details for the agent are displayed.
Select Edit.
For Description, describe the agent and how users can interact with it.
To add sample questions that users can ask the agent, enter a sample question and select Add a question.
Select Tools. Add one or more of the following tools.
To add a semantic view in Cortex Analyst to the agent: This section assumes that you already have a semantic view created. For information about semantic views and how to create one, see Overview of semantic views.
- Find Cortex Analyst and select the respective + Add button.
- For Name, enter a name for the semantic view.
- Select Semantic view.
- Select the semantic view that the agent uses.
- For Warehouse, select the warehouse that the agent uses to run queries.
- For Query timeout (seconds), specify the maximum time in seconds that the agent waits for a query to complete before timing out.
- For Description, describe the semantic view.
- Select Add.
To add a Cortex Search service to the agent: This section assumes that you’ve already created a Cortex Search service. For information about creating a Cortex Search service, see Cortex Search. You can also use a Cortex Knowledge Extension (CKE) that is shared with you. For a tutorial that uses a CKE, see Tutorial 3: Add a CKE to Snowflake CoWork.
- Find Cortex Search Services and select the respective + Add button.
- For Name, enter a name for the Cortex Search service.
- For Description, describe the Cortex Search service.
- For Search service, select the Cortex Search service that the agent uses.
- Under Tool details, add Columns Description to help the agent effectively use the search service. Column descriptions are not required for all columns, but providing them for filterable and searchable columns is recommended to improve the quality of results. Provide a description that explains the column’s content and sample values.
- Select Add.
To enable analytical search for a Cortex Search service: After adding a Cortex Search service, toggle Analytical search on to allow the agent to run extensive analytics on your search indexes. Additional costs apply when using AI Functions. For more information, see Analytical search.
To add a custom tool to the agent: By adding custom tools, you can extend the functionality of your agents. With custom tools, the agent can call stored procedures and functions that you have defined to perform actions or do computations. This section assumes that you’ve already created a custom tool. For information about procedures and functions, see Extending Snowflake with Functions and Procedures.
Find Custom tools and select the respective + Add button.
For Name, enter a name for the custom tool.
For Resource type, select whether the custom tool is a function or a procedure. For information about whether to use a function or procedure, see Choosing whether to write a stored procedure or a user-defined function.
For Custom tool identifier, select the existing function or procedure that you want to add as a custom tool.
The related parameters for the function or procedure automatically appear. You can manually add parameters for the custom tool by adding a name, type, description, and selecting whether the parameter is required. You can also modify parameters that automatically populate.
Note
Snowflake Cortex does not support stored procedures and custom tools with a parameter of type
object.For Warehouse, select the warehouse that the agent uses to run the custom tool. You must manually select a warehouse.
For Description, describe the custom tool and how to use it.
Select Add.
After creating the custom tool, make sure users are granted USAGE privileges to the function or procedure that you added as a custom tool. When using stored procedures, agents maintain whether the procedure runs with owner’s or caller’s rights. For information about owner’s and caller’s rights, see Understanding caller’s rights and owner’s rights stored procedures.
To add the web search tool to the agent: This section assumes that you’ve already enabled web search at the account level. For information about enabling web search at the account level, see Web search.
- Find Web search and select the respective toggle to enable the feature.
Select Save.
To add tools to an agent using the REST API, add the following payloads as part of a request to Update Cortex Agent. You can also specify these fields when creating the agent object.
Add Cortex Analyst tool and tool resources: The following example shows how to add a Cortex Analyst tool and tool resources to an existing agent object.
Add a Cortex Analyst tool
Add a Cortex Analyst tool resource
Add Cortex Search tool and tool resources: The following example shows how to add a Cortex Search tool and tool resources to an existing agent object.
Add a Cortex Search tool
Add a Cortex Search tool resource:
The
columns_and_descriptionsfield is a map of column names to column properties. Descriptions are not required for all columns, but providing them for filterable and searchable columns improves the quality of results. Each column entry must include:
description(string): A description of the column content and sample values. Include guidance on when and how to filter on this column.type(string): The column data type. Use"string"or"datetime".searchable(boolean): Set totruefor text index columns that can be searched. Vector index columns are not supported.filterable(boolean): Set totruefor attribute columns that can be used in filter conditions.Add data_to_chart tool: The following example shows how to add the data to chart tool to an existing agent object.
- Add the data_to_chart tool
Add custom tool and tool resources: The following example shows how to add a custom tool and tool resources to an existing agent object.
Add a custom tool
Add a custom tool resource
Add web_search tool: The following example shows how to add the web_search tool to an existing agent object. This section assumes that you’ve already enabled web search at the account level. For information about enabling web search at the account level, see Web search.
- Add the web_search tool
You can update an agent object to add tools and tool resources using the ALTER AGENT command. For information about the ALTER AGENT command, see ALTER AGENT.
Note
The new specification completely replaces the existing one. Fields that are not included in the new specification are removed.
Web search
Cortex Agents use the Brave Web Search API to retrieve real-time information during an interaction. The agent creates a query based on the user’s input and any relevant context, and the API returns results from Brave Search’s independent web index. The agent then incorporates relevant results into its response alongside data from other configured tools.
Note that the query and the results leave Snowflake and traverse the public internet. However, Snowflake has enabled zero data retention (ZDR) with Brave: Brave does not store the search query text, the results returned, or any metadata associated with the request, for any length of time.
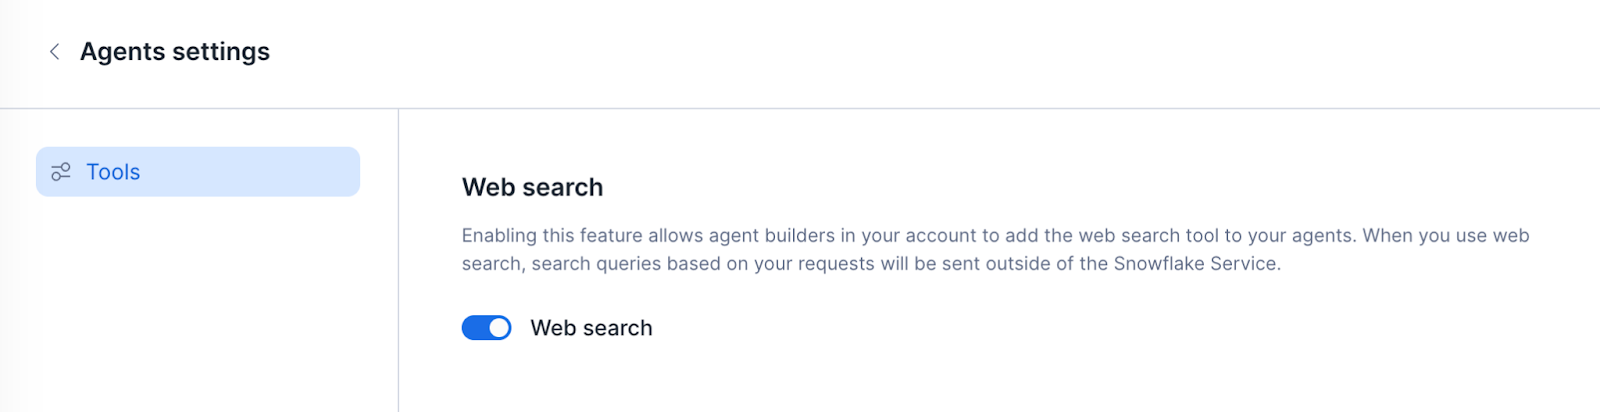
Before agents can use the web search tool, an ACCOUNTADMIN must enable web search at the account level:
- Sign in to Snowsight.
- In the navigation menu, select AI & ML » Agents.
- Select Settings.
- Select the Web search toggle to enable the feature, as shown below.
After enabling web search at the account level, you can add the web search tool to your agents.
Specify orchestration
Cortex Agents orchestrate the task by breaking it into a sequence of sub-tasks and identifying the right tool for each sub-task. You specify the LLM that the agent should use to conduct this orchestration. You can also influence the orchestration by providing instructions. For example, consider an agent built to respond to retail product questions. You can use the orchestration instruction "Use the search tool for all requests related to refunds" to ensure the agent only provides refund policy details (using Cortex Search) and does not actually calculate the refund amounts (using Cortex Analyst). You can also specify instructions to align the response to a brand or a tone, such as "Always provide a concise response; maintain a friendly tone".
- Select Orchestration.
- For the Orchestration model, select the model that the agent uses to handle orchestration.
- For Planning instructions, provide instructions that influence tool selection by the agent based on user-provided input. These can include specific instructions about when to use each tool, or even to always use a tool at the beginning or end of a response.
- For Response instruction, provide instructions that the model uses for response generation. For example, specify if you want the agent to prioritize chart creation, or to keep a certain tone with users.
- For Budget configuration, you can specify time limit and token limit for the agent. The budget is the maximum amount of time or tokens that the agent can use to generate a response. After either one of the limits is reached, the agent will stop generating a response. Token limits are used only for orchestration and don’t include tokens used by Cortex Analyst, Cortex Search, and other tools invoked.
- Select Save.
To update an agent using the REST API, add the following payloads as part of a request to Update Cortex Agent. You can also specify these fields when creating the agent object. The following procedure shows how to update the agent with planning and response instructions, and specify the LLM model used for orchestration.
-
Update the LLM model
-
Specify the planning and response instructions
You can update an agent object to add orchestration information using the ALTER AGENT command. For information about the ALTER AGENT command, see ALTER AGENT.
Review the agent
After you have built the agent, you can review the agent to verify all parameters.
Note
When reviewing agents from Snowsight, you can only view agents in the Agent Admin UI. You cannot view agents in the database object explorer.
- In the navigation menu, select AI & ML » Agents.
- From the list of agents, select the agent that you want to view the details for. This opens a new page that gives an overview of the agent details.
- To review all agent details, select Next.
You can list and describe agents using the REST APIs.
-
List all agents.
-
Describe the desired agent.
You can list and describe agents using SQL.
-
List all agents.
-
Describe the desired agent.
Test the agent
After you’ve created the agent, you can test it to see how it responds to user queries. You can also test the agent using Agent run request with agent object.
To test the agent, follow these steps:
- Sign in to Snowsight.
- In the navigation menu, select AI & ML » Agents.
- Select the agent from the list of agents.
- On the agent details page, enter a query in the agent playground.
- Verify that the agent responds to the query as expected. If the agent does not respond as expected, modify the agent’s configuration by following the steps in Add tools.
Interact with the agent
After creating the agent object, you can integrate the agent directly into your application using the REST API. To maintain context during the interaction, use a thread. The agent object and thread combined simplify the client application code.
Create a thread
Create a thread to maintain the context during a conversation. When the thread is created successfully, the system returns a Thread ID.
Send a request to the agent
To interact with the agent, you must pass the agent object, thread ID, and a unique parent_message_id as part of your REST API request. The initial parent_message_id should be 0.
Collect feedback about the agent
You can collect feedback from users about the responses given by the agent. This feedback can help you refine the agent as you iterate on your use case. Users can provide an objective rating (positive/negative), as well as more subjective detail with a message. Also, users can classify the feedback across one of many categories.
Interact without an agent object
In some cases, you may want to get started with Cortex Agents by using agent:run without an agent object. For example, this may be useful when you want to quickly try out a use case. For more information about the REST API, see Agent run without an agent object.
Note
When interacting with an agent without creating an agent object, you must manually maintain the context for the agent with every request.