Configure an external volume for Azure
Grant Snowflake restricted access to your own Microsoft Azure container using an external volume. Snowflake supports the following Azure cloud storage services for external volumes:
Blob storage
Data Lake Storage Gen2
 Preview feature — Open
Available to all accounts. Configuring an external volume that is connected to Data Lake Storage Gen2 (Data Lake Storage) is in public preview.
General-purpose v1
General-purpose v2
Microsoft Fabric OneLake
Important
To enable interoperability between Snowflake and remote catalogs that are only configured to use Data Lake Storage, you must configure your external volume to connect to Data Lake Storage. For more information, see Enable interoperability with remote catalogs that use Data Lake Storage.
Note
To harden your security posture, you can configure an external volume to use private connectivity rather than the public Internet for network traffic. For more information, see Private connectivity to external volumes for Microsoft Azure.
To configure an external volume for Azure, you can use SQL or use Snowsight.
Prerequisites
Before you configure an external volume, you need the following:
An Azure storage container.
To use the external volume for externally managed Iceberg tables, all of your table data and metadata files must be located in the container.
To support data recovery, enable versioning for your external cloud storage location.
Permissions in Azure to create and manage IAM policies and roles. If you aren’t an Azure administrator, ask your Azure administrator to perform these tasks.
If you use an Azure storage firewall to block unauthorized traffic to your storage account, follow the instructions in Allow the VNet subnet IDs to explicitly grant Snowflake access to your Azure storage account.
Enable interoperability with remote catalogs that use Data Lake Storage
This section describes how to configure Snowflake so that Iceberg tables you write to by using Snowflake are interoperable with remote catalogs that are only configured to use Data Lake Storage. For example, Unity Catalog is configured to only use Data Lake Storage.
To enable interoperability with these catalogs, Snowflake must write data files for Iceberg tables to Data Lake Storage. To enable Snowflake to
write data files to Data Lake Storage, you must configure an external volume that connects Snowflake to Data Lake Storage,
which uses the dfs.core.windows.net endpoint.
When you use Snowflake to write to Iceberg tables that are interoperable with a remote catalog that uses Data Lake Storage, the following scenarios are supported:
Use Snowflake to create Snowflake-managed Iceberg tables that the query engine for the remote catalog can read and write to.
Note
To enable interoperability with your existing Snowflake-managed Iceberg tables that are stored in Blob Storage, migrate them to Data Lake Storage. For instructions, see Migrate an Iceberg table to Azure Data Lake Storage.
Use Snowflake to read and write to remote tables in the remote catalog.
Configure an external volume that connects Snowflake to Data Lake Storage
![]() Preview feature — Open
Preview feature — Open
Available to all accounts.
To configure an external volume that connects Snowflake to Data Lake Storage, when you create an external volume in Snowflake,
you must specify a STORAGE_BASE_URL that points to an dfs.core.windows.net endpoint.
The following example creates an external volume named exvoldfs that is configured with a STORAGE_BASE_URL that points to a
dfs.core.windows.net endpoint.
Configure an external volume by using SQL
Step 1: Create an external volume in Snowflake
Create an external volume using the CREATE EXTERNAL VOLUME command.
Note
Only account administrators (users with the ACCOUNTADMIN role) can execute this SQL command.
The following example creates an external volume that defines an Azure storage location with encryption:
Note
Use the
azure://prefix and nothttps://when specifying a value for STORAGE_BASE_URL.For information about specifying a OneLake location (preview feature), see the CREATE EXTERNAL VOLUME reference page.
If you use a regional endpoint for a Microsoft Fabric OneLake storage location, use the same region as your Microsoft Fabric capacity. This must also be the same region that hosts your Snowflake account.
Step 2: Grant Snowflake access to the storage location
To retrieve a URL to the Microsoft permissions request page, use the DESCRIBE EXTERNAL VOLUME command. Specify the name of the external volume that you created previously.
Record the values for the following properties:
Property
Description
AZURE_CONSENT_URLURL to the Microsoft permissions request page.
AZURE_MULTI_TENANT_APP_NAMEName of the Snowflake client application created for your account. In a later step in this section, you grant this application permission to obtain an access token on your allowed storage location.
You use these values in the following steps.
In a web browser, navigate to the Microsoft permissions request page (the
AZURE_CONSENT_URL).Select Accept. This action allows the Azure service principal created for your Snowflake account to obtain an access token on a specified resource inside your tenant. Obtaining an access token succeeds only if you grant the service principal the appropriate permissions on the storage account level (see the next step).
The Microsoft permissions request page redirects to the Snowflake corporate site (snowflake.com).
Log in to the Microsoft Azure portal.
Go to Azure Services » Storage Accounts. Select the name of the storage account that the Snowflake service principal needs to access.
Note
You must set IAM permissions for an external volume at the storage account level, not the container level.
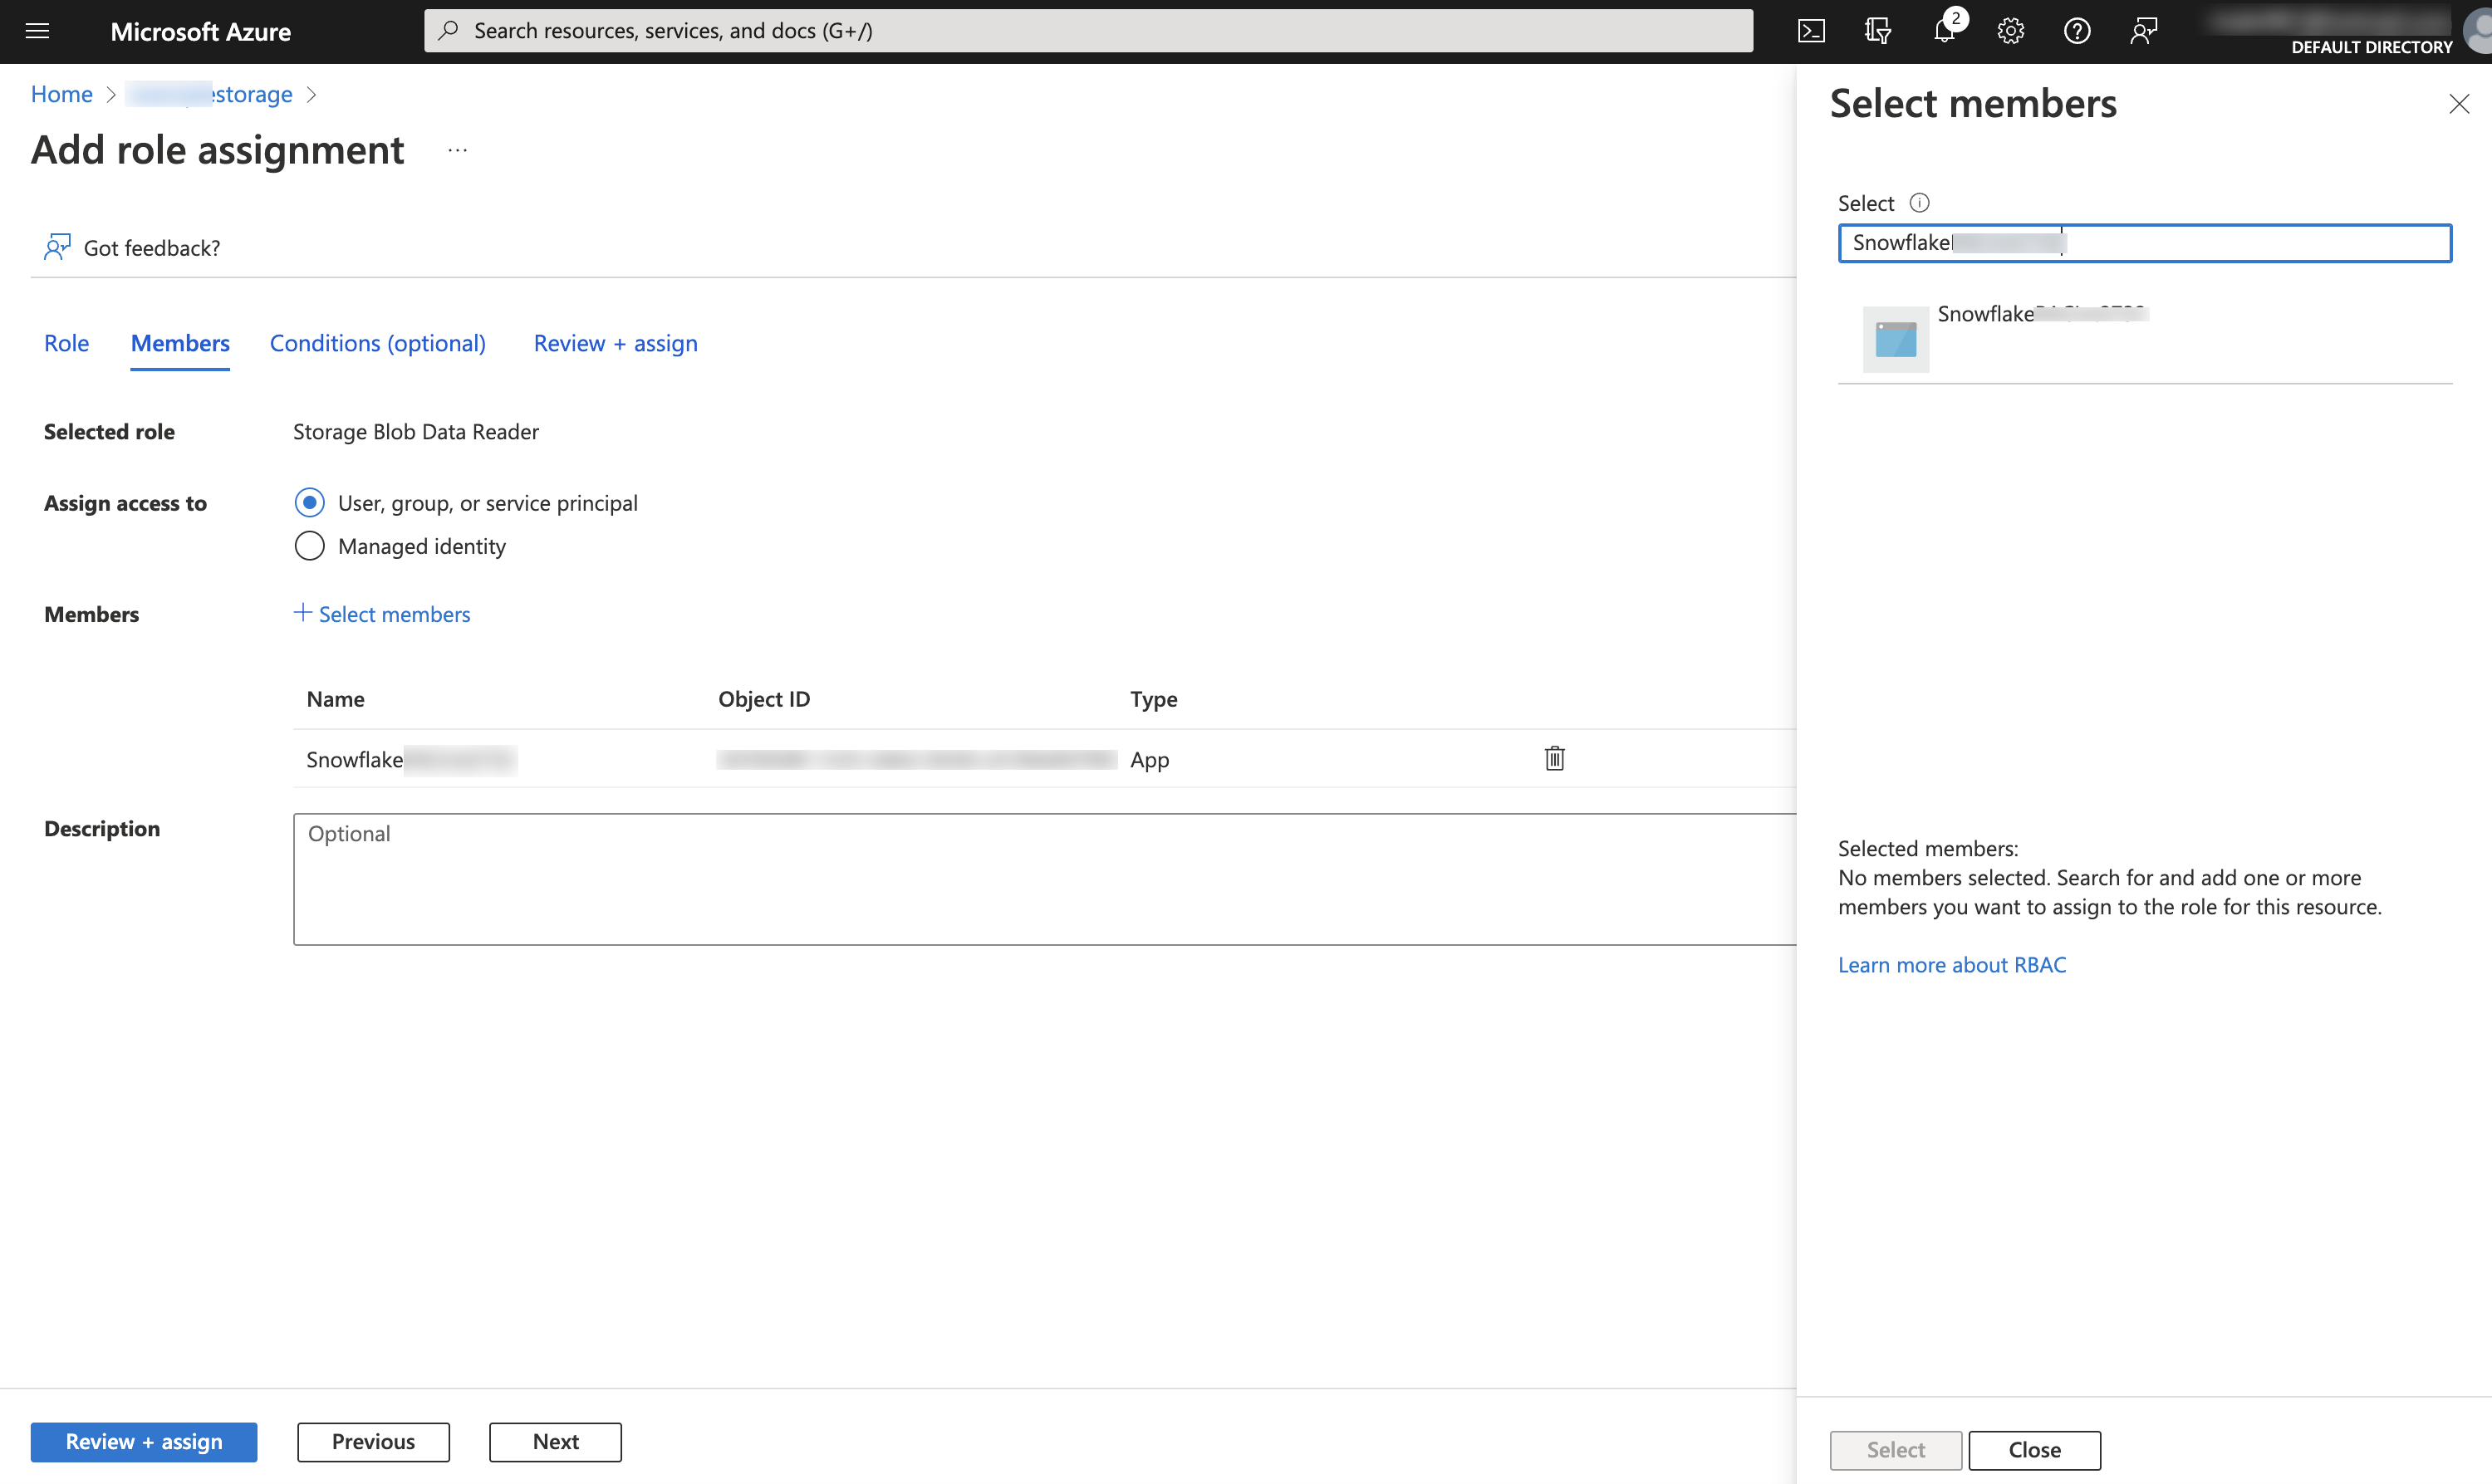
Select Access Control (IAM) » Add role assignment.
Select the
Storage Blob Data Contributorrole to grant read and write access to the Snowflake service principal.Note
The
Storage Blob Data Contributorrole grants write access to the external volume location, which is necessary for generating Iceberg metadata. To completely configure write access, set theALLOW_WRITESparameter of the external volume toTRUE(the default value).For read-only access to Delta Lake data on Azure, you can use
Storage Blob Data ReaderwithALLOW_WRITES = FALSEinstead. See Azure roles and Delta Direct on this external volume and Read-only vs write access for Delta Direct on each storage provider.Select + Select members.
Search for the Snowflake service principal. This is the identity in the AZURE_MULTI_TENANT_APP_NAME property in the DESC EXTERNAL VOLUME output (in Step 1). Search for the string before the underscore in the AZURE_MULTI_TENANT_APP_NAME property.
Important
It can take an hour or longer for Azure to create the Snowflake service principal requested through the Microsoft request page in this section. If the service principal is not available immediately, wait an hour or two and then search again.
If you delete the service principal, the external volume stops working.
Select Review + assign.
Note
It can take up to 10 minutes for changes to take effect when you assign a role. For more information, see Symptom - Role assignment changes are not being detected in the Microsoft Azure documentation.
Azure roles and Delta Direct on this external volume
For Iceberg tables created from Delta table files, often called Delta Direct, choose an Azure built-in role that matches
ALLOW_WRITES on the external volume: use Storage Blob Data Reader
with ALLOW_WRITES = FALSE, or Storage Blob Data Contributor
with ALLOW_WRITES = TRUE. Follow the consent, IAM, and Access scope steps earlier in this topic for either combination.
For the same read-only and write patterns on Amazon S3 and Google Cloud Storage, see Read-only vs write access for Delta Direct on each storage provider.
Step 3: Verify storage access
To check that Snowflake can successfully authenticate to your storage provider, call the SYSTEM$VERIFY_EXTERNAL_VOLUME function.
Note
If you receive the following error, your account administrator must activate AWS STS in the Snowflake deployment region. For instructions, see Manage AWS STS in an AWS Region in the AWS documentation.
Configure an external volume in Snowsight
Sign in to Snowsight.
In the lower-left corner, select your name » Switch role, and then select ACCOUNTADMIN or a role that has the CREATE EXTERNAL VOLUME privilege.
For more information, see Switch your primary role.
In the navigation menu, select Catalog » External data.
Select the External volumes tab.
Select + Create.
Select Microsoft Azure & OneLake and then select Next.
From the Prerequisites page, for Azure tenant ID, specify your Azure tenant ID.
To find your Azure tenant ID, see How to find your Microsoft Entra tenant ID in the Microsoft Entra documentation.
Select Next.
From the Grant storage access page, to grant Snowflake access to the storage location, follow these steps:
To provide consent for Snowflake to connect to your Azure storage or Microsoft OneLake, select Provide consent.
The Microsoft permissions request page opens in a new browser tab.
From the Microsoft permissions request page, select Accept. This action allows the Azure service principal created for your Snowflake account to obtain an access token on a specified resource inside your tenant. Obtaining an access token succeeds only if you grant the service principal the appropriate permissions on the storage account level (see the next step).
The Microsoft permissions request page redirects to the Snowflake corporate site (snowflake.com).
In Snowflake, from the Multi-tenant app name field, copy the name of the Snowflake client application created for your account into a text editor. In the next step, you grant this application permission to obtain an access token on your allowed storage location.
To grant your application permission to obtain an access token on your allowed storage location, follow these steps:
Log in to the Microsoft Azure portal.
Go to Azure Services » Storage Accounts. Select the name of the storage account that the Snowflake service principal needs to access.
Note
You must set IAM permissions for an external volume at the storage account level, not the container level.
Select Access Control (IAM) » Add role assignment.
Select the
Storage Blob Data Contributorrole to grant read and write access to the Snowflake service principal.Note
The
Storage Blob Data Contributorrole grants write access to the external volume location. To completely configure write access, set theALLOW_WRITESparameter of the external volume toTRUE(the default value).For read-only access to Delta data on Azure, you can use
Storage Blob Data ReaderwithALLOW_WRITES = FALSEinstead. See Azure roles and Delta Direct on this external volume and Read-only vs write access for Delta Direct on each storage provider.Select + Select members.
Search for the Snowflake service principal.
This is the Multi-tenant app name that you copied from Snowflake in the previous step.
Important
It can take an hour or longer for Azure to create the Snowflake service principal requested through the Microsoft request page in this section. If the service principal is not available immediately, wait an hour or two and then search again.
If you delete the service principal, the external volume stops working.
Select Review + assign.
Note
It can take up to 10 minutes for changes to take effect when you assign a role. For more information, see Symptom - Role assignment changes are not being detected in the Microsoft Azure documentation.
In Snowflake, select Next.
In Snowflake, to configure your external volume, from the Configure external volume page, complete the fields:
Field
Description
External volume name
Enter a name for your external volume.
Storage base URL
Specifies the base URL for your cloud storage location.
Access scope
Specifies whether write operations are allowed for the external volume; must be set to Allow writes for the following tables:
Iceberg tables that use Snowflake as the catalog.
Iceberg tables that use an external catalog and are writable. Externally managed Iceberg tables are writable when you access them through a catalog-linked database that has the ALLOWED_WRITE_OPERATIONS parameter set to TRUE.
For Iceberg tables created from Delta table files, setting this parameter to Allow writes enables Snowflake to write Iceberg metadata to your external storage. For more information, see Delta-based tables.
The value of this parameter must also match the permissions that you set on the cloud storage account for each specified storage location.
Note
If you plan to use the external volume for only reading externally managed Iceberg tables or Delta Direct tables, you can set this field to Off. Snowflake doesn’t write data or Iceberg metadata files to your cloud storage when you read tables in an external Iceberg catalog.
Scope
Choose where this external volume should become the default location for future Iceberg tables. Possible values are:
Do not set a default: Don’t set the external volume as a default anywhere.
Account: Set the external volume as the default for Iceberg tables that are created under the entire account.
Specific database: Set the external volume as the default for Iceberg tables that are created under the database you specify. To specify this database, use the Database drop-down that appears when you select Specific database.
Specific schema: Set the external volume as the default for Iceberg tables that are created under the schema you specify. To specify this schema, use the Database drop-down that appears to first select the parent database of the schema and then select the schema.
Comment (optional)
Specifies a comment for the external volume.
Connectivity
Specifies whether to use outbound private connectivity to harden your security posture. For information about using outbound private connectivity, see Private connectivity to external volumes for Microsoft Azure. Possible values are:
Public (default): Use the public internet.
Private (Azure Private Endpoint): Use outbound private connectivity.
Select Next.
On the Verify connection & create volume page, Snowflake verifies your connection to Azure and then displays a “Successfully connected” message.
Note
If Snowflake is unable to verify your connection, check your permission or external volume configuration and then select Verify again.
Select Create.
Next steps
After you configure an external volume, you can create an Iceberg table.
To create a read-only Iceberg table that uses an external catalog, see Configure a catalog integration.
To create an Iceberg table with full Snowflake platform support, see Create a Snowflake-managed table.