Skills in Cortex Code Desktop
Skills extend the Cortex Code Desktop agent with reusable, prepackaged knowledge and workflows for specific tasks. A skill is a self-contained folder with a SKILL.md file describing what the skill does and the steps the agent should follow when it is invoked.
You can use the skills that ship with Cortex Code Desktop, install community skills from a Git repository, share skills with your team through a Snowflake stage, or author your own. All skills are managed from the Agent Settings panel and can be invoked automatically by the agent or explicitly from chat.
Note
Skills configuration is stored in ~/.snowflake/cortex/skills.json and shared with the cortex command-line tool. A skill you add in Cortex Code Desktop is also available from the CLI, and vice versa.
Prerequisites
- Cortex Code Desktop installed and signed in.
- For Stage skills: an active Snowflake connection with read access (and write access, to publish) on the target stage.
- For GitHub skills: network access to the Git host. Private repositories use your system Git credentials.
Open the Agent Settings panel
Skills are managed from the Agent Settings panel. To open it:
- Run the Open Agent Settings command from the Command Palette, or
- Click the Agent Settings entry in the activity bar.
In the Agent Settings panel, select the Skills category from the left sidebar. This is the recommended place to browse, add, update, favorite, disable, and remove skills.
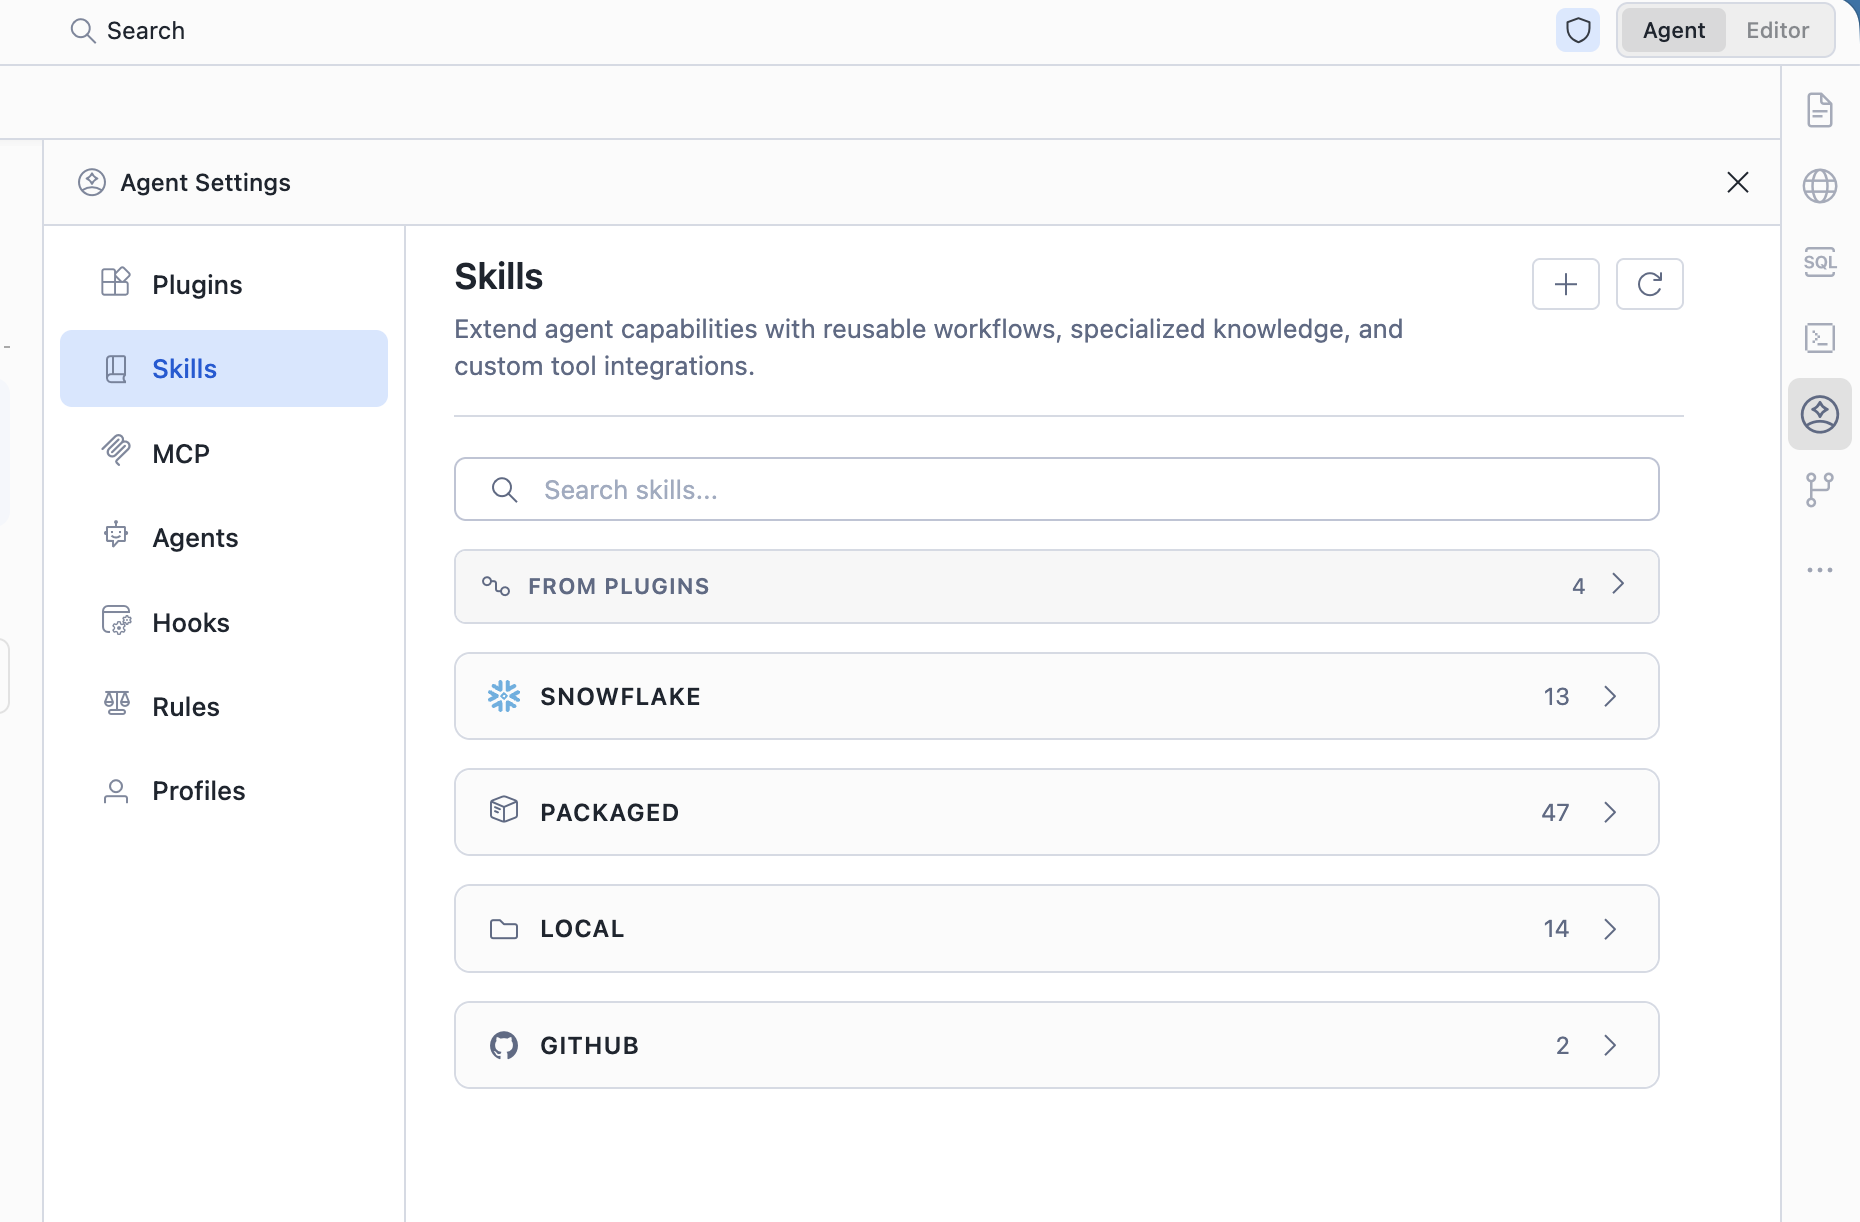
The Skills tab groups every skill the agent can see into collapsible sections:
- Profile Skills — skills attached to the active agent profile.
- Packaged Skills — built-in skills shipped with Cortex Code Desktop.
- GitHub Skills — skills added from a Git repository.
- Stage Skills — skills fetched from a Snowflake stage.
- My Skills — project skills (workspace-local) and any user-level skills you’ve registered.
A search box at the top of the Skills tab filters skills by name or description across all sections. Selecting a skill shows its description and exposes actions such as Open SKILL.md, Favorite, Disable, Update, Publish to stage, and Remove.
Tip
Other Agent Settings categories — Plugins, Profiles, MCP, Subagents, Hooks, and Rules — are also managed from the same panel. Plugins you install from the Plugins tab can contribute skills that show up automatically in the Skills tab.
Skill sources
Cortex Code Desktop loads skills from several sources. All of them appear in the Skills tab of the Agent Settings panel and can be invoked the same way from chat.
Built-in (packaged) skills
Built-in skills ship with Cortex Code Desktop and appear in the Packaged Skills section. They cover common Snowflake tasks such as creating a Cortex Agent, optimizing a Cortex Search service, building a Streamlit app, and authoring a new plugin.
You can browse, favorite, and disable packaged skills, but you cannot delete them — they are part of the application bundle. To stop the agent from auto-selecting a packaged skill, disable it (see Managing skills).
Project skills
Project skills live inside a workspace folder you open in Cortex Code Desktop, typically under .snowflake/cortex/skills/. They are committed alongside your code or notebooks, so they travel with the project and apply only when that workspace is open.
Use project skills when you want a workflow scoped to a particular repository, for example:
- A “deploy this dbt project to Snowflake” runbook.
- Conventions specific to the codebase (lint commands, test commands, naming standards).
- A team-onboarding walkthrough that lives next to the code it documents.
Project skills are auto-discovered when the workspace is opened and appear in the My Skills section. No manual registration is required.
Local (user-created) skills
Local skills are stored in any folder on your machine that you register with Cortex Code Desktop. Use them when you want a personal skill that follows you across workspaces but isn’t published to a Git host or stage.
To add a local skill folder:
- Open the Agent Settings panel and select the Skills category.
- In the My Skills section header, click the
+button (Add Local Skill). - Pick a directory that contains one or more skills (each skill is a subdirectory with a
SKILL.md).
Cortex Code recursively scans the folder for SKILL.md files (up to 10 directories deep) and registers every skill it finds. The folder path is saved to ~/.snowflake/cortex/skills.json.
Plugin-contributed skills
Plugins are bundles that can ship multiple skills, hooks, agents, and MCP servers in one package. When you install a plugin, every skill it contributes appears in the Skills view automatically.
You can install plugins from two sources:
- GitHub — clone a plugin repository (any Git URL works: GitHub, GitLab, Bitbucket, SSH, self-hosted).
- Local folder — register a directory that contains a
.cortex-plugin/or.claude-plugin/manifest.
Plugin-contributed skills are listed alongside other skills, often prefixed with the plugin name (for example, commit-commands:commit). To install or remove a plugin, open the Agent Settings panel and select the Plugins category. Removing a plugin removes every skill it contributed.
GitHub skills
You can add a single skill or a folder of skills directly from a Git repository. Cortex Code clones the repository into a cache directory under ~/.snowflake/cortex/remote_cache/ and discovers every SKILL.md it contains.
To add a GitHub skill:
- Open the Agent Settings panel and select the Skills category.
- In the GitHub Skills section header, click the
+button (Add from GitHub). - Enter a source in any of these supported formats:
owner/repo— for example,anthropics/skillsowner/repo#branch— pin to a specific branch or taghttps://github.com/owner/repohttps://github.com/owner/repo/tree/branch/path— restrict discovery to a subfolder
- Click Add.
Use the Update action on a GitHub skill (or Update all at the top of the section) to re-download the latest version. If the repository no longer contains a SKILL.md, Cortex Code surfaces an error and leaves your previous version in place.
Note
For private repositories, Cortex Code uses your system Git credentials. If a clone fails with an authentication error, run git clone <url> from your terminal first to confirm credentials are set up.
Snowflake Stage skills
Stage skills let your team share skills through a Snowflake stage instead of a Git repository. This is the recommended way to distribute skills inside your organization when you want governance through Snowflake roles and grants rather than Git permissions.
To add a stage skill:
- Make sure you are connected to a Snowflake account with read access to the stage.
- Open the Agent Settings panel and select the Skills category.
- In the Stage Skills section header, click the
+button (Add from Snowflake). - Enter the stage path in the format
@DATABASE.SCHEMA.STAGEor@DATABASE.SCHEMA.STAGE/subfolder/. - Click Add.
Cortex Code downloads the contents of the stage path into ~/.snowflake/cortex/stage_cache/, scans for SKILL.md files, and registers every skill it finds. Use Update on a stage skill to re-fetch the latest contents.
Note
Stage paths must match @DB.SCHEMA.STAGE or @DB.SCHEMA.STAGE/path. Paths containing SQL or shell metacharacters such as ;, ', --, /* */, $, or backticks are rejected to prevent SQL injection. Quoted identifiers (for example, @"My DB".PUBLIC.SKILLS) are supported.
Using a skill in chat
Once a skill is registered, the agent can invoke it in two ways:
- Automatically, by matching your prompt against each skill’s
description. If your message clearly matches a skill (for example, “create a new Cortex Agent” matchescreate-cortex-agent), the agent runs that skill’s instructions before doing anything else. - Explicitly, by mentioning the skill in chat. Type
/in the chat input and pick a skill from the picker, or reference it by name (for example, “use thecommitskill to commit my changes”).
When the agent invokes a skill, you see a “Using skill name” indicator in the chat transcript. Click the skill name to open its SKILL.md and inspect what the agent loaded.
Managing skills
All skill management actions are available from the Skills tab of the Agent Settings panel.
Favorite a skill
Click the star icon next to a skill in the Skills tab to add it to favorites. Favorites are saved to ~/.snowflake/cortex/skills.json and sync across windows of the desktop app.
Disable a skill
Disabling a skill keeps it visible in the Skills tab but prevents the agent from invoking or auto-selecting it. Use this to silence a built-in skill you don’t want the agent to use, or to temporarily turn off a custom skill while you’re editing it.
Disabled skills are stored in the user setting:
Update a skill
For GitHub and Stage skills, the Update action re-downloads the latest contents of the source. The Update all action at the top of each section refreshes every skill in that section in one pass. Project, local, and packaged skills update automatically when you edit the underlying files.
Remove a skill
The Remove action behavior depends on the source:
| Source | What “Remove” does |
|---|---|
| Packaged | Not allowed. Disable the skill instead. |
| Project | Deletes the skill folder from your workspace. |
| Local | Unregisters one skill, or unregisters the entire local folder. Files on disk are left alone. |
| GitHub | Removes the entry from skills.json and deletes the cached clone under remote_cache/. |
| Stage | Removes the entry from skills.json and deletes the cached download under stage_cache/. Files in the stage itself are not touched. |
| Plugin | Uninstall the plugin from the Plugins view; all of its skills are removed together. |
Publish a skill to a Snowflake stage
You can publish any local or project skill to a Snowflake stage so other Snowflake users in your organization can register it from their own Cortex Code Desktop installations.
To publish a skill:
- Open the Agent Settings panel and select the Skills category.
- Select the skill you want to publish.
- Click Publish to stage.
- Enter the destination stage path (for example,
@SHARED.SKILLS.TEAM_LIBRARY/release-notes/). - Confirm whether to overwrite existing files, then click Publish.
Cortex Code uploads the entire skill directory — SKILL.md plus any supporting scripts or resources — to the stage. Teammates can then add it from the Skills view using the same stage path.
Tip
Use a dedicated database/schema with appropriate role grants for shared skills (for example, SHARED.SKILLS readable by PUBLIC and writable only by skill maintainers). This gives you fine-grained access control without requiring Git access for everyone on the team.
Create your own skill
A skill is a folder with a SKILL.md file. The minimal layout looks like this:
Anatomy of SKILL.md
SKILL.md starts with YAML front matter that gives the skill a name and a description, followed by a markdown body that the agent reads when the skill is invoked.
The name is what the user types to invoke the skill and what the agent matches against. The description is critical: the agent uses it to decide when to auto-invoke the skill, so it should clearly state what the skill does and when to use it.
Use the plugin-creator skill
The fastest way to scaffold a new skill is to ask the agent to use the bundled plugin-creator skill. It walks you through an interactive wizard, generates the directory layout, and creates a starter SKILL.md.
In the chat panel, type:
The agent invokes plugin-creator, asks for the plugin name, the skills it should contain, and any hooks or MCP servers, then writes the files to a folder you choose.
Test your skill locally
- Save your skill folder somewhere on disk (for example,
~/snowflake-skills/release-notes/). - Open the Agent Settings panel, select the Skills category, and use the Add Local Skill button (
+) in the My Skills section to register the parent directory. - Open a chat and ask for the workflow your skill describes. Confirm the agent invokes the skill (you’ll see “Using skill” in the transcript).
- Edit
SKILL.mdto refine instructions and re-run. Changes are picked up live. - When you’re satisfied, publish to a Git repository or Snowflake stage so others can use it.
Settings reference
| Setting / path | Description |
|---|---|
snowflake.skills.disabledSkills | Array of skill IDs the agent will not invoke or auto-select. Set per workspace or per user. |
snowflake.skills.recentStagePaths | Recently used Snowflake stage paths, used for autocompletion in the Add-from-stage and Publish-to-stage dialogs. |
~/.snowflake/cortex/skills.json | Persistent skill configuration: registered local folders, GitHub sources, stage entries, marketplace entries, and favorites. Shared with the cortex CLI. |
~/.snowflake/cortex/remote_cache/ | Local cache of cloned GitHub repositories backing GitHub skills. |
~/.snowflake/cortex/stage_cache/ | Local cache of files downloaded from Snowflake stages. |
Troubleshooting
“No SKILL.md found” when adding a folder or repo
Cortex Code recursively scans up to 10 directories deep for SKILL.md files. If you see this error, check that your skill folder contains a file named exactly SKILL.md (the name is case-sensitive on Linux and macOS) and that it is not nested inside an excluded hidden folder (any directory whose name begins with .).
“Invalid stage path format”
Stage paths must start with @ and follow the pattern @DATABASE.SCHEMA.STAGE or @DATABASE.SCHEMA.STAGE/path. They cannot contain shell metacharacters, semicolons, or ...
GitHub clone fails
Cortex Code uses your system Git credentials. Try cloning the repository from a terminal first (git clone <url>); if that fails, fix your credentials there and retry the Add Skill flow. If the URL is correct but no skills are discovered, the repository likely doesn’t contain a SKILL.md; the cached clone is removed automatically in that case.
Skill doesn’t appear in the chat picker
- Confirm the skill shows up in the Skills tab of the Agent Settings panel.
- Verify it isn’t listed in
snowflake.skills.disabledSkills. - Check the
namein the skill’s YAML front matter — this is what the picker matches.
“Cannot import skills from the packaged skills directory”
You tried to register the application’s bundled resources/snowflake/skills/ directory as a local skill source. This is not allowed because the bundled skills are already loaded by Cortex Code. Pick a different folder for your custom skills, such as ~/snowflake-skills/.