Building apps
This topic explains how to build, develop, and deploy data applications on Snowflake using Cortex Code Desktop. Cortex Code Desktop scaffolds working applications connected to your Snowflake data, runs a local development server for live iteration, and deploys the finished app to Snowflake.
Cortex Code Desktop supports two application frameworks. It automatically recommends the best framework based on your requirements, or you can choose directly.
Prerequisites
Before building apps, ensure the following requirements are met:
| Requirement | Details |
|---|---|
| Snowflake connection | An active Snowflake connection configured in Cortex Code Desktop. The agent uses your connection to discover tables, views, and schemas referenced by your app. |
| Snowflake CLI | The Snowflake CLI (snow) version 3.17 or later installed and configured for deployment commands. See Getting started with Snowflake App Runtime. |
| App Runtime account setup (App Runtime only) | Snowflake App Runtime enabled in your account. Your administrator completes infrastructure setup in Snowsight at /settings/account/apps. |
| Node.js (App Runtime only) | Node.js 22 or later installed locally for running the development server. |
| Python (Streamlit only) | Python 3.8 or later with the streamlit and snowflake-snowpark-python packages for local development. |
Supported frameworks
| Framework | Best for | Technology | Deployment target |
|---|---|---|---|
| Streamlit-in-Snowflake | Python dashboards, KPI monitors, data exploration tools, analyst utilities | Python + Streamlit | Snowflake Streamlit Apps |
| Snowflake App Runtime | Full-stack web apps with custom UI, multi-step forms, role-based routing, customer-facing tools | JavaScript / Node.js | Application Service |
Tip
If you need a quick data dashboard or internal analyst tool, start with Streamlit-in-Snowflake. If you need a custom web interface with multi-page navigation, advanced forms, or role-based access, choose Snowflake App Runtime.
Quick start
-
Select the Build an app starter card on the chat home screen.
-
Describe what you want to build, who will use it, and what Snowflake data it should access.
-
Cortex Code recommends a framework. Confirm or switch.
-
The agent scaffolds the project, connects to your data, and starts a local dev server.
-
Iterate on the app using natural language — ask the agent to add features, change layouts, or fix issues.
-
When ready, tell the agent to deploy.
Entry points
You can start building an app from any of these locations:
| Entry point | Behavior |
|---|---|
| Starter card | Select the Build an app card shown on the chat home screen when you start a new session. |
| Apps view toolbar | Select Build an app to open the framework picker in chat. |
Chat composer + menu | Select Build an app from the attachment menu. |
| Command palette (F1) | Search for “Build an app”, “Build a Streamlit App”, or “Build a Snowflake App Runtime App”. |
| Natural language | Type requests like “Build me a dashboard” or “Create an internal tool” directly in chat. |
When you use the command palette entries for a specific framework, the framework picker step is skipped and scaffolding begins immediately.
Creating a Streamlit app
Streamlit-in-Snowflake is ideal for Python-based data applications. The agent creates a single streamlit_app.py file with Snowflake-branded theming, connected to your tables via Snowpark.
What you get
- A
streamlit_app.pywith Snowflake session management and branded styling - Live data queries against your Snowflake tables (never mock data)
- Interactive filters, charts, and KPI components
- A deployment-ready structure compatible with
snow streamlit deploy
Developing locally
The agent starts a local Streamlit server automatically after scaffolding. You can iterate on the app by asking the agent to make changes — the local preview updates in real time.
The Agent Browser opens an in-IDE preview so you can see changes without switching windows.
Deploying to Snowflake
When your app is ready, ask the agent to deploy. It uses the Snowflake CLI:
After deployment, your app is accessible in Snowsight under Streamlit Apps. The agent verifies the deployment with SHOW STREAMLITS and provides the app URL.
Creating a Snowflake App Runtime app
Snowflake App Runtime produces a full-stack web application with a custom UI, deployed as an Application Service on Snowflake. Use it for apps that need multi-page navigation, custom styling, advanced forms, or per-user data isolation.
What you get
- A complete project with pages, API routes, and a Snowflake data layer
- A
lib/snowflake.tsmodule providingquerySnowflakeandquerySnowflakeLongRunninghelpers with built-in SPCS OAuth - A
snowflake.ymlmanifest for deployment configuration - Support for both Owner’s Rights and Caller’s Rights authentication
Authentication modes
Snowflake App Runtime supports three authentication modes for data queries:
| Mode | How it works | Use when |
|---|---|---|
| Owner’s Rights | Queries run as the service identity. | Shared reference data that all users can see. |
| Caller’s Rights | Queries run as the signed-in user. | Row-level security, column masking, or per-user data isolation. |
| Both | Some routes use Owner’s Rights; others use Caller’s Rights. | Apps mixing shared dashboards with personalized views. |
Note
Caller’s Rights is enabled automatically in SPCS. No additional configuration is needed beyond passing { callersRights: true } to your query helper and setting executeAsCaller: true in snowflake.yml.
Developing locally
After scaffolding, the agent installs dependencies and starts the local development server:
The app runs at http://localhost:3000 with hot reload. The Agent Browser provides an in-IDE live preview. Ask the agent to add features, change layouts, or wire up new data sources — changes appear immediately.
Tip
During local development, the Snowflake data layer authenticates using your local Snowflake connection (the same one Cortex Code Desktop uses). No additional setup is needed.
Deploying to Snowflake
When ready, ask the agent to deploy. It uses the Snowflake CLI:
This uploads your source, runs a remote build, deploys an Application Service, and returns the live URL shown in the deployment output. The agent verifies the service is running.
For Snowflake App Runtime setup, manifests, sharing, observability, and SQL reference, see Getting started with Snowflake App Runtime, Access control, Observability, and the Snowflake App Runtime developer guides.
Using the Apps view
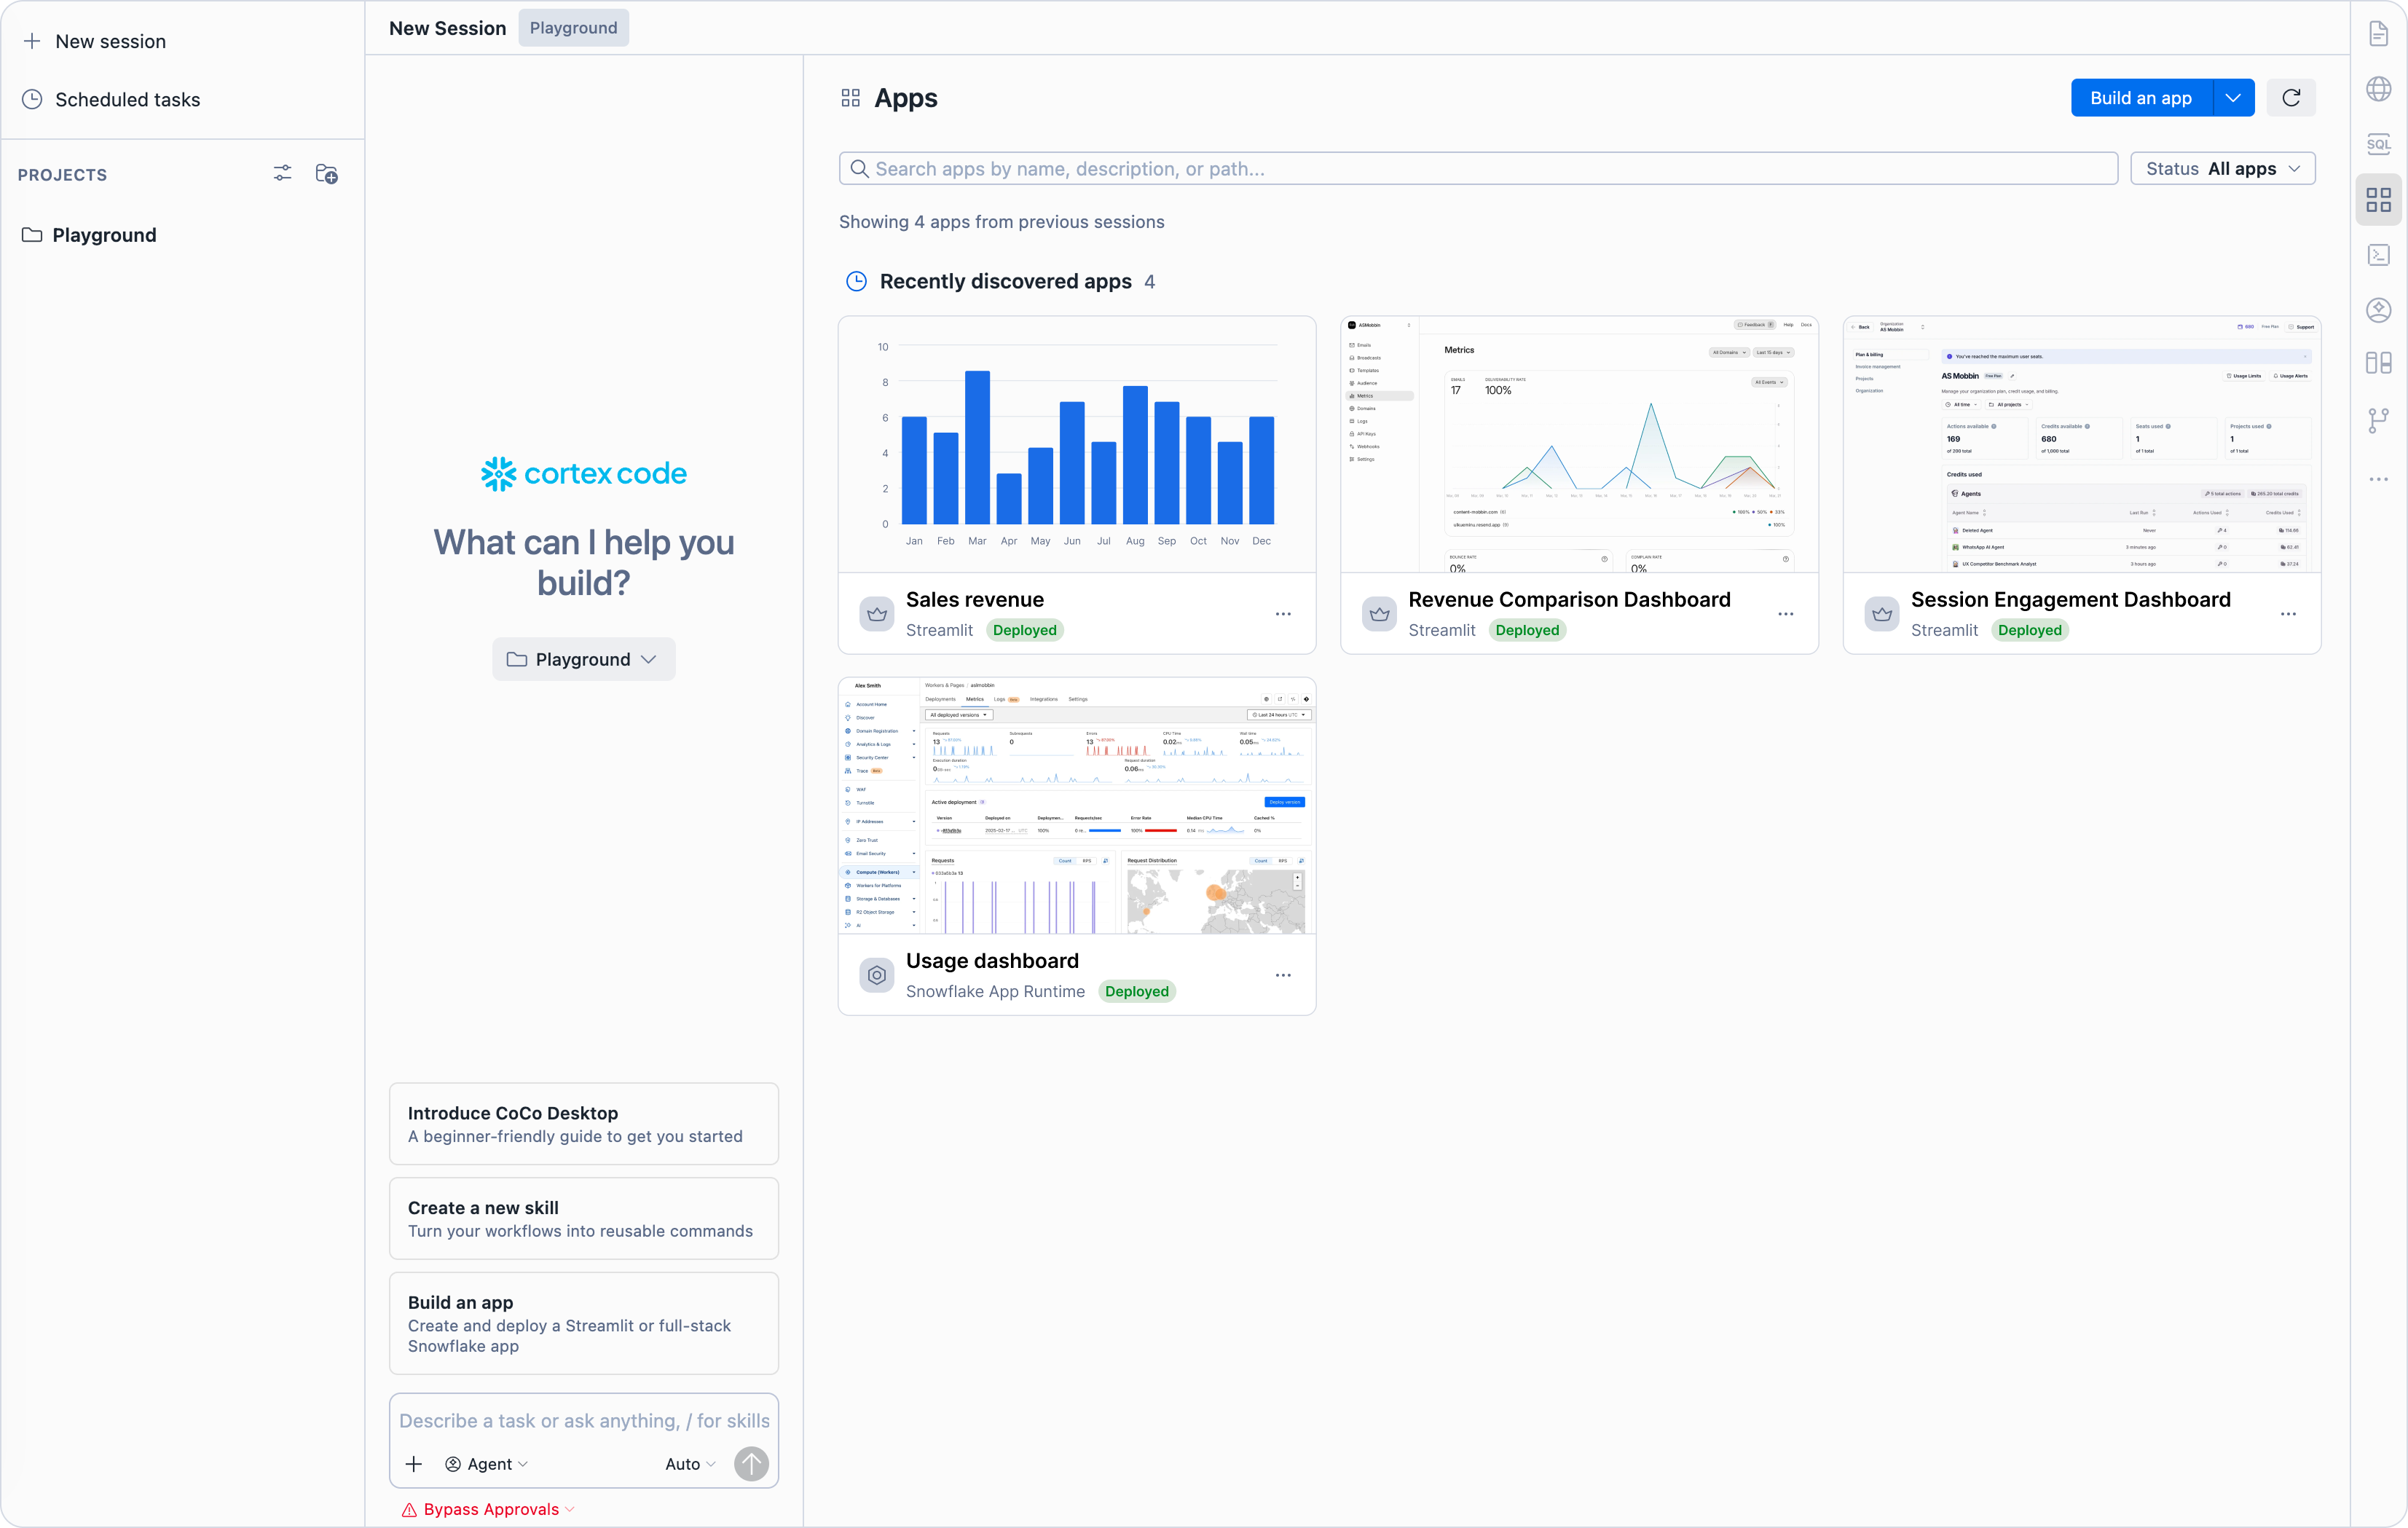
The Apps view in the activity bar provides a unified list of all your applications — both local projects and deployed apps on Snowflake.
For each app, the view shows:
- App name and framework (Streamlit or Snowflake App Runtime)
- Deployment status (local only, deployed, or both)
- The Snowflake endpoint URL for deployed apps
Available actions from the Apps view:
| Action | Description |
|---|---|
| Build | Start a new app from scratch using the framework picker. |
| Develop | Open the project in the editor and start the local dev server. |
| Deploy | Push the app to Snowflake. |
| Modify | Open a chat session with the app context loaded for making changes. |
| Share | Grant access to the deployed app for other Snowflake roles. |
Using live preview
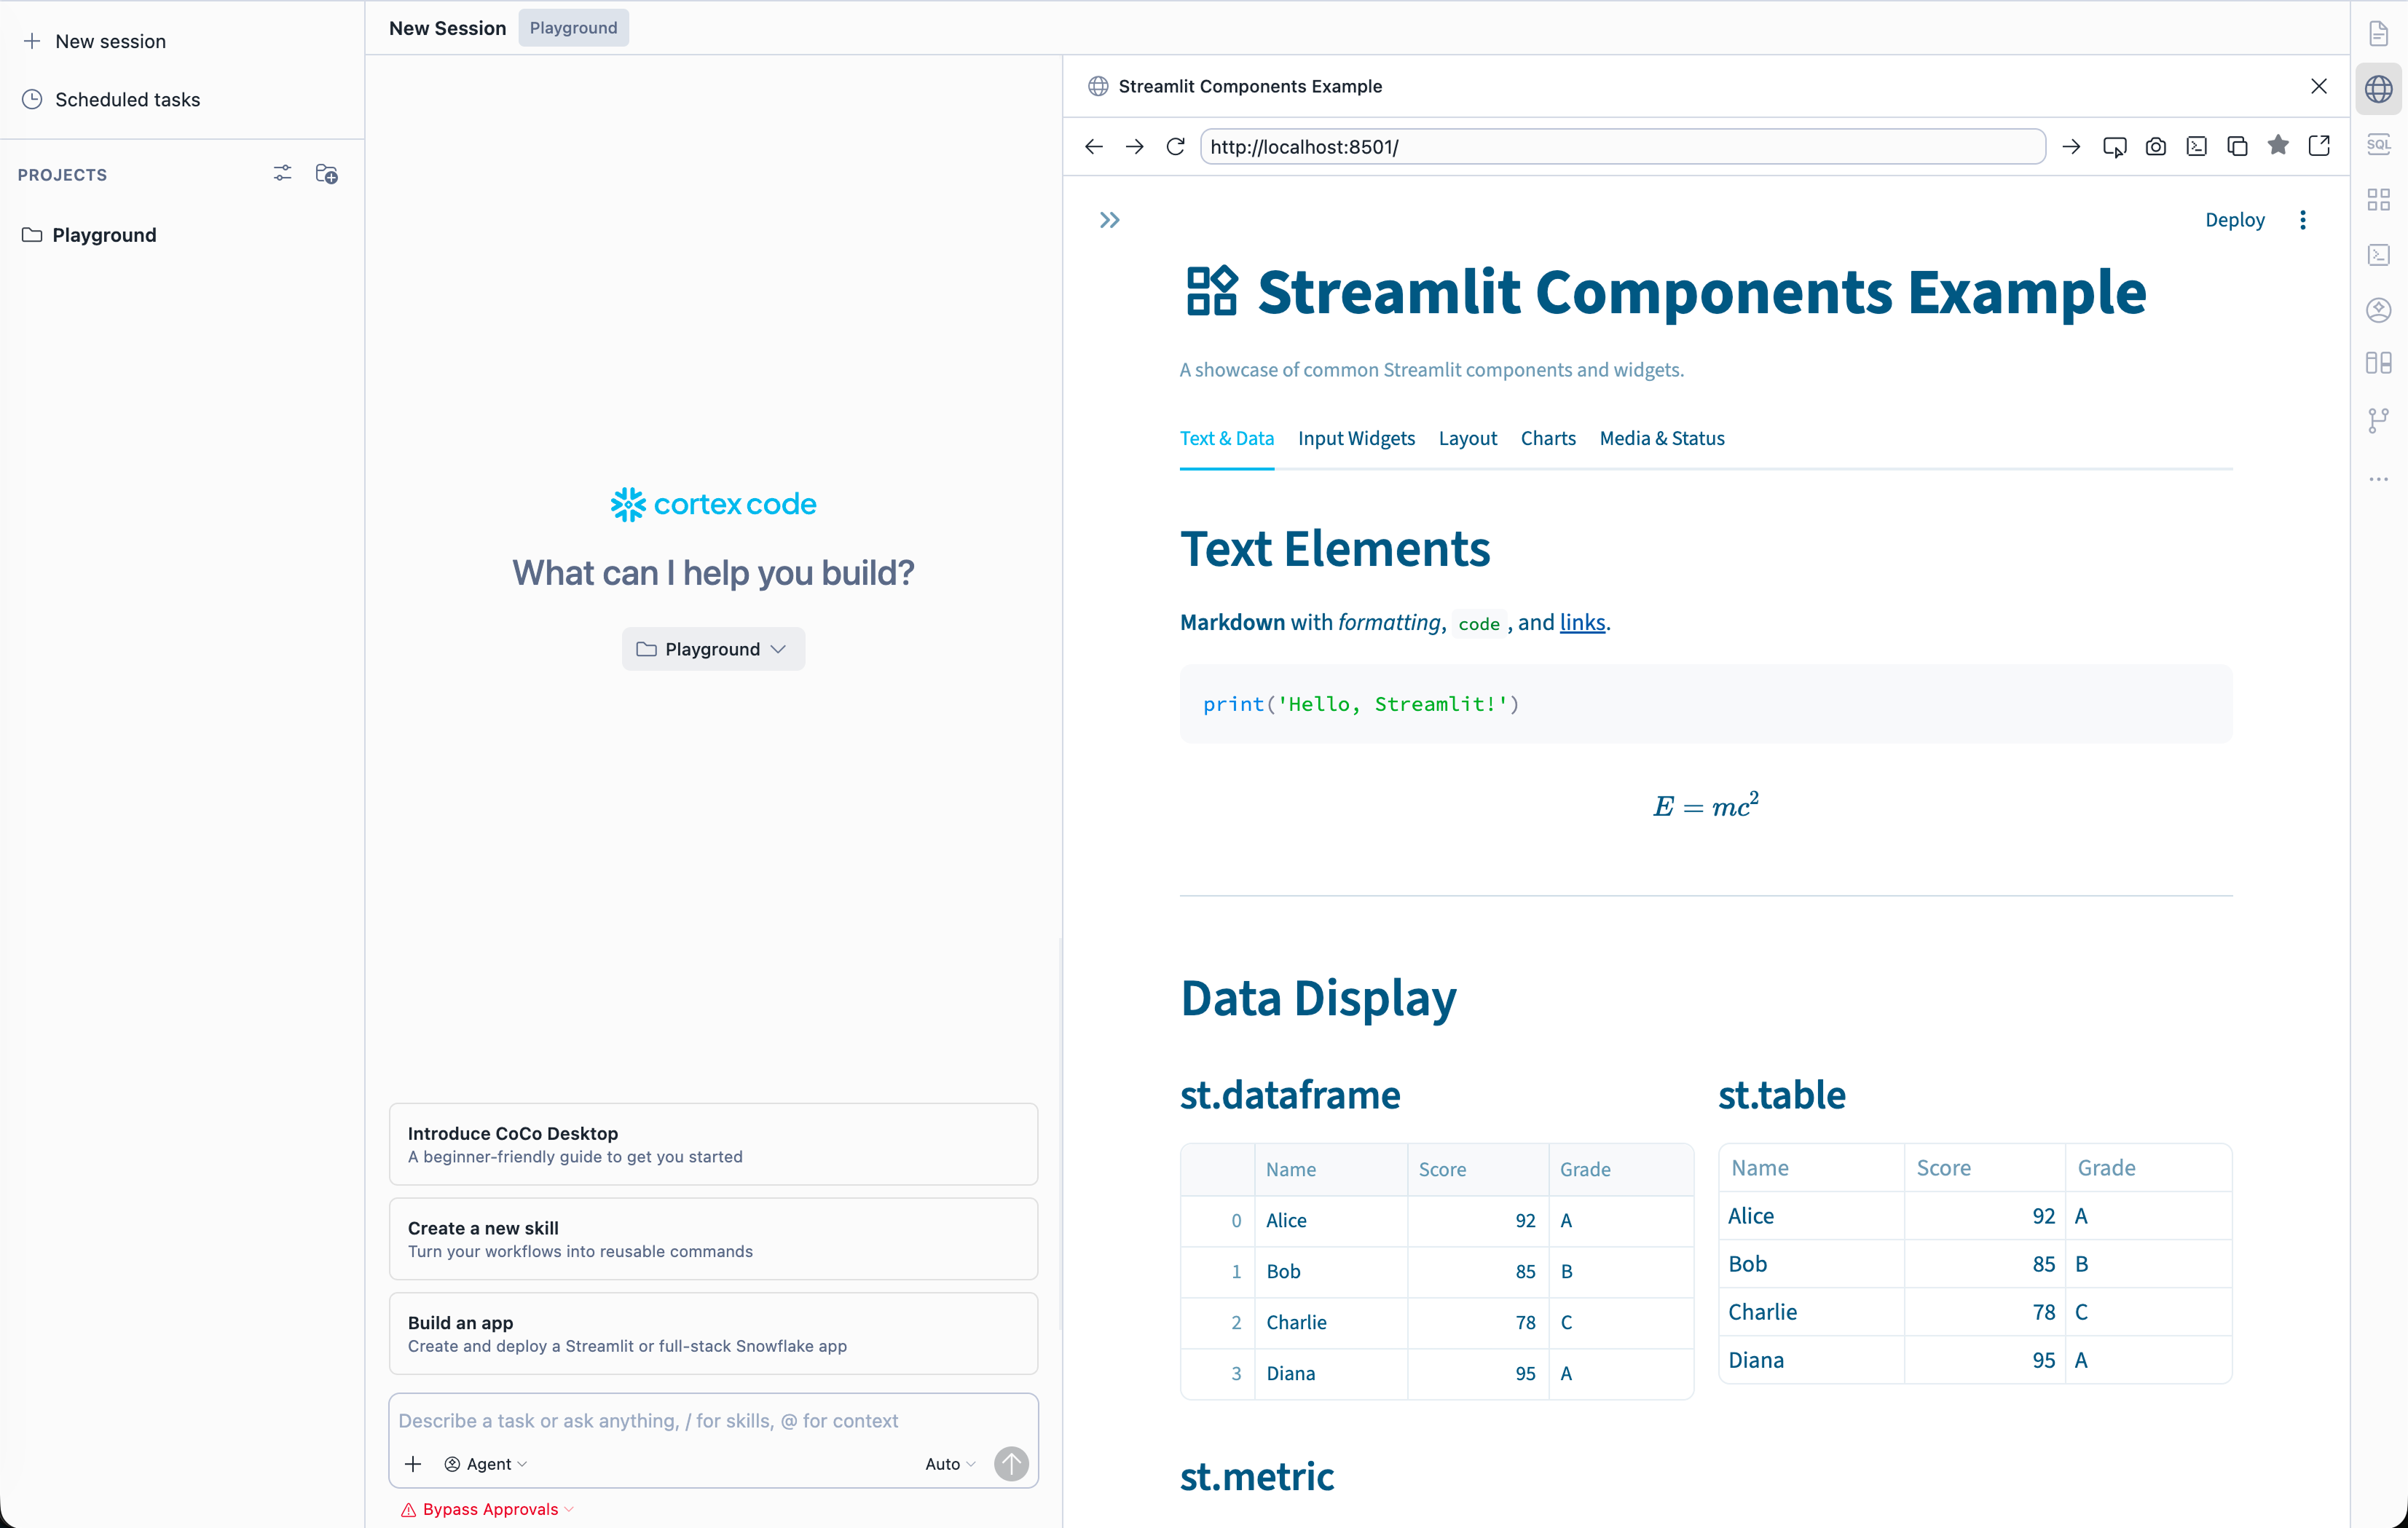
Cortex Code Desktop includes an Agent Browser that renders your app inside the IDE during development. When the agent starts a local dev server, the browser panel opens automatically and shows the running application.
As you ask the agent to make changes, the preview updates in real time via hot reload. This lets you iterate visually without switching to an external browser.
The Agent Browser supports:
- Full page rendering for both Streamlit and web apps
- Interactive elements (selecting, scrolling, form input)
- Automatic refresh when source files change
- Screenshot capture for the agent to verify its own work
Deploying apps
Streamlit deployment
Streamlit apps are deployed using the Snowflake CLI. The agent runs:
After deployment, the app appears in Snowsight under Projects > Streamlit. Access is controlled by Snowflake RBAC — grant the app’s role to users who need access.
Snowflake App Runtime deployment
Snowflake App Runtime apps are deployed with the Snowflake CLI:
The deployment process:
- Uploads your source to Snowflake
- Runs a remote build (using
app.ymlor auto-detected project layout) - Stores the built package in an artifact repository (
TYPE = APPLICATION) - Creates or upgrades the Application Service and returns the live URL
Managing deployed apps
After deployment, you can manage your app through Cortex Code Desktop by asking the agent. The following table describes the supported operations:
| Operation | Example prompt | What happens |
|---|---|---|
| Check status | “Show me the app status” | Checks service health and endpoint availability. |
| View logs | “Show me the logs” | Retrieves recent application logs from the service. |
| Restart | “Restart the app” | Restarts the Application Service or Streamlit app. |
| Diagnose | “My app is down” | Runs diagnostics, inspects logs, and suggests fixes. |
| Scale (App Runtime) | “Scale the compute pool” | Adjusts the compute pool for the Application Service. |
| Rollback (App Runtime) | “Roll back to the previous version” | Reverts to the prior deployment. |
Best practices
- Always use real Snowflake data. The agent connects to your actual tables and views. Never use mock or hardcoded data — this ensures your app works correctly when deployed.
- Be specific about your data. Mention table names, column names, or describe the data you want to use. The more specific your prompt, the better the result. The agent can also discover tables by searching your catalog.
- Start simple, then iterate. Begin with a basic working app and ask the agent to add features incrementally. Each iteration benefits from the live preview so you can verify changes immediately.
- Use Caller’s Rights for sensitive data. If your app shows user-specific data or your tables have row-level security policies, use Caller’s Rights so queries respect the signed-in user’s permissions.
- Test locally before deploying. The local dev server and Agent Browser let you verify functionality before pushing to Snowflake. Fix issues locally where iteration is fast.
- Keep prompts self-contained. When asking the agent to modify your app, describe the change completely in one message. Reference specific pages, components, or data sources by name.