Onboarding and authentication
This guide walks you through the Cortex Code Desktop interface and shows you how to connect it to your Snowflake account so you can start asking questions, exploring data, and building workflows in plain English.
Get Cortex Code Desktop
Download the latest version. Available for macOS and Windows.
Onboarding and sign in
On first launch, Cortex Code Desktop guides you through a short setup flow to connect to your Snowflake
account. If you already have a ~/.snowflake/connections.toml file (for example, from Cortex
Code CLI), your existing connections are detected automatically.
Step-by-step
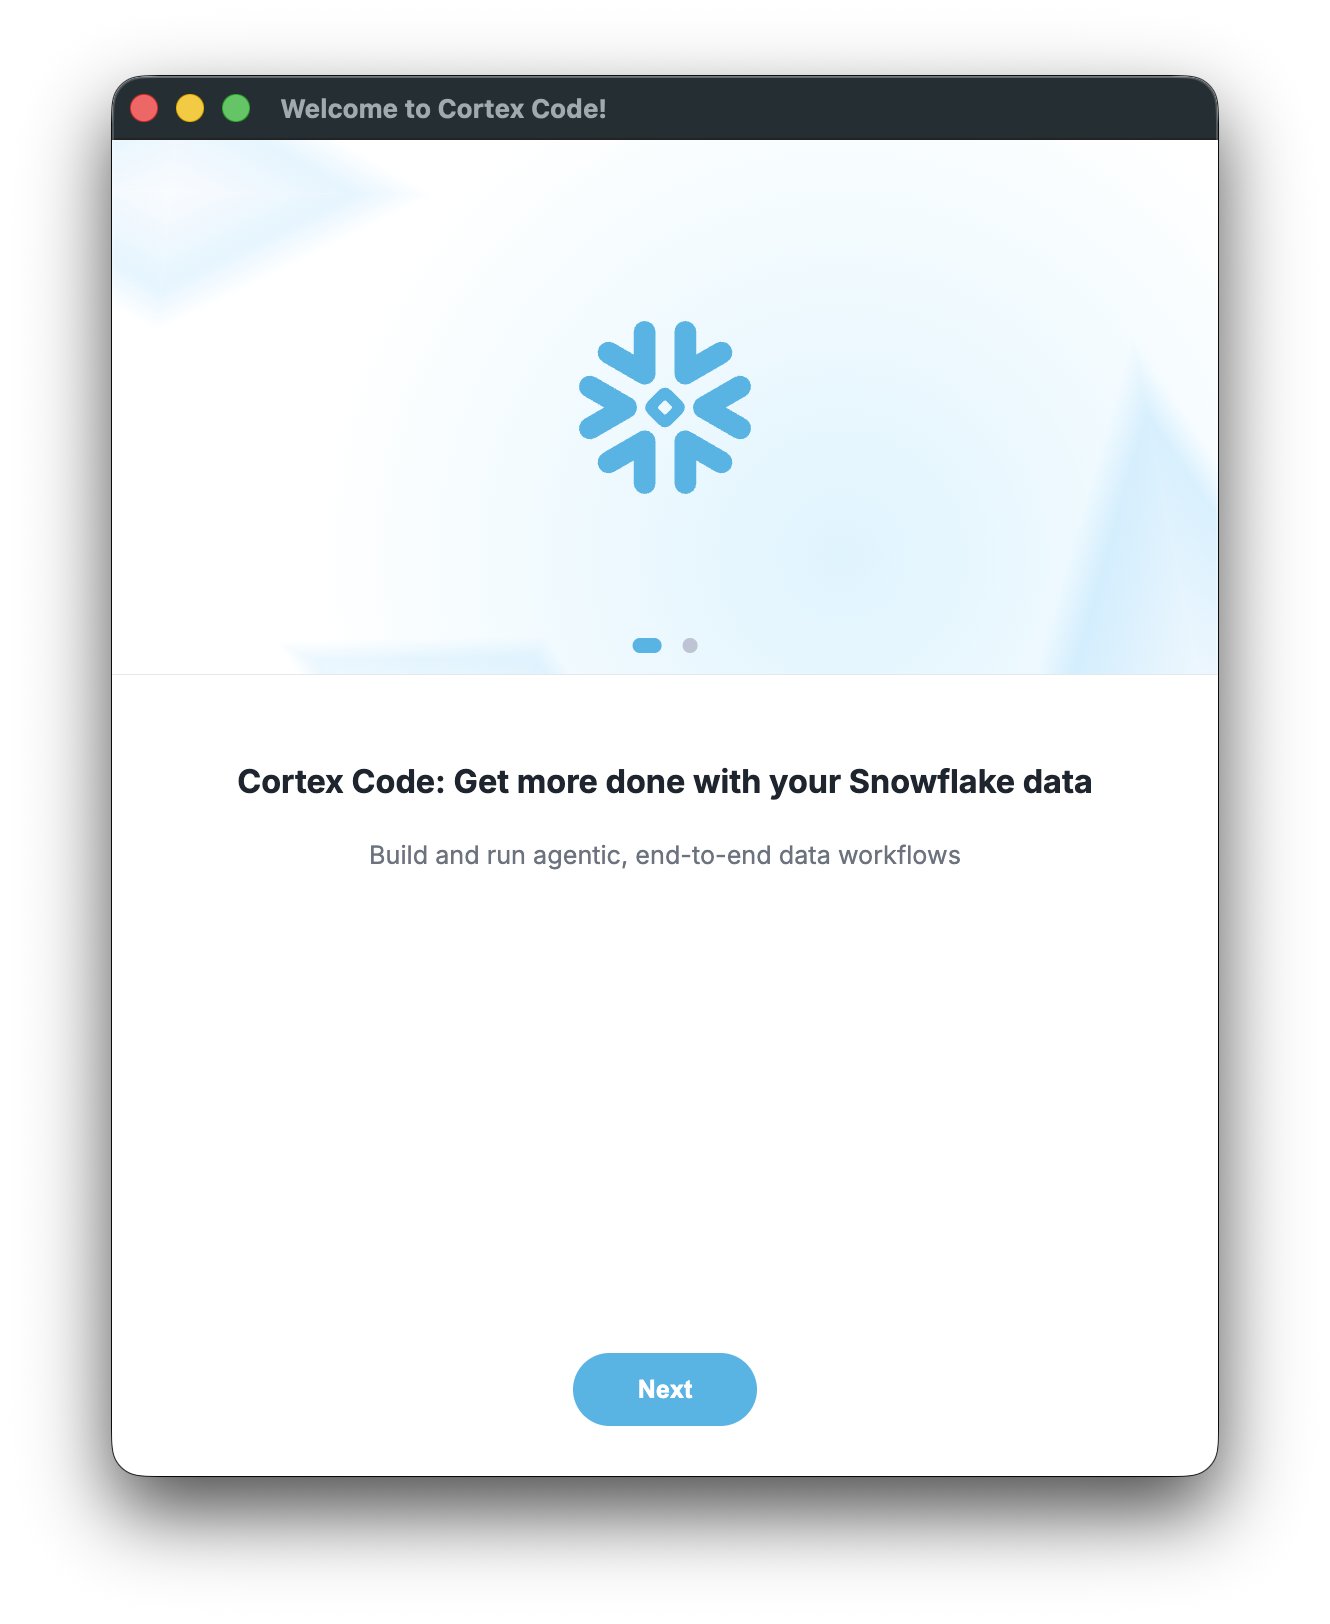
- Launch Cortex Code Desktop. The Welcome screen introduces Cortex Code and its capabilities. Click Next to begin setup.
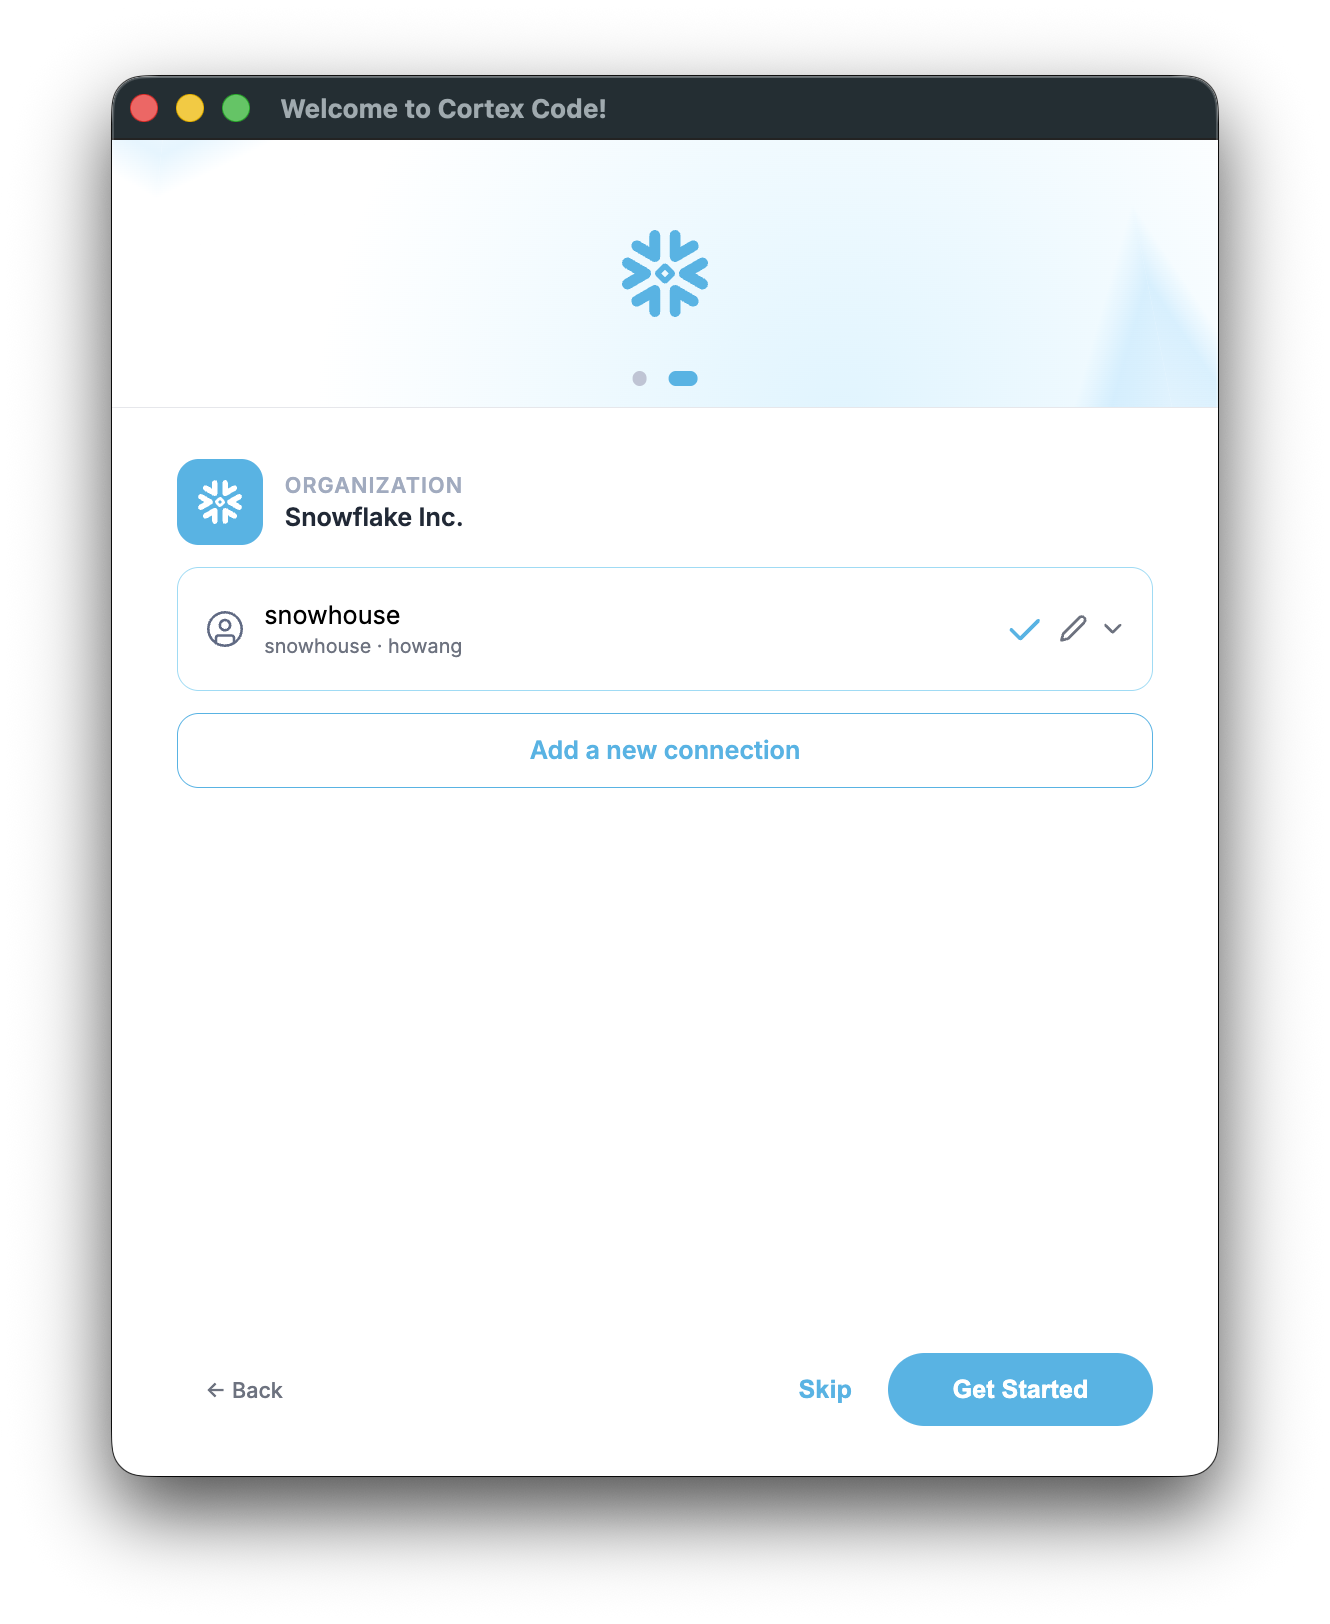
- If existing connections are detected (from a
connections.tomlfile), they appear in a list. Select one using the radio button, or click Add a new connection to create one. Use the edit icon to modify an existing connection, or the dropdown arrow to see connection details. Click Get Started when ready, or Skip to set up later.
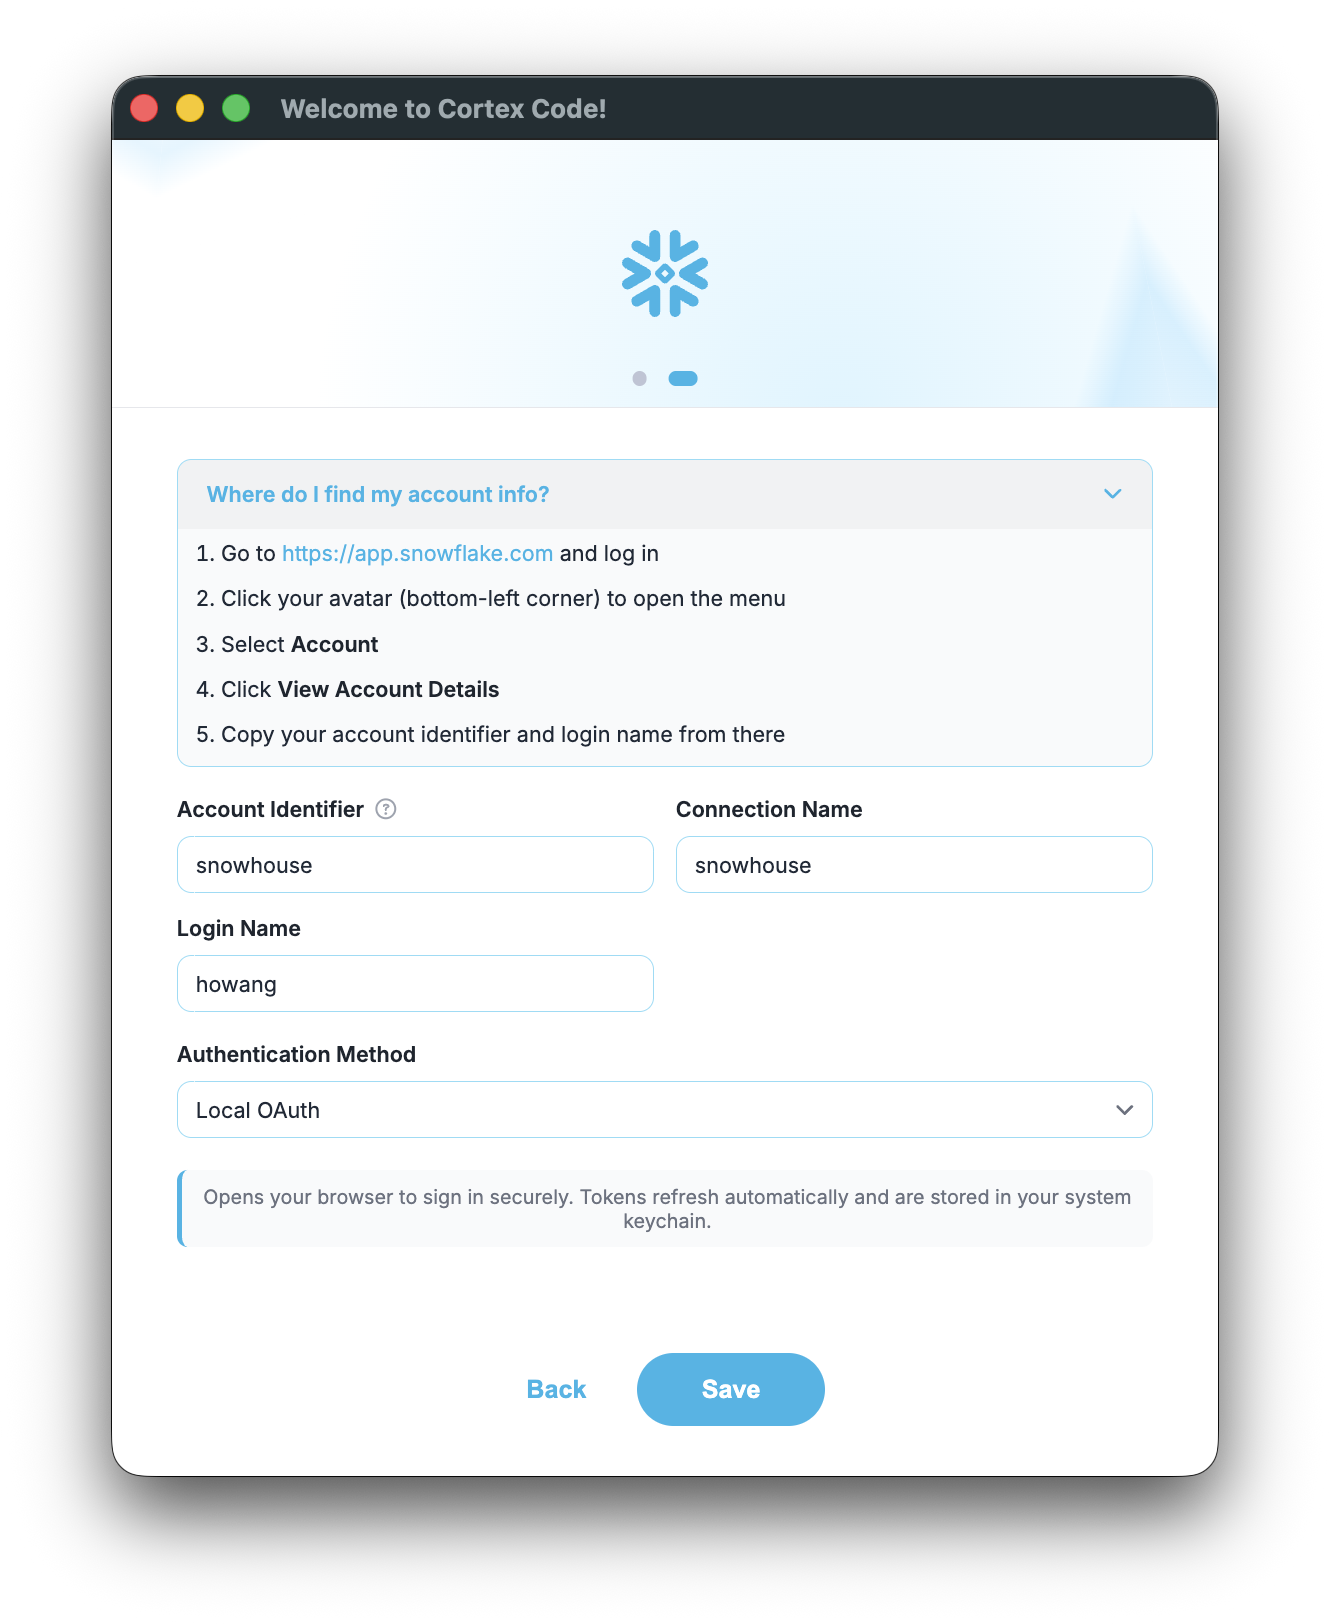
- If adding a new connection, fill in the form:
- Account Identifier — for example,
myorg-myaccount(see Find your account identifier). Expand “Where do I find my account info?” for step-by-step instructions. - Connection Name — a friendly label, auto-derived from the account identifier.
- Login Name — your Snowflake username.
- Authentication Method — Local OAuth (recommended), External Browser (SSO), or Password. A description of the selected method appears below the dropdown.
- Account Identifier — for example,
- Click Save to store the connection. For OAuth or SSO, complete sign-in in your browser when prompted.
- If asked, pick a default warehouse. Cortex Code saves it for future sessions.
- Click Get Started to launch the main app.
Tip
If your browser doesn’t open automatically for OAuth/SSO, use the “Browser didn’t open?” link in the app to copy the sign-in URL and open it manually.
Find your account identifier
- Sign in at app.snowflake.com.
- Click your account name in the bottom-left corner.
- Your account identifier is shown as
orgname-accountname. You can also see it in the URL:https://app.snowflake.com/orgname/accountname/.
Manage connections after setup
You can add, edit, or switch connections at any time from within the app:
Open the connection menu: Click the connection name in the top navigation bar to reveal a dropdown with connection management options:
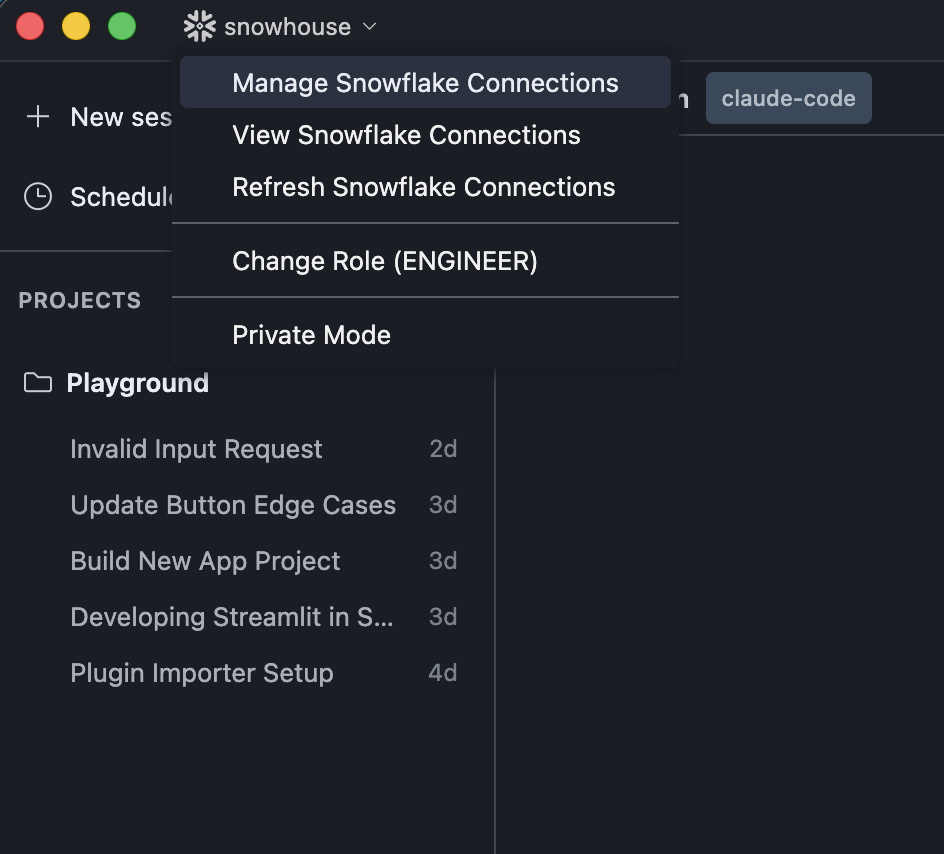
- Manage Snowflake Connections — Opens the connection manager dialog where you can switch between connections, add new ones, or edit/delete existing ones.
- View Snowflake Connections — Shows your
connections.tomlfile for quick reference. - Refresh Snowflake Connections — Reloads connections from disk (useful after manually editing the config file).
- Change Role — Switch your active Snowflake role without disconnecting.
- Private Mode — Toggle private mode for sensitive work.
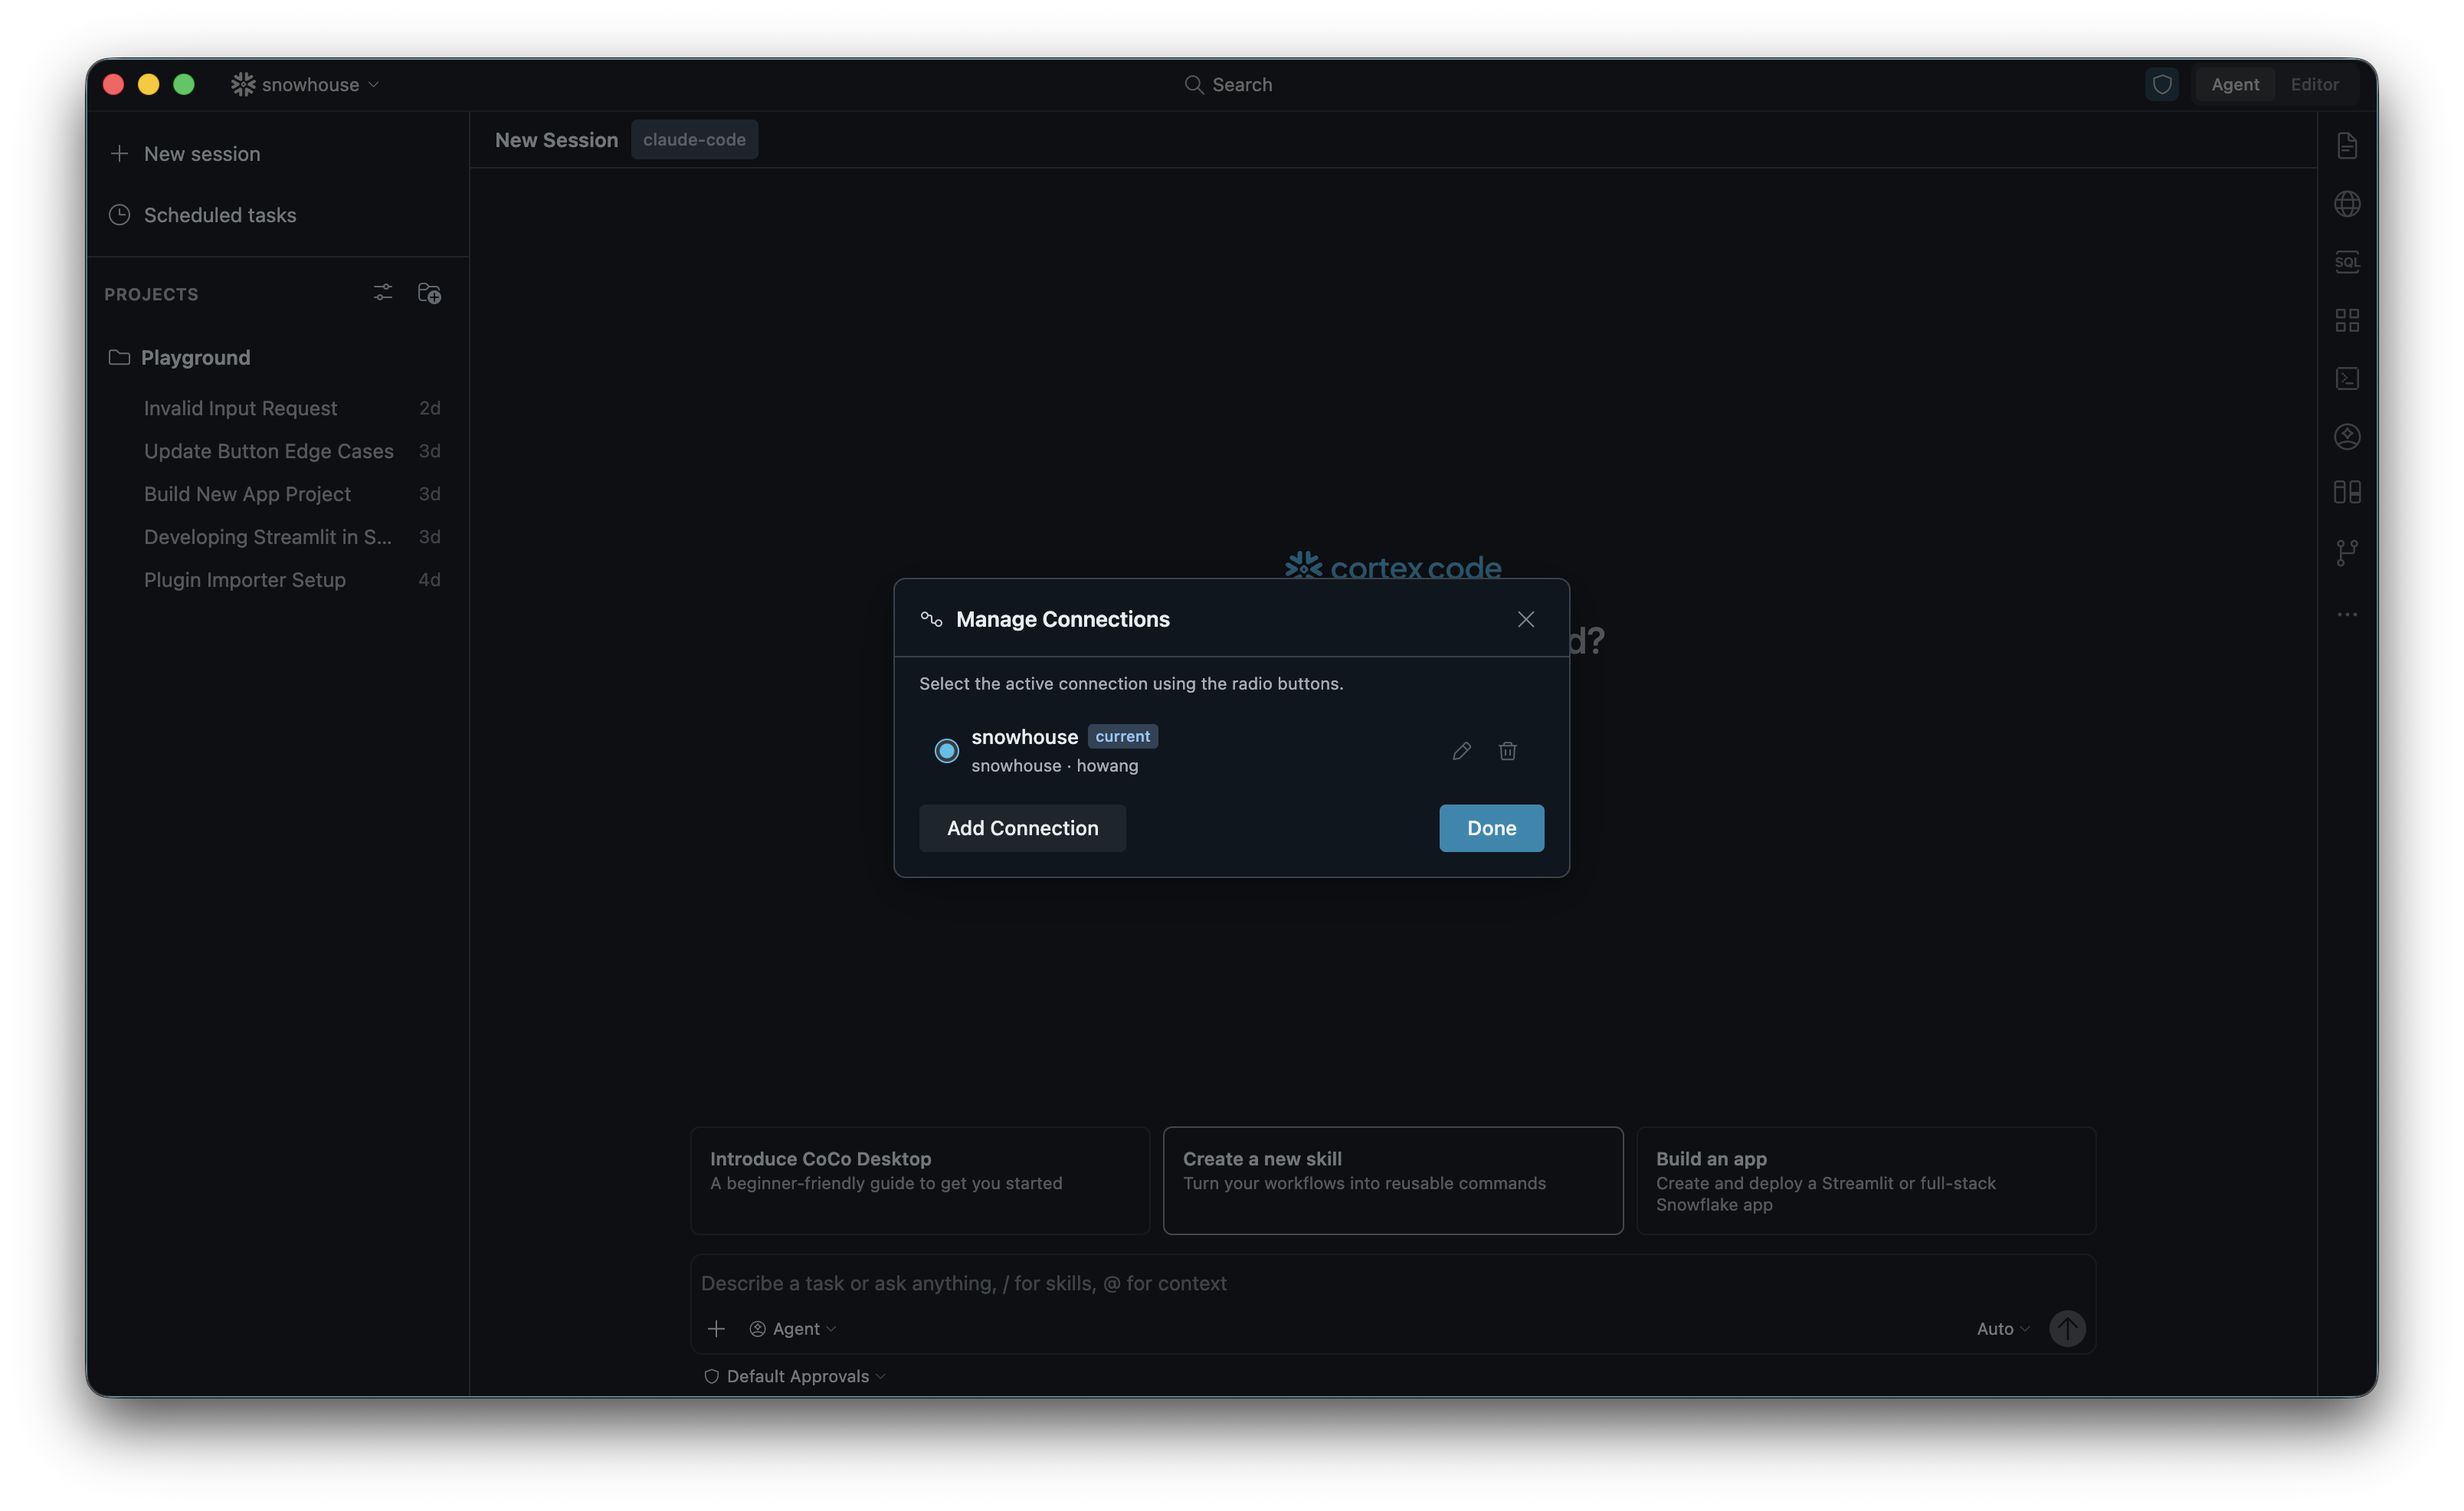
Manage Connections dialog: Select Manage Snowflake Connections to open this dialog. Use the radio buttons to switch between connections, the edit (pencil) icon to modify a connection, or the trash icon to delete one. Click Add Connection to create a new connection.
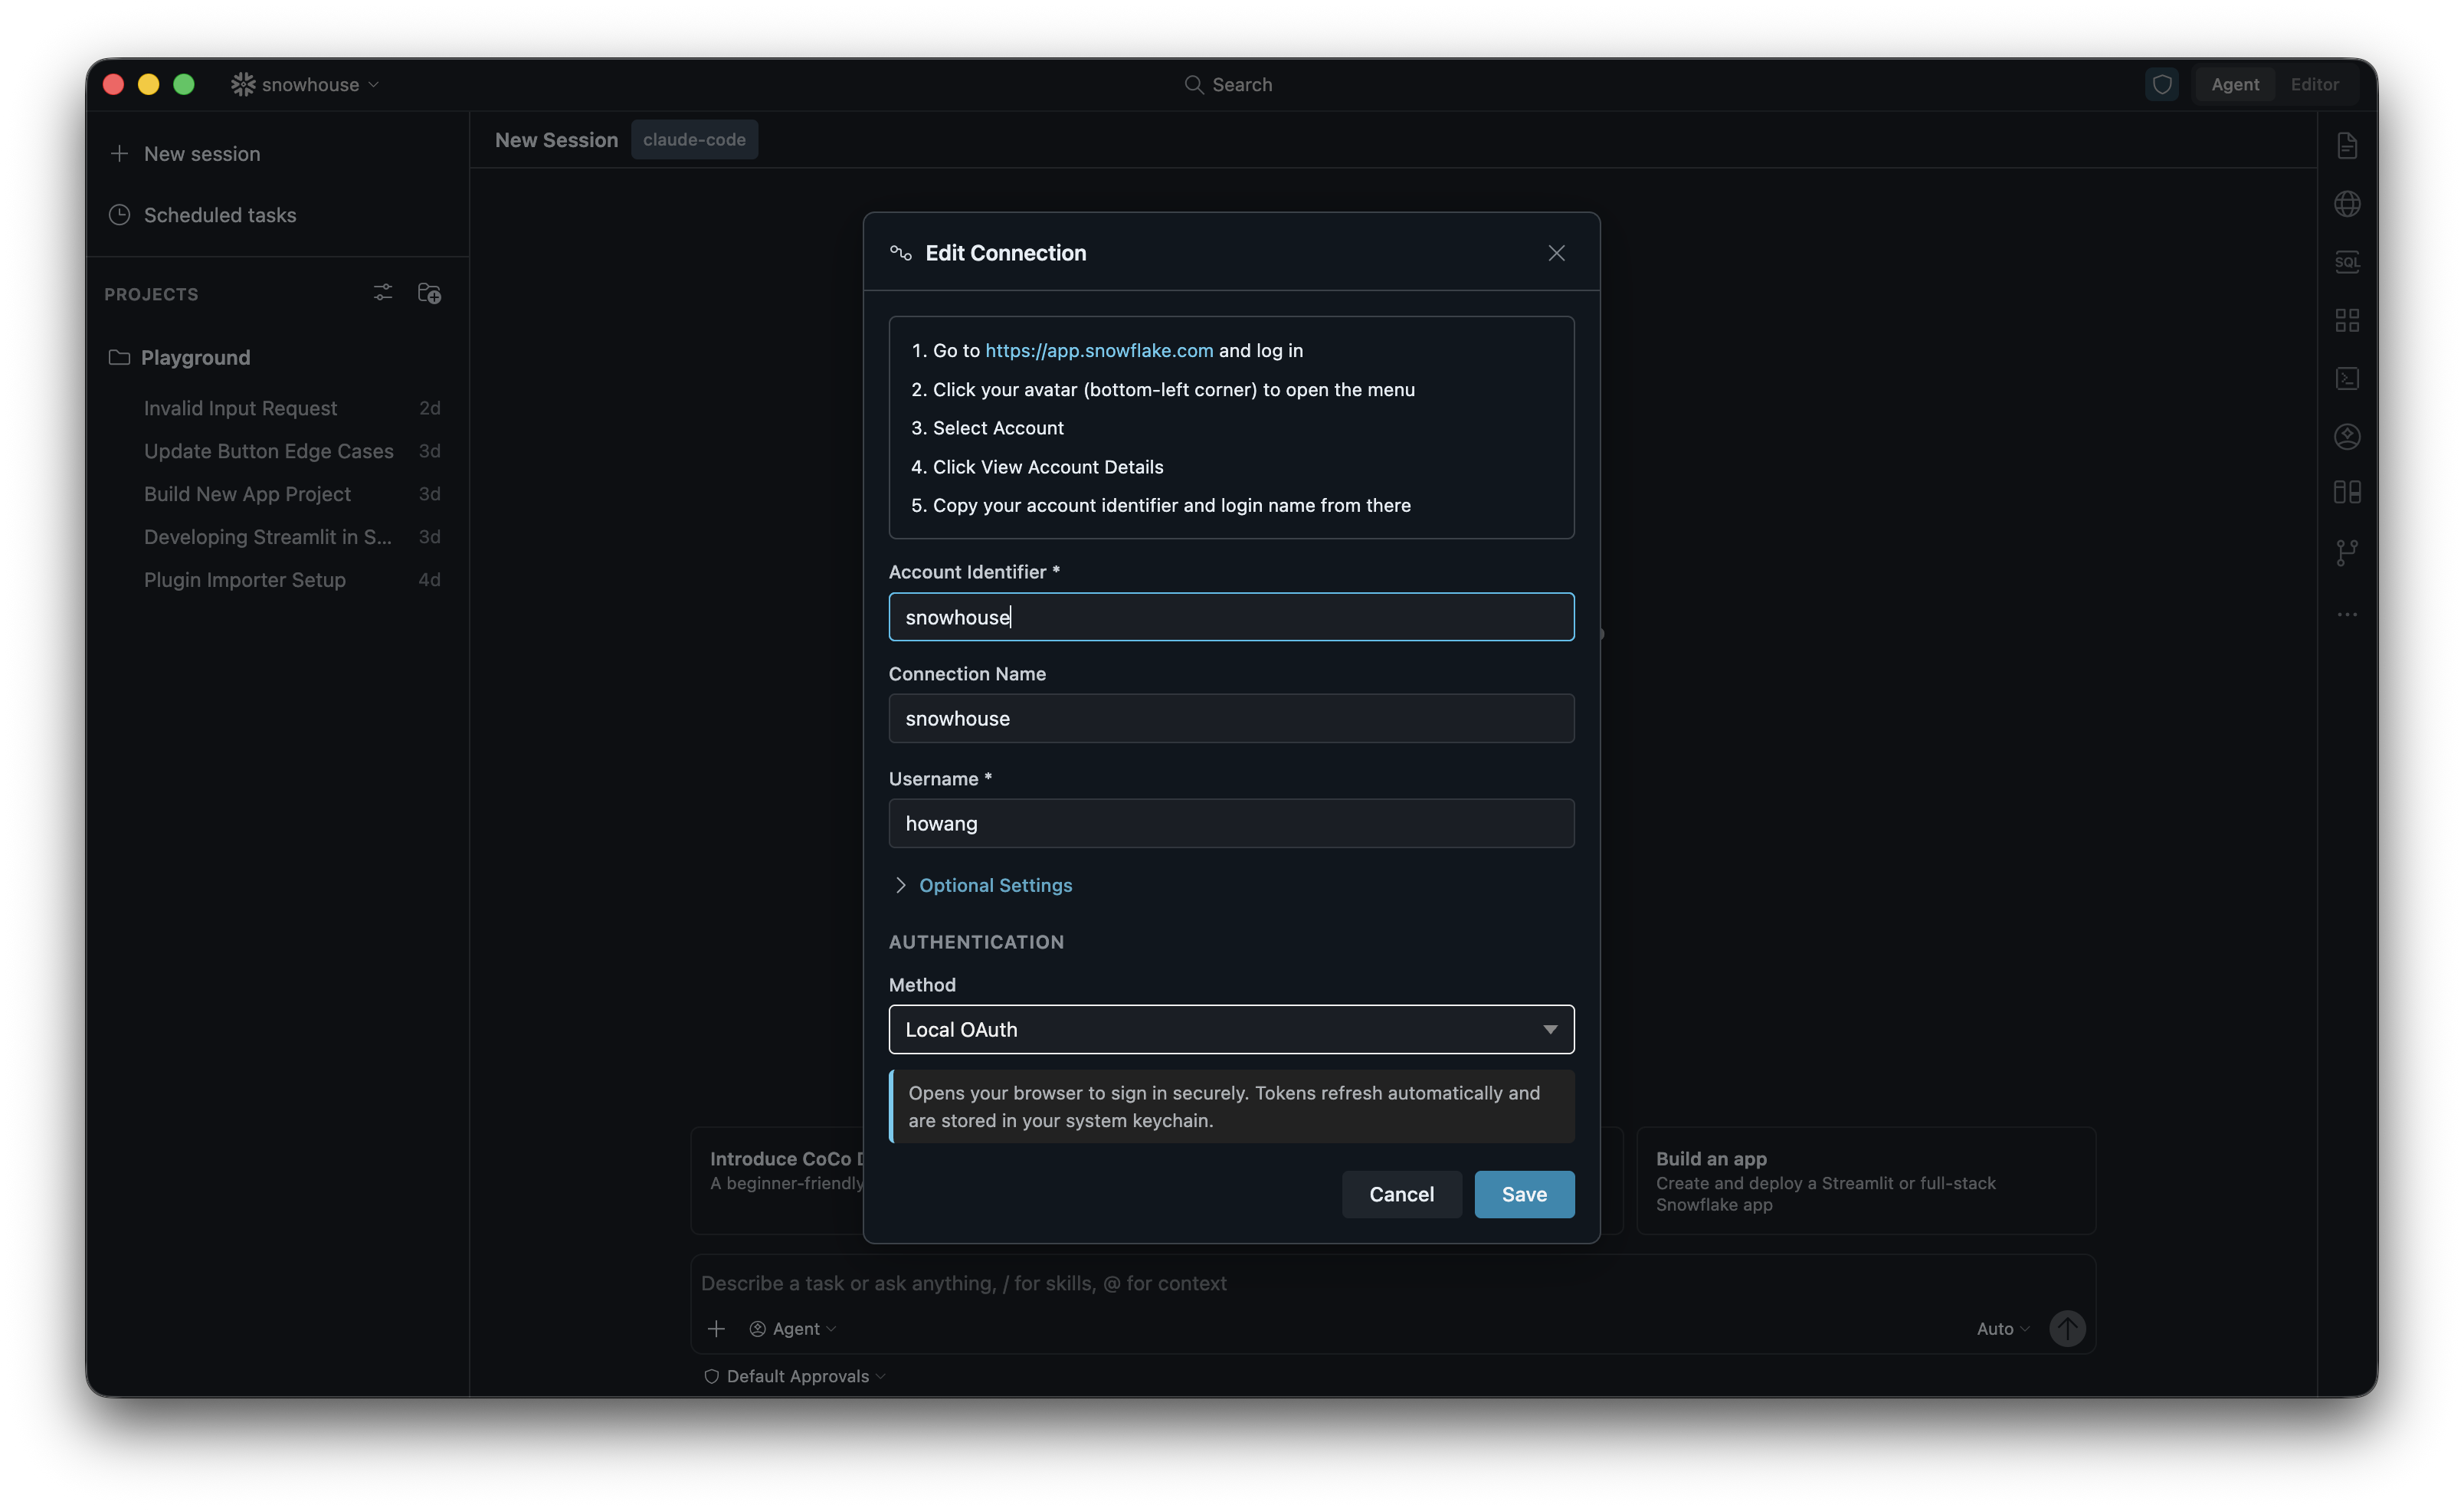
Edit or add a connection: Clicking the edit icon or Add Connection opens the Edit Connection dialog. This form works the same as the onboarding form — fill in your Account Identifier, Connection Name, Username, and Authentication Method, then click Save.
Tip
You can also type /connections in the chat input to quickly open the connection manager, or use the “Sign in to Snowflake” starter card if no connection is active.
UI walkthrough
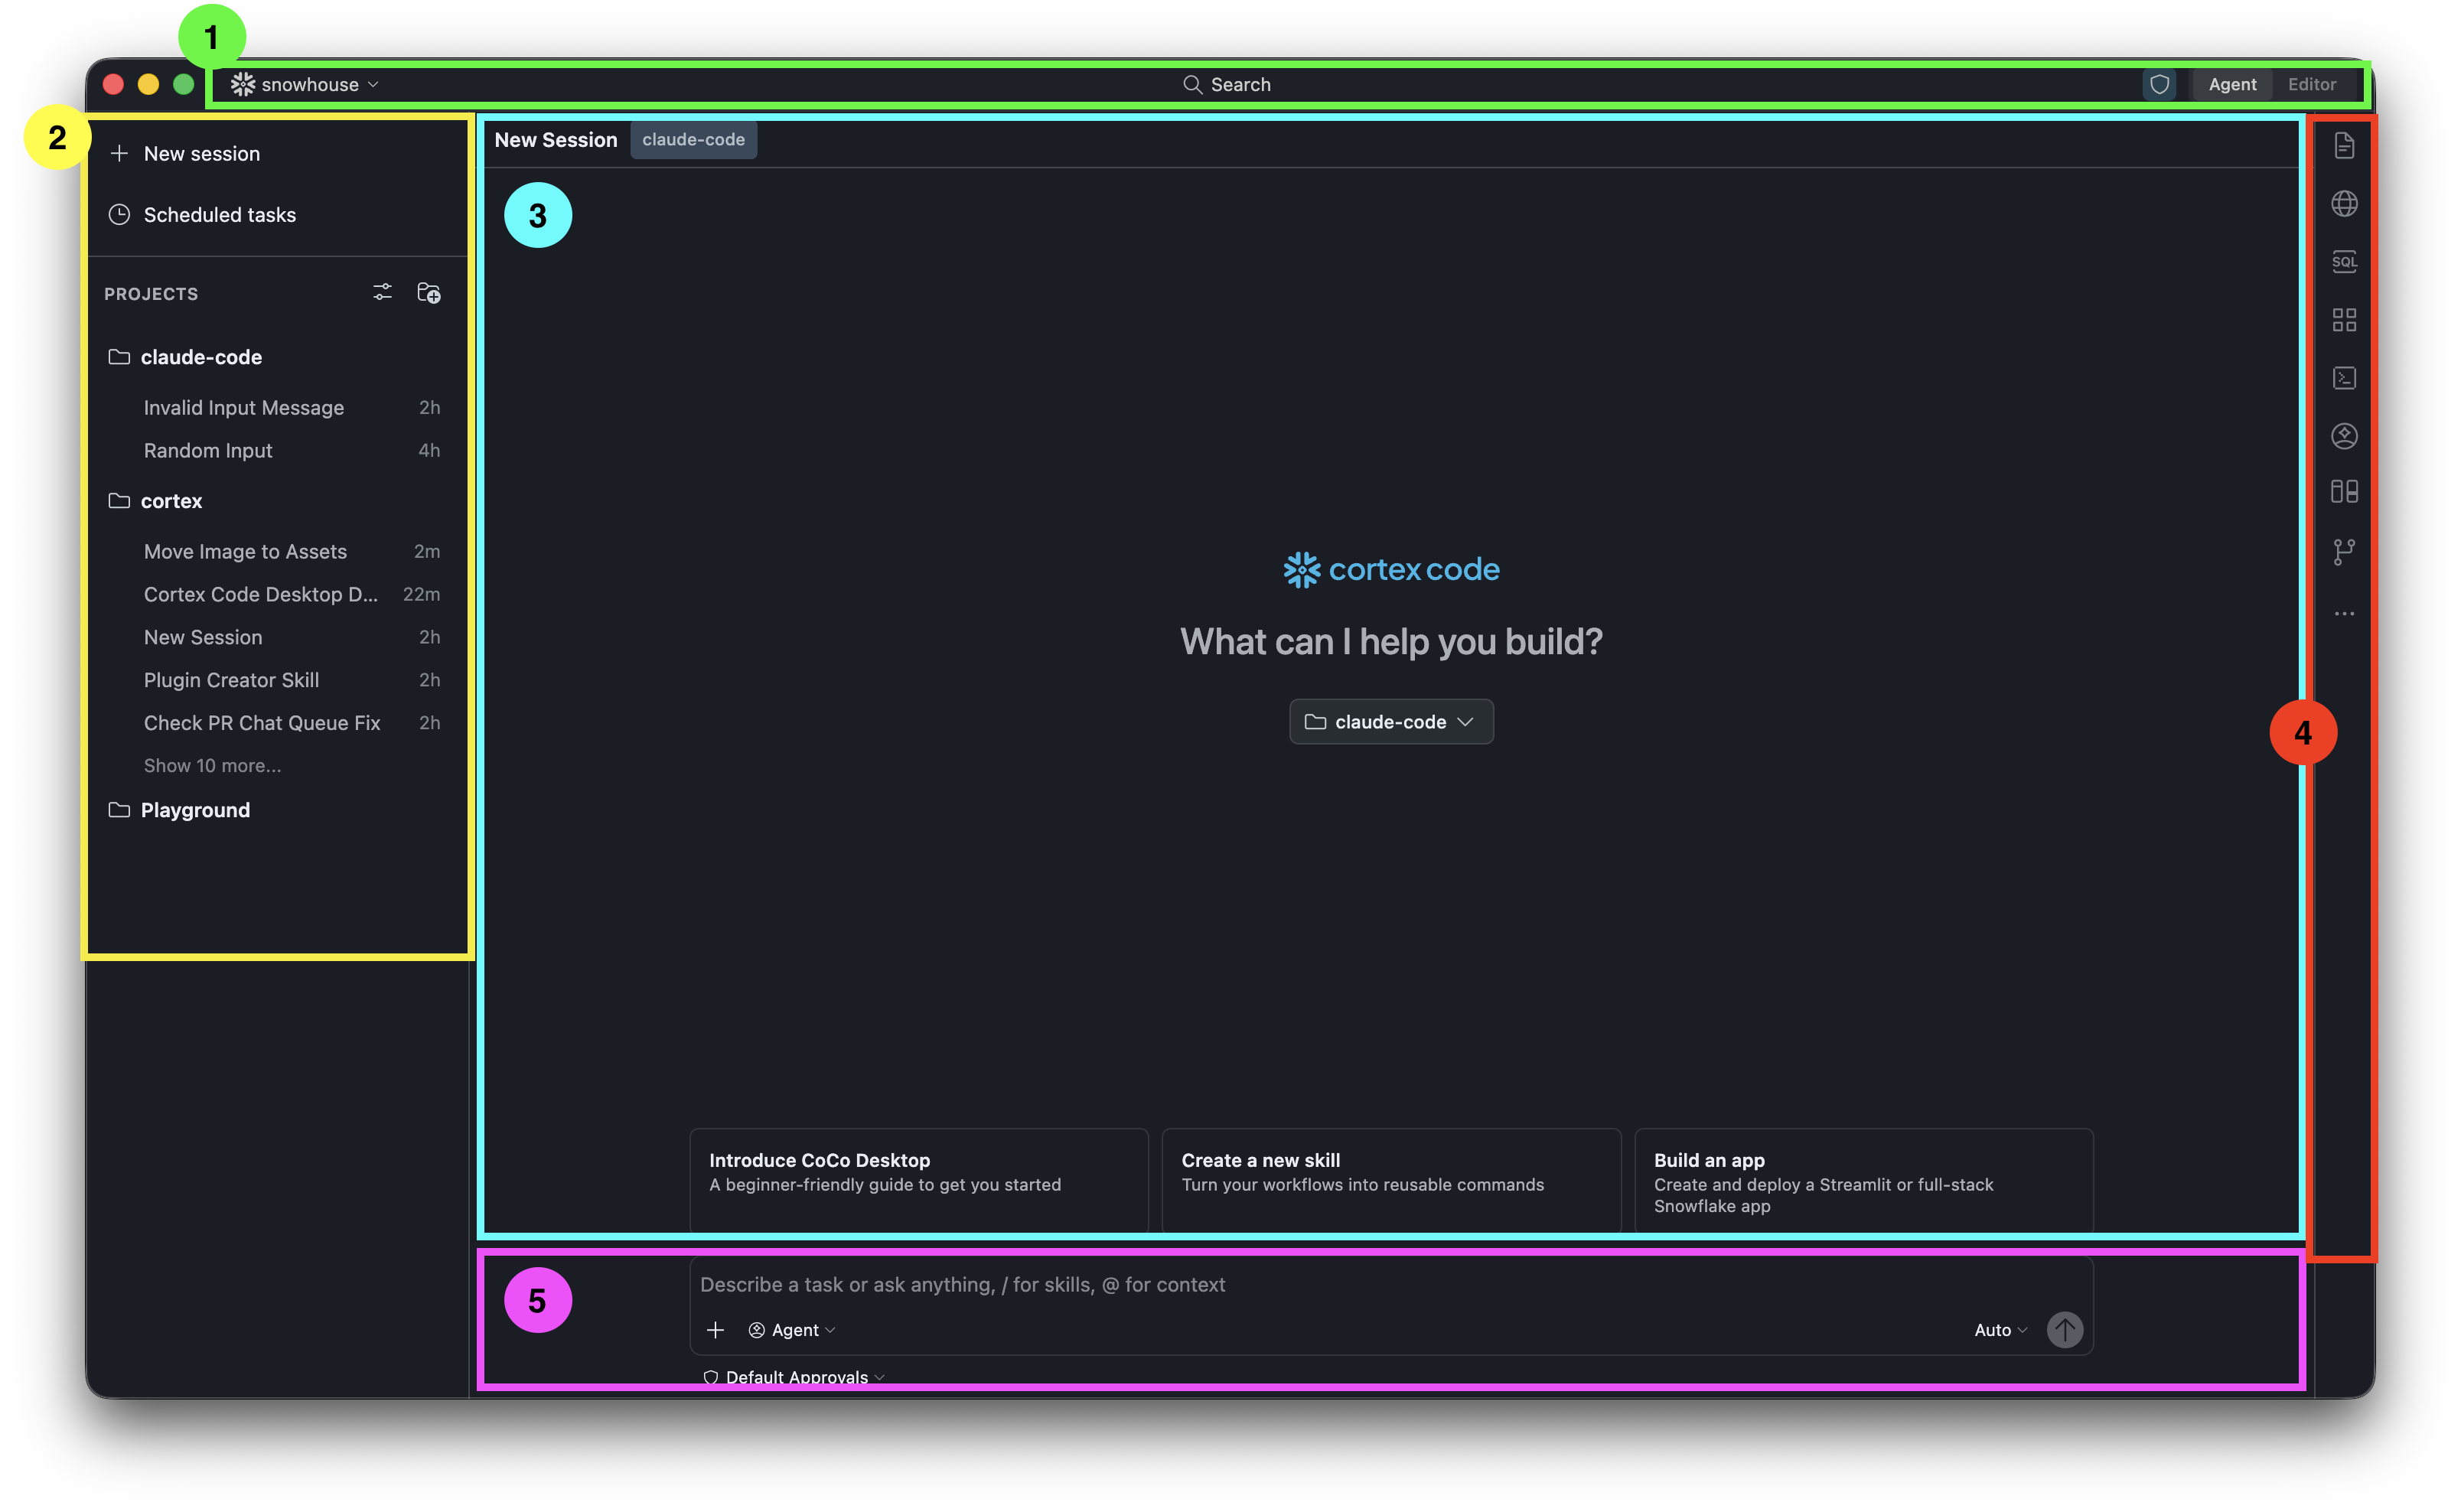
The Cortex Code Desktop interface has five key areas:
- Top Navigation Bar: Shows your active Snowflake connection, a Profile selector, and a global Search. The Agent/Editor toggle on the right switches how the assistant operates.
- Left Sidebar: Create a New Session, view Scheduled Tasks, and browse your Projects. Each project corresponds to a working directory on your computer.
- Main Chat Area: The central area where your conversation with the assistant happens. Messages, tool runs, code, SQL results, charts, and file diffs all appear here.
- Right Toolbar: Quick-access icons for the terminal, file explorer, Snowflake objects, and more.
- Input Bar: Where you type your messages. Use
/to invoke skills and@to add context. You can also pick your mode (Agent), model, and approval preferences.
Authentication methods
Cortex Code Desktop supports several ways to sign in to Snowflake. Pick the one that fits your account.
Local OAuth (recommended)
Opens your browser to sign in securely. Tokens are cached in your operating system’s keychain so you don’t have to sign in every time. This is the default and recommended option.
External Browser (SSO)
Sign in through your organization’s Identity Provider (Okta, Azure AD, etc.). Requires that SSO is configured for your Snowflake account.
Password
Traditional username and password. If your account has MFA enabled, you’ll be prompted in your authenticator app on sign-in.
Note
Storing passwords in plain text is not recommended. Prefer OAuth or SSO when available.
Key Pair (JWT)
Authenticate with an RSA key pair. Common for service accounts and automated workflows. Configure this
by editing your connections.toml directly.
Programmatic Access Token (PAT)
Sign in using a Snowflake-issued token. Useful for headless or scripted use cases.
Connection file reference
Cortex Code Desktop reads connection settings from ~/.snowflake/connections.toml. You can
edit this file directly, set defaults like warehouse and role, and define multiple named connections.
Common fields
| Field | Description |
|---|---|
account | Account identifier (orgname-accountname). Required. |
user | Your Snowflake username. Required. |
authenticator | Sign-in method (for example, oauth_authorization_code, externalbrowser, snowflake). |
warehouse | Default warehouse for queries. |
role | Default role. |
database | Default database. |
schema | Default schema. |
client_store_temporary_credential | Cache OAuth/SSO tokens so you don’t re-sign-in each launch. |
Credential security
Cortex Code Desktop stores authentication tokens using your operating system’s built-in encryption:
- macOS: Keychain
- Windows: Data Protection API (DPAPI)
- Linux: System secret service (libsecret / GNOME Keyring)
This lets the app reconnect automatically on subsequent launches without asking you to sign in again.
Troubleshooting
Connection test failures
| Error | What it means | How to fix it |
|---|---|---|
| Account not found | The account identifier is incorrect. | Verify it at app.snowflake.com. |
| Authentication failed | Wrong password, expired token, or SSO mismatch. | Re-enter credentials or sign in again via browser. |
| Connection failed | Network or firewall issue. | Check your network connection and firewall settings. |
| File not found | A referenced file (private key, token file) is missing. | Verify the path in your connections.toml. |
Browser doesn’t open for OAuth/SSO
- Make sure you have a default browser configured.
- Use the fallback link displayed in the app to sign in manually.
Re-run onboarding
Open the command palette and run Reset Onboarding to see the setup flow again on the next launch.
Best practices
- Use OAuth or SSO for the most secure sign-in experience — no passwords stored on disk.
- Enable credential caching (
client_store_temporary_credential = true) so you don’t re-sign-in every launch. - Set a default warehouse during setup to avoid errors when running queries.
- Name connections descriptively (for example,
prod-analytics,dev-sandbox) so they’re easy to pick from the dropdown.