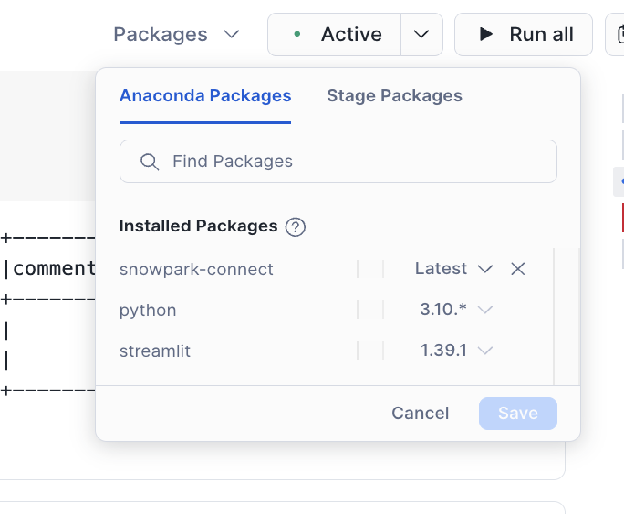
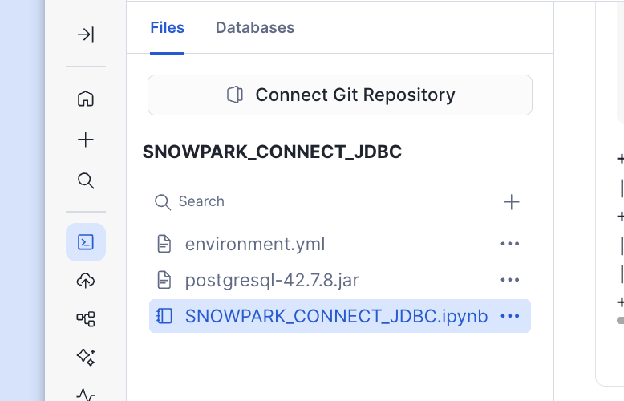
이 섹션에서는 Snowpark Connect JDBC 데이터 소스 기능을 사용하여 외부 데이터베이스에서 데이터를 읽고 외부 데이터베이스(예: MySQL 및 PostgreSQL)에 데이터를 쓰는 방법에 대한 가이드 및 샘플 코드를 제공합니다. 클라이언트 측 설정과 Snowflake Notebook 설정을 모두 다룹니다.
이 예제에서는 ``spark_session.read.jdbc()``를 사용하여 MySQL 데이터베이스에서 테이블을 읽는 방법을 보여줍니다.
frompyspark.sqlimportRow# Adjust the URL for your server host, port, and database nameMYSQL_JDBC_URL="jdbc:mysql://localhost/test_db"# Ensure this driver name matches your version of the JDBC driverMYSQL_JDBC_DRIVER="com.mysql.cj.jdbc.Driver"deftest_jdbc_read_from_mysql(self,spark_session):# This code snippet uses the Snowpark Connect Spark sessionjdbc_df=spark_session.read.jdbc(MYSQL_JDBC_URL,"my_schema.my_table",# Specify your table name in MySQLproperties={"user":"root",# Your MySQL user name"password":"****",# Your password for MySQL"driver":MYSQL_JDBC_DRIVER,},).collect()# After reading via JDBC, the data is loaded into a temporary table in Snowflake.# You can now perform any standard DataFrame operations supported by Snowpark Connect.
이 예제에서는 ``spark_session.write.jdbc()``를 사용하여 MySQL 데이터베이스에 데이터를 쓰는 방법을 보여줍니다.
frompyspark.sqlimportRow# Adjust the URL for your server host, port, and database nameMYSQL_JDBC_URL="jdbc:mysql://localhost/test_db"# Ensure this driver name matches your version of the JDBC driverMYSQL_JDBC_DRIVER="com.mysql.cj.jdbc.Driver"deftest_jdbc_write_overwrite_to_mysql(self,spark_session):# This code snippet uses the Snowpark Connect Spark sessionjdbc_df=spark_session.createDataFrame([Row(a=1,b=2.0,c="test1"),Row(a=2,b=3.0,c="test2"),Row(a=4,b=5.0,c="test3"),])jdbc_df.write.jdbc(MYSQL_JDBC_URL,"my_schema.my_table2",# Specify your table name in MySQLmode="overwrite",properties={"user":"root",# Your MySQL user name"password":"****",# Your password for MySQL"driver":MYSQL_JDBC_DRIVER,},)
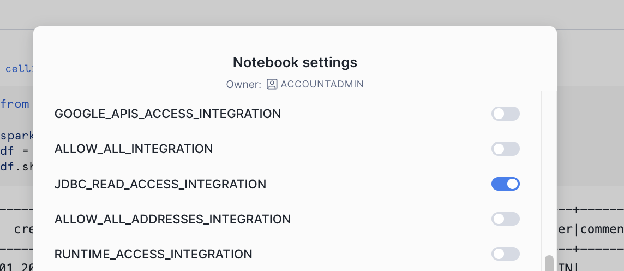
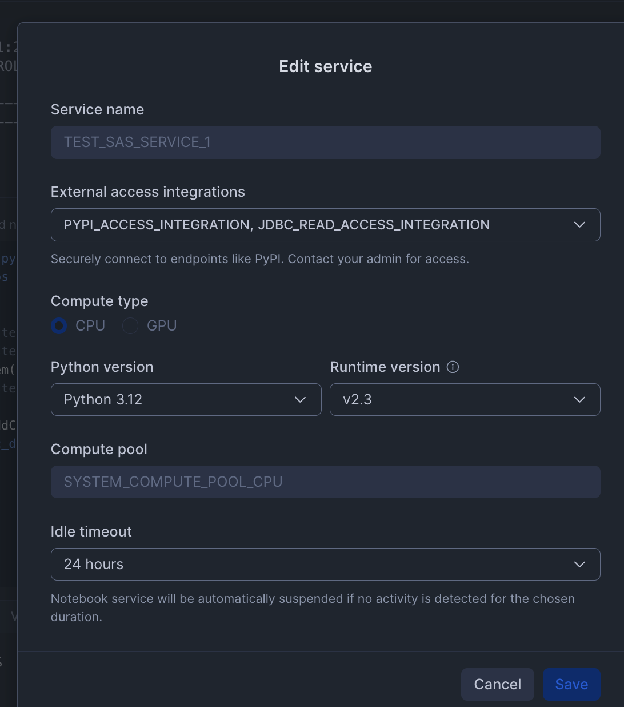
Snowflake에는 노트북이 외부 네트워크 위치와 통신할 수 있도록 **외부 액세스 통합**이 필요합니다. 외부 데이터베이스의 호스트 및 포트에 대한 **네트워크 규칙**을 정의해야 합니다.
-- 1. Create a Network Rule for the external database host and portCREATEORREPLACENETWORKRULEJDBC_READ_NETWORK_RULEMODE=EGRESSTYPE=HOST_PORTVALUE_LIST=('hh-pgsql-public.ebi.ac.uk:5432');-- REPLACE with your host:port-- 2. Create the External Access Integration using the new Network RuleCREATEORREPLACEEXTERNALACCESSINTEGRATIONJDBC_READ_ACCESS_INTEGRATIONALLOWED_NETWORK_RULES=(JDBC_READ_NETWORK_RULE)ENABLED=true;-- NOTE: This integration must be referenced/activated within your notebook's settings.
이 예제에서는 세션을 초기화하고, 드라이버를 로드하고, PostgreSQL에서 데이터를 읽는 데 필요한 Python 코드를 보여줍니다.
fromsnowflakeimportsnowpark_connectimportjpype# Initialize the Spark session for Snowpark Connectspark=snowpark_connect.server.init_spark_session()df=spark.sql("show schemas").limit(2)df.show()# Add the uploaded JDBC driver JAR to the Java Classpath using jpype# Adjust the path to match the name of the JAR file you uploadedjpype.addClassPath('/tmp/appRoot/postgresql-42.7.8.jar')# Using public PostgreSQL DB as an example: https://rnacentral.org/help/public-databasejdbc_df=spark.read.jdbc(# Adjust this URL as per your server host, port, and database"jdbc:postgresql://hh-pgsql-public.ebi.ac.uk:5432/pfmegrnargs","",# Empty string for table name when providing a custom queryproperties={"user":"reader",# Your PostgreSQL user name"password":"***",# Your password for PostgreSQL"driver":"org.postgresql.Driver",# Use the "query" property for a custom SQL statement"query":"""SELECT upi, -- RNAcentral URS identifier taxid, -- NCBI taxid ac -- external accessionFROM xrefWHERE ac IN ('OTTHUMT00000106564.1', 'OTTHUMT00000416802.1')"""},)jdbc_df.show()
이 예제에서는 세션을 초기화하고, 드라이버를 로드하고, PostgreSQL에 데이터를 쓰는 데 필요한 Python 코드를 보여줍니다.
fromsnowflakeimportsnowpark_connectfrompyspark.sqlimportRowimportjpype# Initialize the Spark session for Snowpark Connectspark=snowpark_connect.server.init_spark_session()df=spark.sql("show schemas").limit(2)df.show()# Add the uploaded JDBC driver JAR to the Java Classpath using jpype# Adjust the path to match the name of the JAR file you uploadedjpype.addClassPath('/tmp/appRoot/postgresql-42.7.8.jar')# Create dataframejdbc_df=spark.createDataFrame([Row(a=1,b=2.0,c="test1"),Row(a=2,b=3.0,c="test2"),Row(a=4,b=5.0,c="test3"),])# Using public PostgreSQL DB as an example: https://rnacentral.org/help/public-databasejdbc_df.write.jdbc(# Adjust this URL as per your server host, port, and database"jdbc:postgresql://hh-pgsql-public.ebi.ac.uk:5432/pfmegrnargs","public.my_table2",# Specify your table name in PostgreSQLmode="overwrite",properties={"user":"writer",# Your PostgreSQL user name"password":"***",# Your password for PostgreSQL"driver":"org.postgresql.Driver",},)
-- 1. Create a Network Rule for the external database host and portCREATEORREPLACENETWORKRULEJDBC_READ_NETWORK_RULEMODE=EGRESSTYPE=HOST_PORTVALUE_LIST=('hh-pgsql-public.ebi.ac.uk:5432');-- REPLACE with your host:port-- 2. Create the External Access Integration using the new Network RuleCREATEORREPLACEEXTERNALACCESSINTEGRATIONJDBC_READ_ACCESS_INTEGRATIONALLOWED_NETWORK_RULES=(JDBC_READ_NETWORK_RULE)ENABLED=true;-- NOTE: This integration must be referenced/activated within your notebook's settings.
외부 통합 활성화(네트워크 규칙 및 통합):
Snowflake에는 노트북이 외부 네트워크 위치와 통신할 수 있도록 **외부 액세스 통합**이 필요합니다. 외부 데이터베이스의 호스트 및 포트에 대한 **네트워크 규칙**을 정의해야 합니다.
이 예제에서는 세션을 초기화하고, 드라이버를 로드하고, PostgreSQL에서 데이터를 읽는 데 필요한 Python 코드를 보여줍니다.
fromsnowflakeimportsnowpark_connectimportjpypeimportos# Initialize the Spark session for Snowpark Connectspark=snowpark_connect.server.init_spark_session()df=spark.sql("show schemas").limit(2)df.show()# Add the uploaded JDBC driver JAR to the Java Classpath using jpype# Adjust the path to match the name of the JAR file you uploaded# Copy the driver to /tmp directoryos.system("cp ./postgresql-42.7.8.jar /tmp/postgresql-42.7.8.jar")jpype.addClassPath('/tmp/postgresql-42.7.8.jar')# Using public PostgreSQL DB as an example: https://rnacentral.org/help/public-databasejdbc_df=spark.read.jdbc(# Adjust this URL as per your server host, port, and database"jdbc:postgresql://hh-pgsql-public.ebi.ac.uk:5432/pfmegrnargs","",# Empty string for table name when providing a custom queryproperties={"user":"reader",# Your PostgreSQL user name"password":"***",# Your password for PostgreSQL"driver":"org.postgresql.Driver",# Use the "query" property for a custom SQL statement"query":"""SELECT upi, -- RNAcentral URS identifier taxid, -- NCBI taxid ac -- external accessionFROM xrefWHERE ac IN ('OTTHUMT00000106564.1', 'OTTHUMT00000416802.1')"""},)jdbc_df.show()
이 예제에서는 세션을 초기화하고, 드라이버를 로드하고, PostgreSQL에 데이터를 쓰는 데 필요한 Python 코드를 보여줍니다.
fromsnowflakeimportsnowpark_connectfrompyspark.sqlimportRowimportjpypeimportos# Initialize the Spark session for Snowpark Connectspark=snowpark_connect.server.init_spark_session()df=spark.sql("show schemas").limit(2)df.show()# Add the uploaded JDBC driver JAR to the Java Classpath using jpype# Adjust the path to match the name of the JAR file you uploaded# Copy the driver to /tmp directoryos.system("cp ./postgresql-42.7.8.jar /tmp/postgresql-42.7.8.jar")jpype.addClassPath('/tmp/postgresql-42.7.8.jar')# Create dataframejdbc_df=spark.createDataFrame([Row(a=1,b=2.0,c="test1"),Row(a=2,b=3.0,c="test2"),Row(a=4,b=5.0,c="test3"),])# Using public PostgreSQL DB as an example: https://rnacentral.org/help/public-databasejdbc_df.write.jdbc(# Adjust this URL as per your server host, port, and database"jdbc:postgresql://hh-pgsql-public.ebi.ac.uk:5432/pfmegrnargs","public.my_table2",# Specify your table name in PostgreSQLmode="overwrite",properties={"user":"writer",# Your PostgreSQL user name"password":"***",# Your password for PostgreSQL"driver":"org.postgresql.Driver",},)