Setting up an IDE for using Snowpark Checkpoints
The Snowflake Extension for Visual Studio Code offers support for the Snowpark Checkpoints library to enhance the experience of using the framework. It gives you fine-grained control over the collect and validate statements inserted into your code and also reviews the status of the behavioral-equivalence assertions of your converted code.
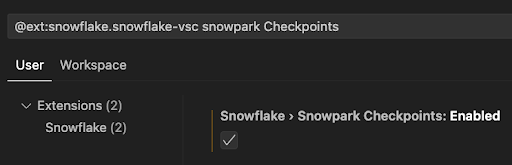
Enable Snowpark Checkpoints
- To enable Snowpark Checkpoints, in the Snowflake extension settings, select Snowpark Checkpoints: Enabled:
View
Setting the Snowpark Checkpoints property to Enabled opens a new tab in the extension called SNOWPARK CHECKPOINTS that displays all checkpoints in the workspace and enables multiple actions to be performed, such as enabling/disabling all or individual checkpoints or clearing all checkpoints from files. Double-clicking each checkpoint navigates to the file and line of code where it is defined.
Toggle all checkpoints
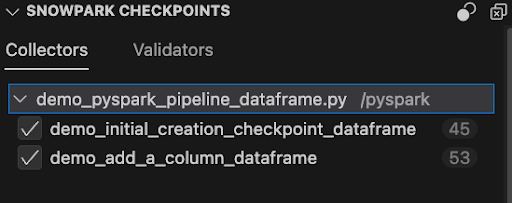
- To enable or disable all checkpoints, select this control in the upper-right corner of the Snowpark Checkpoints tab:
Enabled checkpoints:
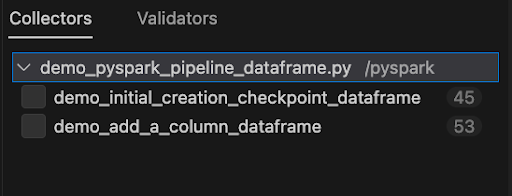
Disabled checkpoints are skipped at runtime:
Remove all checkpoints
- To remove checkpoints from all Python files, including Jupyter notebooks, in your workspace, select this control in the upper-right corner of the Snowpark Checkpoints tab:
The control does not remove the checkpoints from the contract and panel. They can be restored by using the command Snowflake: Restore All Checkpoints.
Insert a checkpoint in a file
- To insert a checkpoint in a file, right-click inside a file, and on the Snowpark Checkpoints menu, select Add Collection Checkpoint or Add Validation Checkpoint.
Snowpark Checkpoints menu and options:

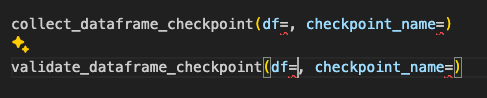
Collector/Validator added:
Run a single checkpoint
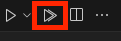
- To run a single checkpoint, select the code lens option displayed above the checkpoint:

Running the checkpoint will open an output console that displays the progress and then the results view. Even if the checkpoint is disabled in the contract file, it will be enabled for its execution.
If an entry point is not declared in the contract file, the following error message is displayed: Entry point not found for the checkpoint.

Run all enabled Snowpark Checkpoints in a file
- To run all the enabled Checkpoints in a file, in the upper-right corner of the file, select Run all checkpoints from the current file:
An output channel displays the progress:

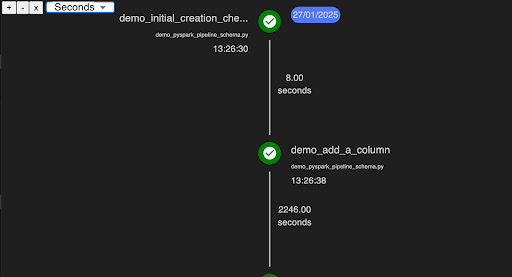
Timeline view
Displays a timeline of the checkpoints execution results.
Commands
The following commands are available for Snowpark Checkpoints. To use them, enter Snowflake: [command name] into the command palette.
| Command | Description |
|---|---|
| Snowflake: Toggle Checkpoints | Toggles the enabled property of all checkpoints. |
| Snowflake: Snowpark Checkpoints Project Initialization | Triggers project initialization, creating a contract file if it doesn’t exist. If the file exists, a display asks whether you want to load the checkpoint into the contract file. |
| Snowflake: Clear All Checkpoints | Deletes all checkpoints from all files in the workspace. |
| Snowflake: Restore All Checkpoints | Restore checkpoints previously deleted from files that are still present in the contract file. |
| Snowflake: Add Validation/Collection Checkpoint | Adds a validator or collector with its mandatory parameters at the cursor position. |
| Snowflake: Focus on Snowpark Checkpoints View | Shifts focus to the panel SNOWPARK CHECKPOINTS. |
| Snowflake: Open Checkpoints Timeline | Displays a timeline of Checkpoints executions. |
| Snowflake: Run all Checkpoints from the current file | Runs all enabled checkpoints in the current file. |
| Snowflake: Run all Checkpoints in the workspace | Runs all enabled checkpoints from the workspace. |
| Snowflake: Show All Snowpark Checkpoints Result | Displays a tab with all checkpoints results. |
Warnings
-
Duplicate: In a collection project, if two checkpoints have the same name, this warning is displayed: “Another checkpoint with an identical name has been detected and will be overwritten.”
Validation projects can have multiple checkpoints with the same name, so no warning is displayed.
-
Wrong type: If you add a checkpoint with a different type than the project type, it is underlined, and this error message is displayed: “Please make sure you are using the correct Snowpark-Checkpoints statement. This particular checkpoint statement is different from the others used in this project, statements that don’t match the project type will be ignored when executed.”
-
Invalid checkpoint name: There are invalid ways to add a checkpoint name parameter. If this happens, a warning is displayed: “Invalid checkpoint name. Checkpoint names must start with a letter and can only contain letters, numbers, hyphens, and underscores”.