Manage Snowpipe in Snowsight
You can use Snowsight to view Snowpipe details and perform some pipe management tasks.
- Visualize the stages, pipes, and tables in a graph and understand the relationships and data lineage between these objects.
- View the complete information for any of your pipes about what was loaded (or partially loaded).
- Check if any of your pipes are failing, stalled, or stopped loading new data from files.
- Perform some pipe management tasks, such as pausing or resuming a pipe, dropping a pipe, transferring ownership of a pipe, and adding comments to a pipe.
- View the detailed status and copy history.
Requirements
To view details about the pipe, you must use a role with the MONITOR or OWNERSHIP privilege on the pipe and the USAGE privilege on both the database and schema that contain the pipe. For more information, see Pipe privileges.
Pipe details
To view pipe details in Snowsight, take the following steps:
-
Sign in to Snowsight.
-
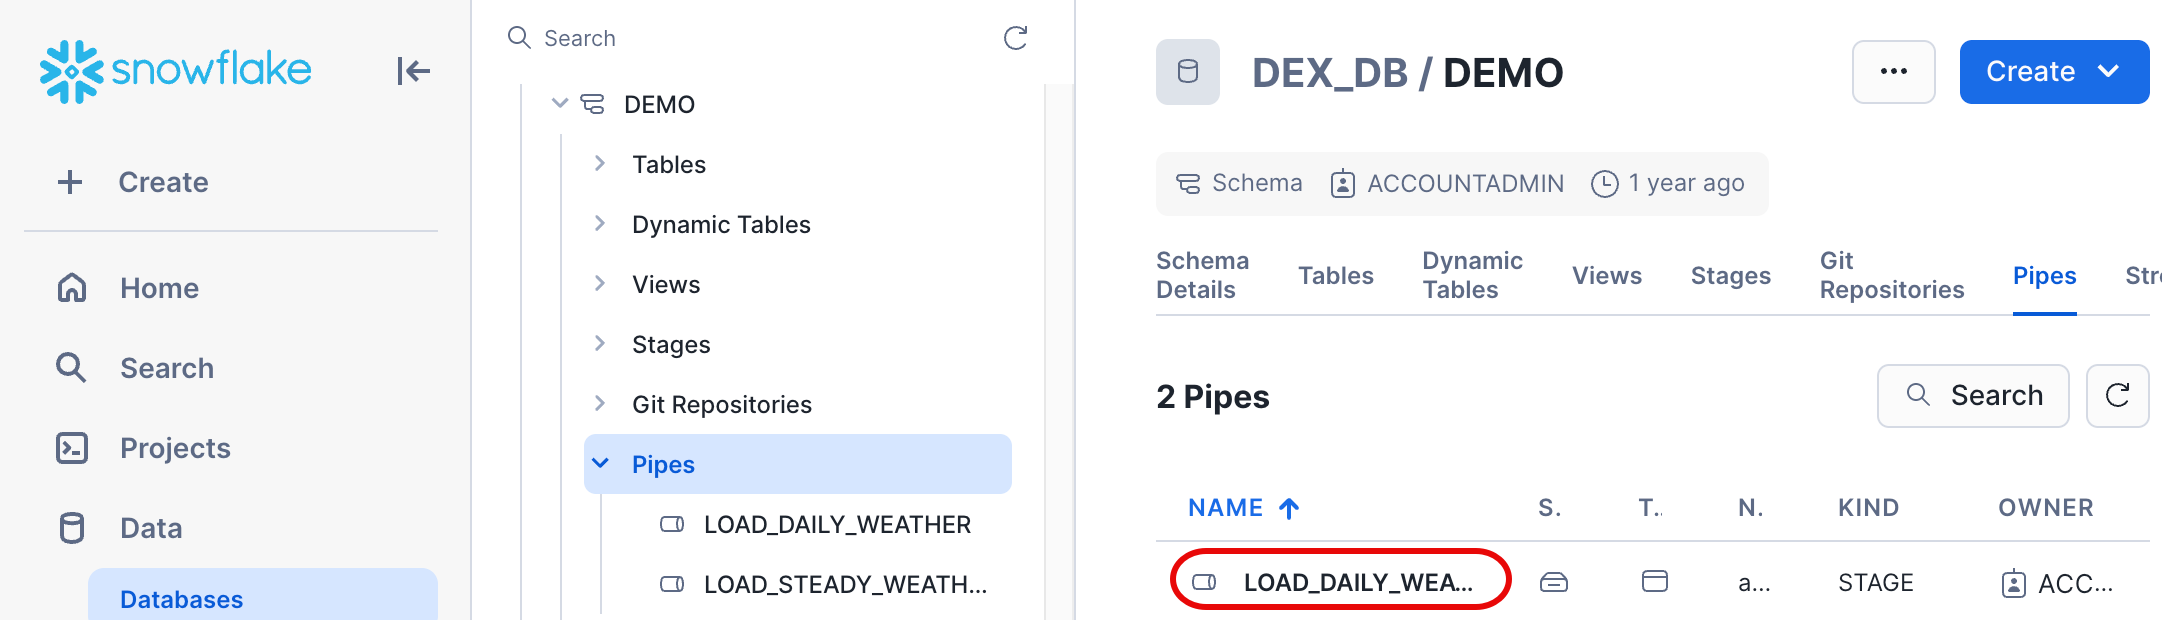
In the navigation menu, select Catalog » Database Explorer.
-
Locate the database and schema that contain the pipe.
-
Select the pipe to open the details.
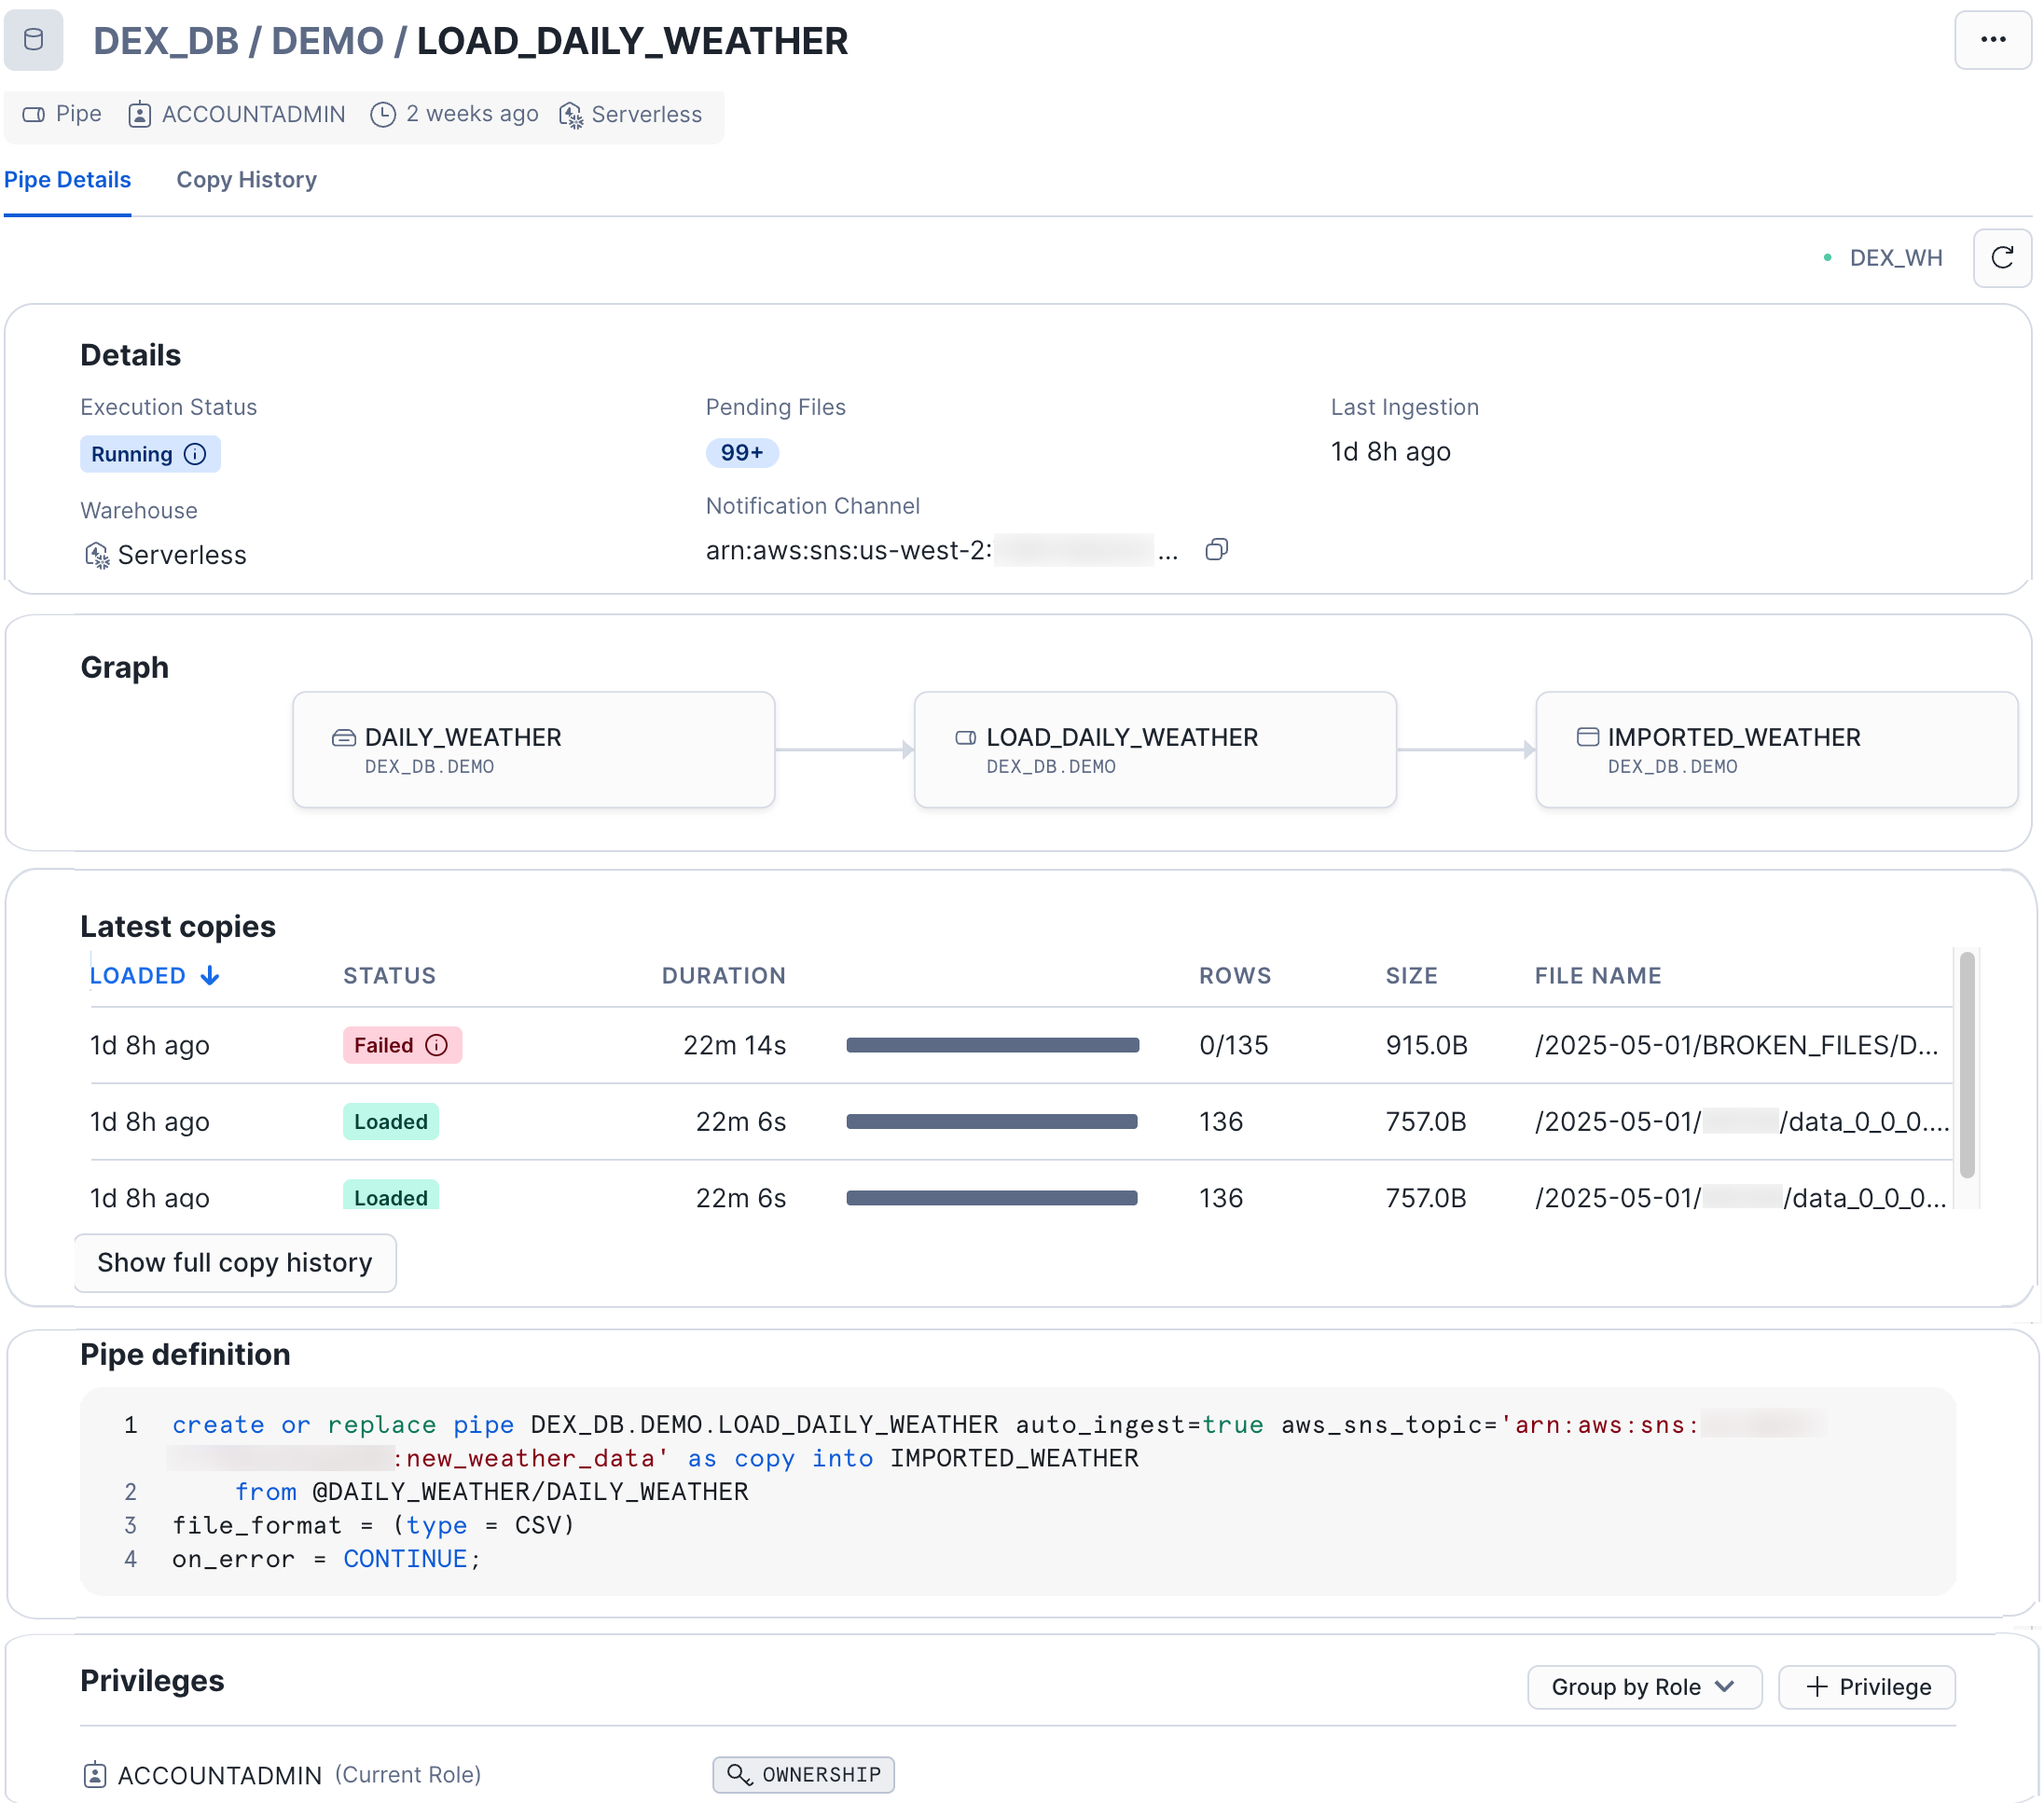
The Pipe Details page includes information about the following:
- Status. Examples: Running; Paused.
- The number of files pending in the pipe, if any.
- The date of last ingestion performed, if applicable.
- The warehouse. (Snowpipe always runs using Serverless compute resources.)
- The incoming Notification channel to tell the Pipe when there are new files.
- Relationships between the stages, pipes, and tables in a graph.
- The latest copies performed.
- The SQL command used to create the pipe (Pipe Definition).
- The Privileges granted on the pipe.
Manage pipes
You can perform the following tasks from the Pipe Details page:
- To add a comment to the pipe, select
 » Edit. To edit other properties of a pipe, you must use the
CREATE PIPE SQL command to replace the pipe.
» Edit. To edit other properties of a pipe, you must use the
CREATE PIPE SQL command to replace the pipe. - To pause or resume the pipe, select » Pause or Resume.
- To drop the pipe, select » Drop.
- To transfer ownership of the pipe to another role, select » Transfer Ownership.
For more information about managing pipes, see Managing Snowpipe.
Copy history
To view the copy history for any of your pipes, go to the Pipe Details page, and select the Copy History tab.
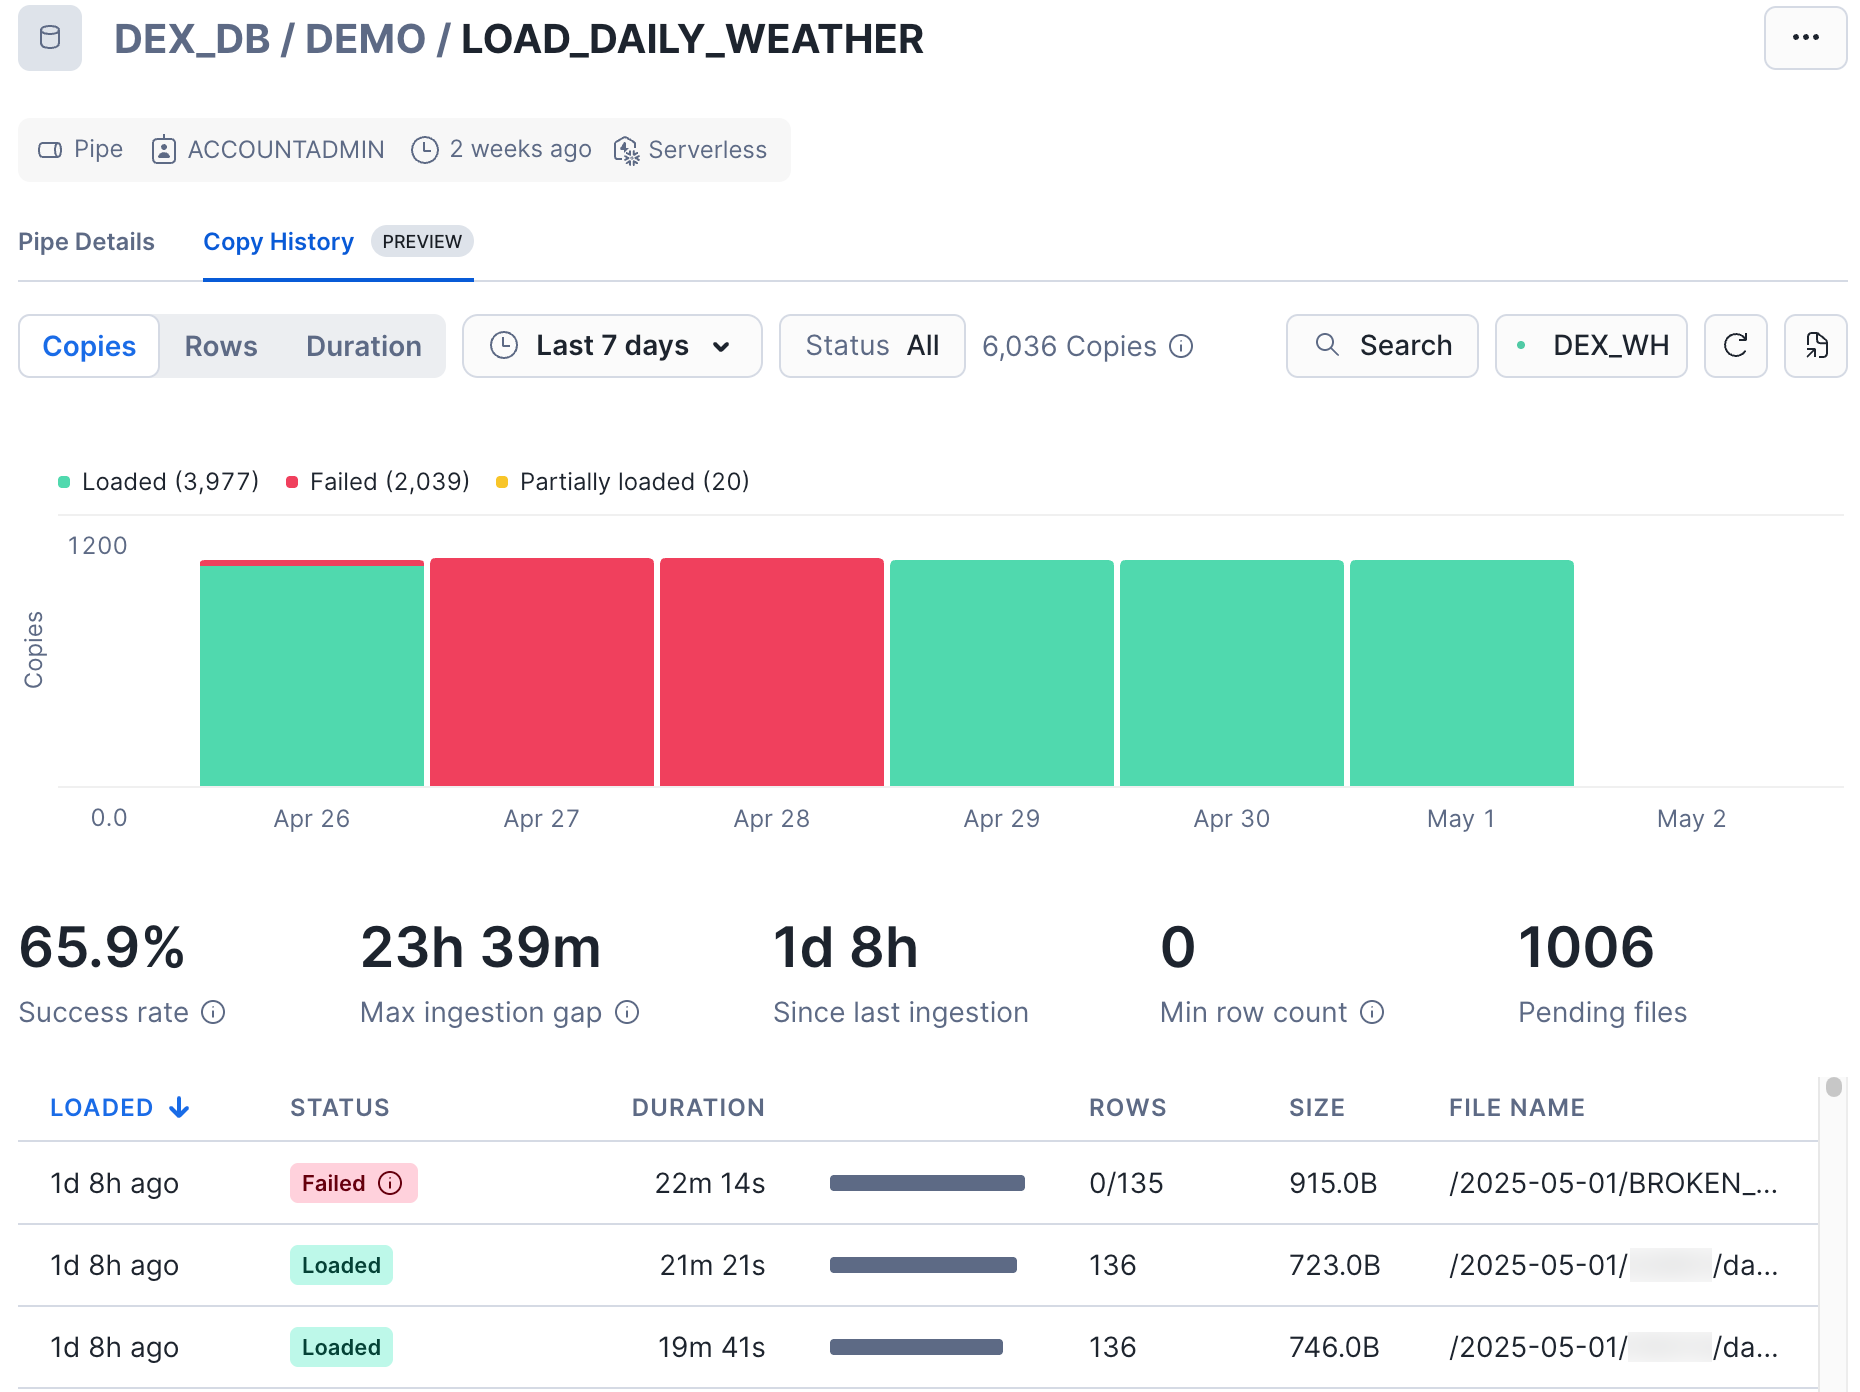
The Copy History tab shows details including STATUS, DURATION, ROWS, SIZE, and FILE NAME.
The histogram displays up to 14 days of loading history and allows you to select from the following dimensions:
- Copies (default): the number of files loaded. Displays file counts grouped by status on a daily or hourly basis, helping to identify failed loads and monitor ingestion trends over time.
- Rows: the number of rows inserted. Aggregates row counts by day or hour, providing insights into data throughput trends.
- Duration: pipe ingestion duration. Shows the time taken for pipe ingestion (aggregated by day or hour), which represents the serverless compute time of your pipe and serves as a proxy for compute cost.
The pipe metrics section helps analyze health and throughput of your pipe with the following key metrics:
- Success rate: Percentage of files successfully loaded within the selected time range.
- Max ingestion gap: Highlights large gaps between ingestion cycles, making it easier to identify interruptions in continuous ingestion.
- Time since last ingestion: indicates the time elapsed since the most recent file was loaded.
- Min row count: identifies files with fewer rows than expected or empty files.
- Pending files: shows the number of detected files yet to be loaded into the table.
You can also choose to manually load files that haven’t been loaded by selecting the Manual Refresh option on the ellipsis drop-down menu on the top right corner of the page.
To search for individual files, use the search bar on the top right corner of the page. You can search by file name, status, or date.