Clone databases that contain hybrid tables
You can clone databases that contain hybrid tables for two main purposes:
- To run point-in-time restore operations. Cloning works in combination with Time Travel, which by default creates implicit continuous backups. After setting a data retention period, you can clone a database at any point in its Time Travel history to restore the database to a healthy state (in the event that a corruption was introduced). You do not need to create a clone except when a restore is necessary.
- To hydrate other environments from a source environment, such as cloning a database from production to development or test.
Before you attempt to create any cloned databases that contain hybrid tables, be sure to read and understand the specific requirements and limitations in the following sections.
Cloning hybrid tables at the database level
Hybrid table clones must be created at the database level. For example:
You cannot clone hybrid tables at the schema level or the table level. If you try to create a new hybrid table by cloning a hybrid table or a standard table, the command fails with an error. For example:
If you try to create a schema by cloning another schema, and the source schema has one or more hybrid tables, the command fails. However, you can clone the schema by using the IGNORE HYBRID TABLES parameter to explicitly skip the hybrid tables in the schema. This parameter also works for creating database clones. For example:
Usage notes for cloning hybrid tables
- You cannot create clones that include hybrid tables by using the AT BEFORE, OFFSET, or STATEMENT (query UUID) parameters. You must specify either no parameters at all or AT TIMESTAMP with an explicitly cast TIMESTAMP value.
- Consistent with the behavior for standard tables, the history of a source table that is cloned is not retained by the clone itself. Cloned tables lose all the prior history of their source tables, which means that you cannot use Time Travel to see any past state after they have been cloned. Time Travel can be used to see the new history of tables that accrues after the cloning operation.
- Cloning hybrid tables is a size-of-data operation, while cloning standard tables is a metadata-only operation. This difference has an impact on compute cost, storage cost, and performance.
- The database clone operation itself incurs compute cost when the database contains hybrid tables.
- When hybrid tables are cloned, the data is physically copied into the row store; therefore, the cloning operation can take a long time for large tables, and the cost scales linearly with the size of the data.
- Cloning performance is similar to that of optimized direct bulk loading with CREATE TABLE AS SELECT. See Loading data.
The examples that follow highlight the main requirements for creating clones of databases that contain hybrid tables. For complete syntax information and usage notes, see AT | BEFORE and CREATE <object> … CLONE.
Example: CREATE DATABASE … CLONE
You can clone a database that contains hybrid tables by using a CREATE DATABASE … CLONE command. The command specifies the name of the existing source database and the name of a new destination database. The cloned database is created as of the AT TIMESTAMP value you specify, or as of now if you don’t specify a timestamp. The new database is a copy of the schemas and tables that existed in the source at that point in time (regardless of standard or hybrid table type).
The following example demonstrates the expected behavior when you clone a database that contains one or more hybrid tables. The first command shows the two tables that exist in the testdata schema of the testdb database. The ht1 table is a hybrid table, and the st1 table is a standard table.
The following command clones this database, as of 16:01 on November 14, shortly after the tables were created:
To see the cloned tables, use the testdata schema in the clone_testdb database:
Use a SHOW TABLES command to check that the tables were successfully cloned:
Example: Create a clone that restores a dropped hybrid table
Using the same testdb database as the previous example, assume that a user creates and loads another hybrid table named ht2.
However, a few minutes later, another user drops the ht2 table by mistake.
You can restore the database to its “healthy” state, when it contained three tables, by creating a clone of testdb (named
restore_testdb in this case) with an appropriate timestamp. The timestamp specified here is very close to the point in time when the
table was created (and before it was dropped). In practice, you would have to choose the timestamp carefully, based on when data was
loaded into the table or other updates were applied. The main goal in this example is to capture the state of the table just before it was
dropped.
Now you can check the contents of the new clone and verify that table ht2 is there:
Example: Restore a database to a point in time before an incorrect DML operation
A database named ht_sensors has a schema ht_schema that contains a table named sensor_data_device2.
Assume that a series of DELETE operations were run on this table on November 25th. In Snowsight, in the navigation menu, select Monitoring » Query History
to see information about these DELETE operations. (In this example, the SQL Text filter is set to DELETE to isolate them.)
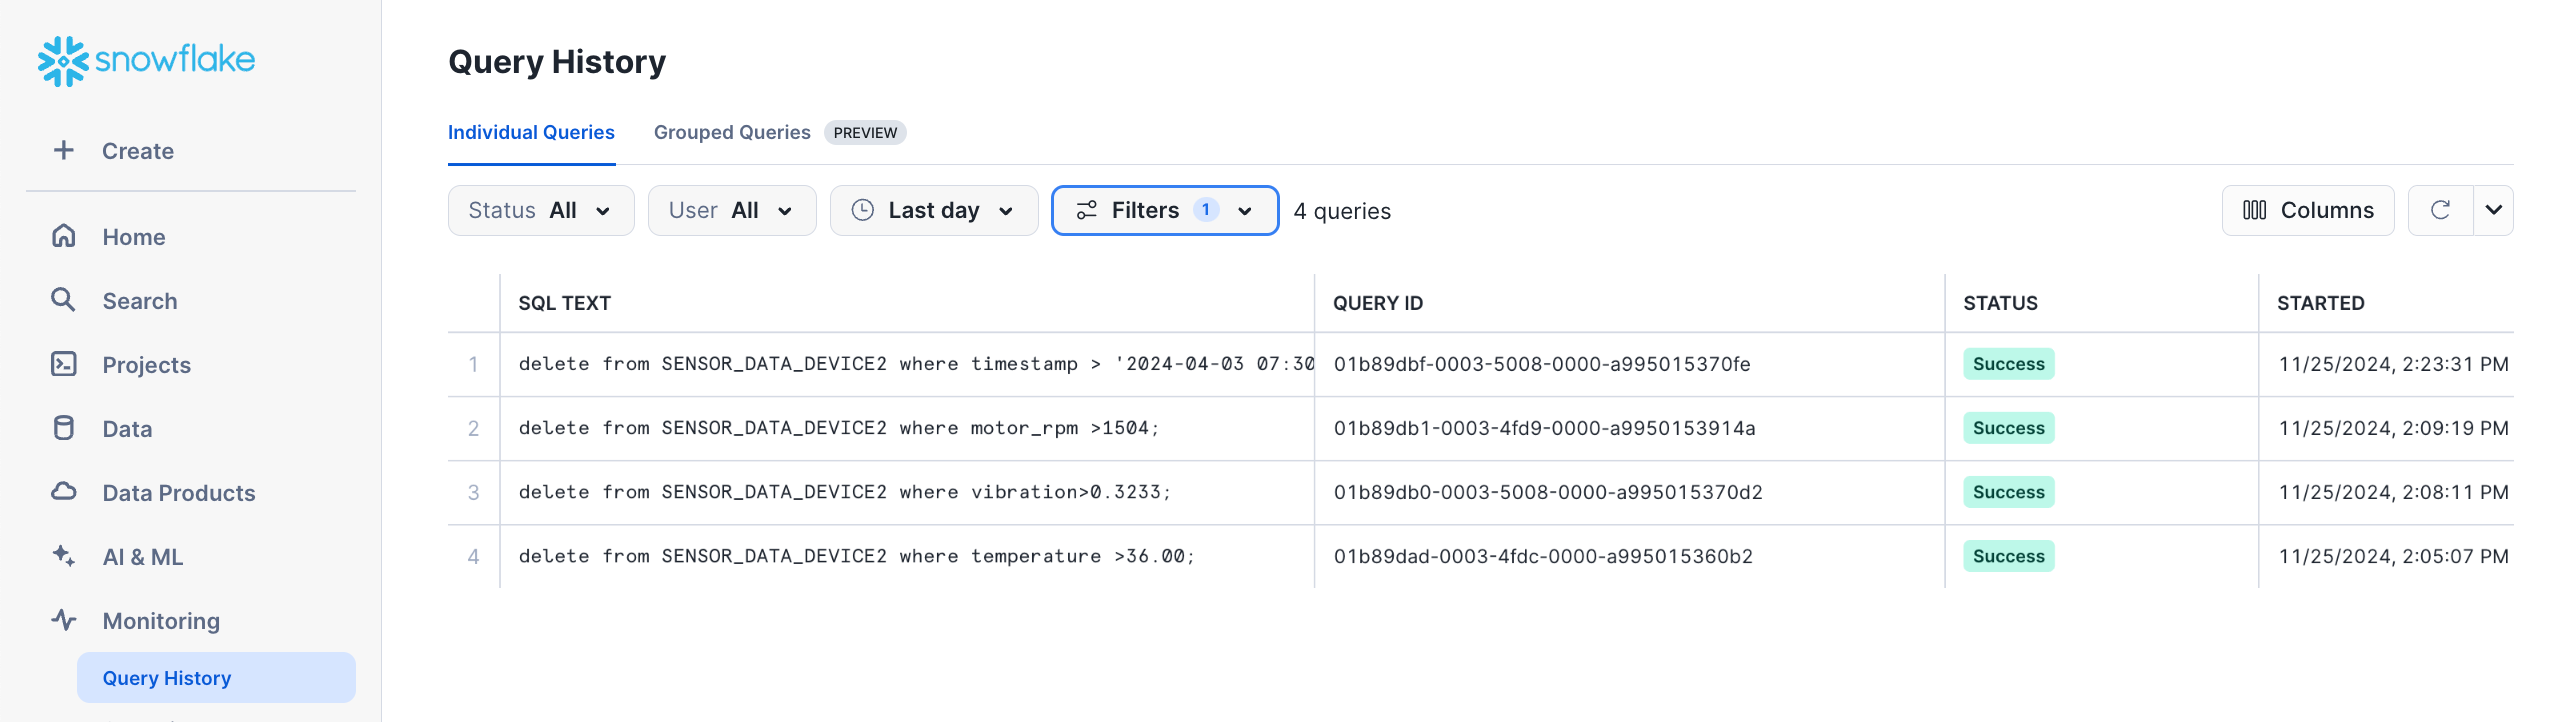
If the second DELETE operation in the list was run by mistake (rows with motor_rpm values greater than 1504 were deleted),
you can clone the database to restore it to its
state directly before that operation was committed. (For the sake of simplicity in this example, let’s assume that
no other changes, such as updates or inserts, were applied to that table or any other table in the database
during this time frame.)
Before cloning the database, you can check Time Travel results with a simple query. In this way, you can verify that the clone captures the expected data before running the more costly restore operation.
For example, compare the results of the following two Time Travel queries, which are one minute apart:
The results confirm the expected difference. Now you can clone the database, using the same timestamp as the first query:
Now check the state of the cloned database. Keep in mind that the cloned version of table sensor_data_device2 does not have any Time Travel data.
The following Time Travel query against the new table fails as expected:
Finally, note that the most recent DELETE operation in the query history might need to be reapplied because the cloned table retained
the rows where the timestamp column was greater than 2024-04-03 07:30:00.000.