Snowpark Migration Accelerator: 파이프라인 랩 - 평가
As with SnowConvert, we will run code through the SMA, evaluate the result, resolve any issues, and run it on the new platform. However, unlike SnowConvert, the SMA does NOT connect to any source platform, nor does it connect to Snowflake. It is a local application that can be run completely offline. But its power is in its assessment. Most of the heavy lifting on conversion has been done by building compatibility between the Spark API and the Snowpark API.
추출 및 코드 가용성
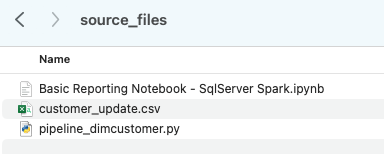
AdventureWorks 랩에 사용할 파일은 다음과 같습니다.
end_to_end_lab_source_code.zip
For the purpose of this lab, we will assume that the notebook and script file that we are converting are already accessible as files. In general, the SMA takes in files as an input and does not connect to any source platform. If the files are being orchestrated by a specific tool, you may need to export them. If you are using notebooks as part of databricks or EMR, you can export those as .ipynb files just as the jupyter notebook we are going to run through the SMA today.
This lab only has a few files, but it’s common in a large migration to have hundreds or thousands of files. Extract what you can and run those files through the SMA. The good thing about using a tool like this is that it can tell you what you might be missing.
Note that there is also a data file as well: ‘customer_update.csv’. This is a sample of the file being generated locally by the Point of Sale (POS) system that Adventure Works is currently using. While that system is also being updated, this Proof of Concept (POC) is focused on making the existing pipeline work with Snowpark instead of Spark.
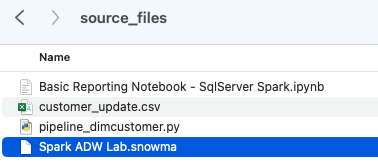
Let’s take each of these files, and drop them into a single directory on our local machine:
It would be recommended to create a project directory. This can be called whatever you like, but as a suggestion for this lab, let’s go with spark_adw_lab. This means we would create a folder with the name spark_adw_lab, then create another folder in that directory called source_files (the path being something like /your/accessible/directory/spark_adw_lab/source_files). This isn’t required, but will help keep things organized. The SMA will scan any set of subdirectories as well, so you could add specific pipelines in a folder and notebooks in another.
Access
이제 액세스 가능한 디렉터리에 소스 파일이 있으므로 SMA를 실행할 차례입니다.
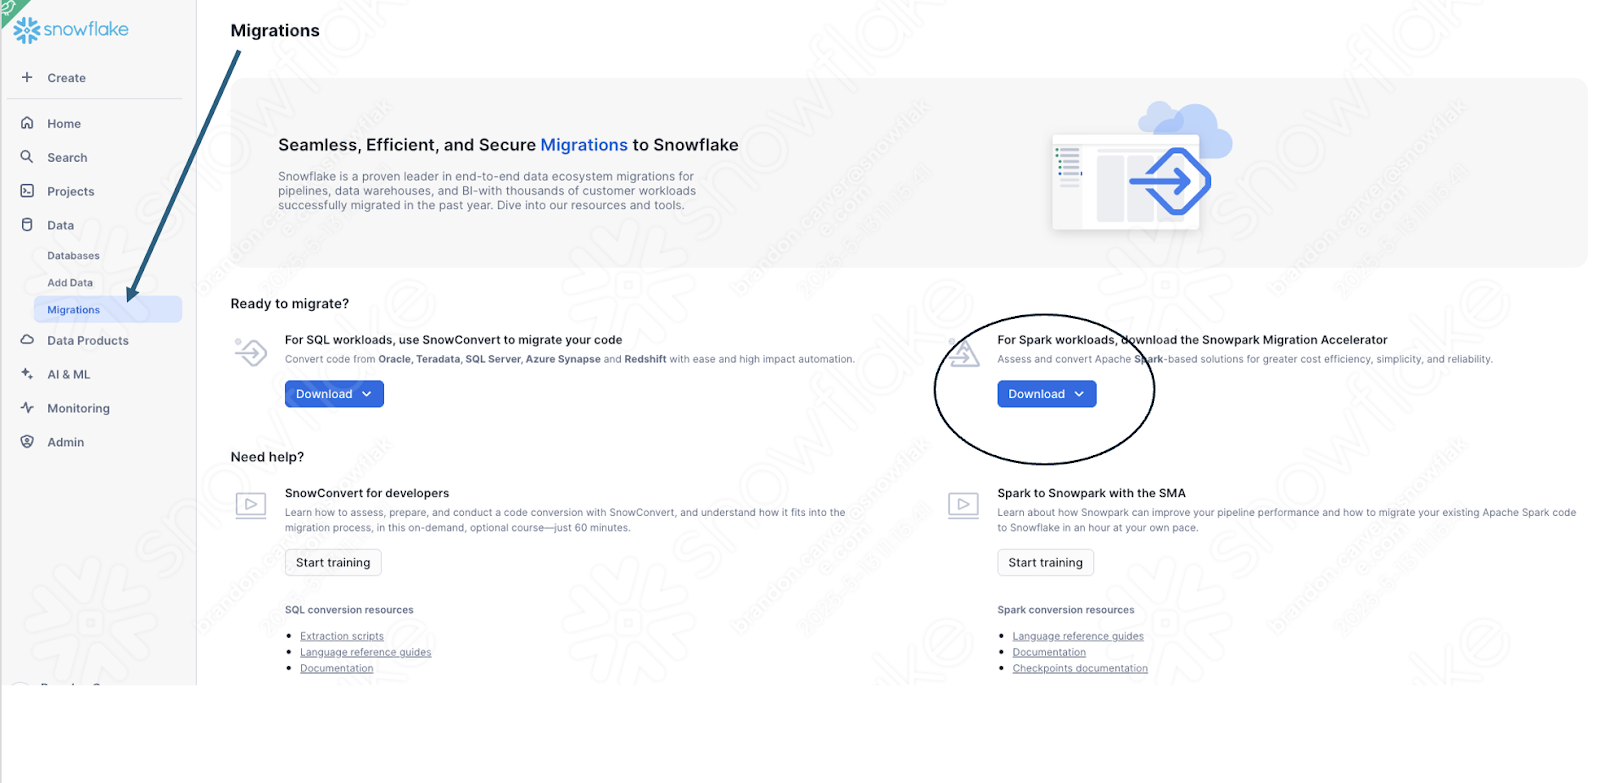
If you have not already downloaded it, the SMA is accessible from the Snowflake website. It is also accessible from the Migrations page in SnowSight in your Snowflake account:
Once you download the tool, install it! There is more information on installing the SMA in the SMA documentation.
Snowpark Migration Accelerator 사용
Once you have installed the tool, open it! When you launch the SMA, it will look very similar to its partner tool, SnowConvert. Both of these tools are built on a similar concept where you input code files into the tool and it runs. As a reminder, we have seen that SnowConvert can take the DDL and data directly from the source and input it directly into Snowflake. The SMA does not do this. It only takes in code files as a source and outputs those files to something that is compatible with Snowflake. This is primarily because the tool does not know how a user will orchestrate their spark code, but also to make it more secure to use.
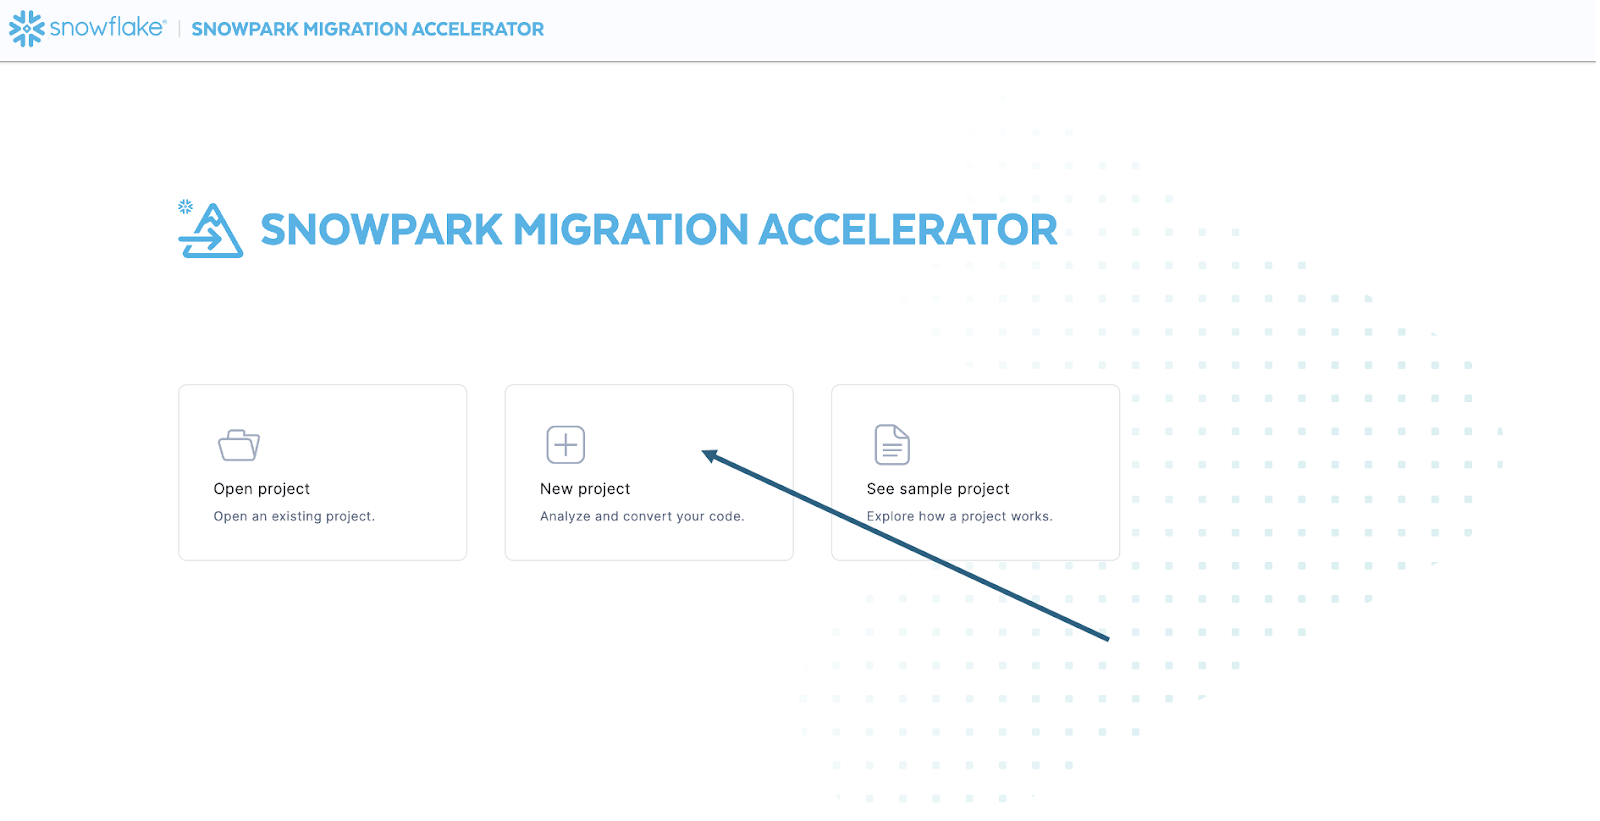
SMA를 실행하면 새 프로젝트를 만들지, 아니면 기존 프로젝트를 열지 묻는 메시지가 표시됩니다.
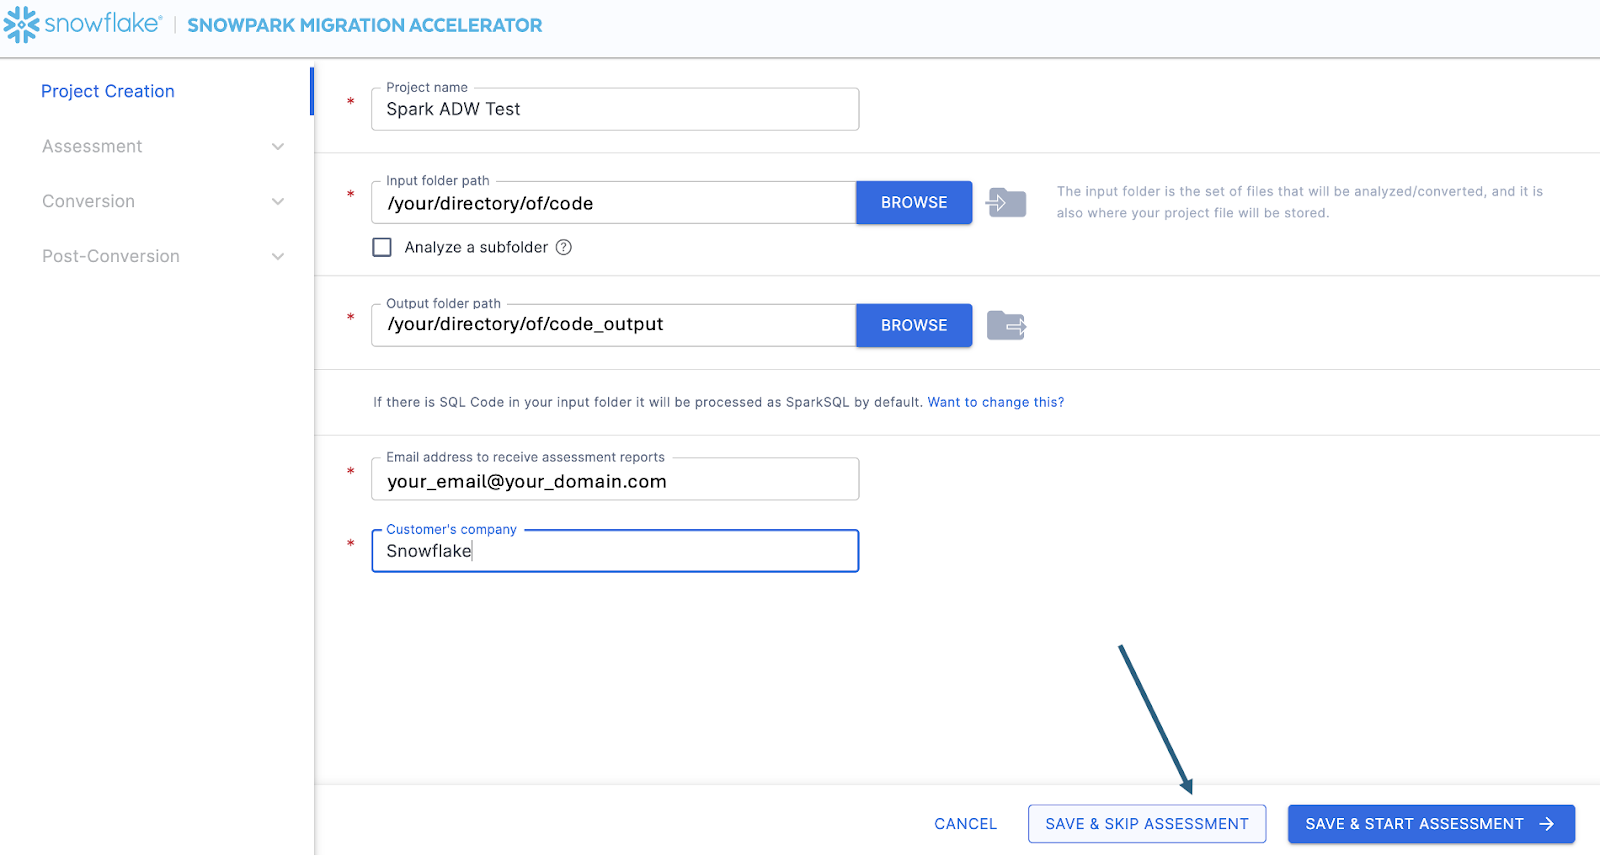
프로젝트 생성 화면으로 이동합니다.
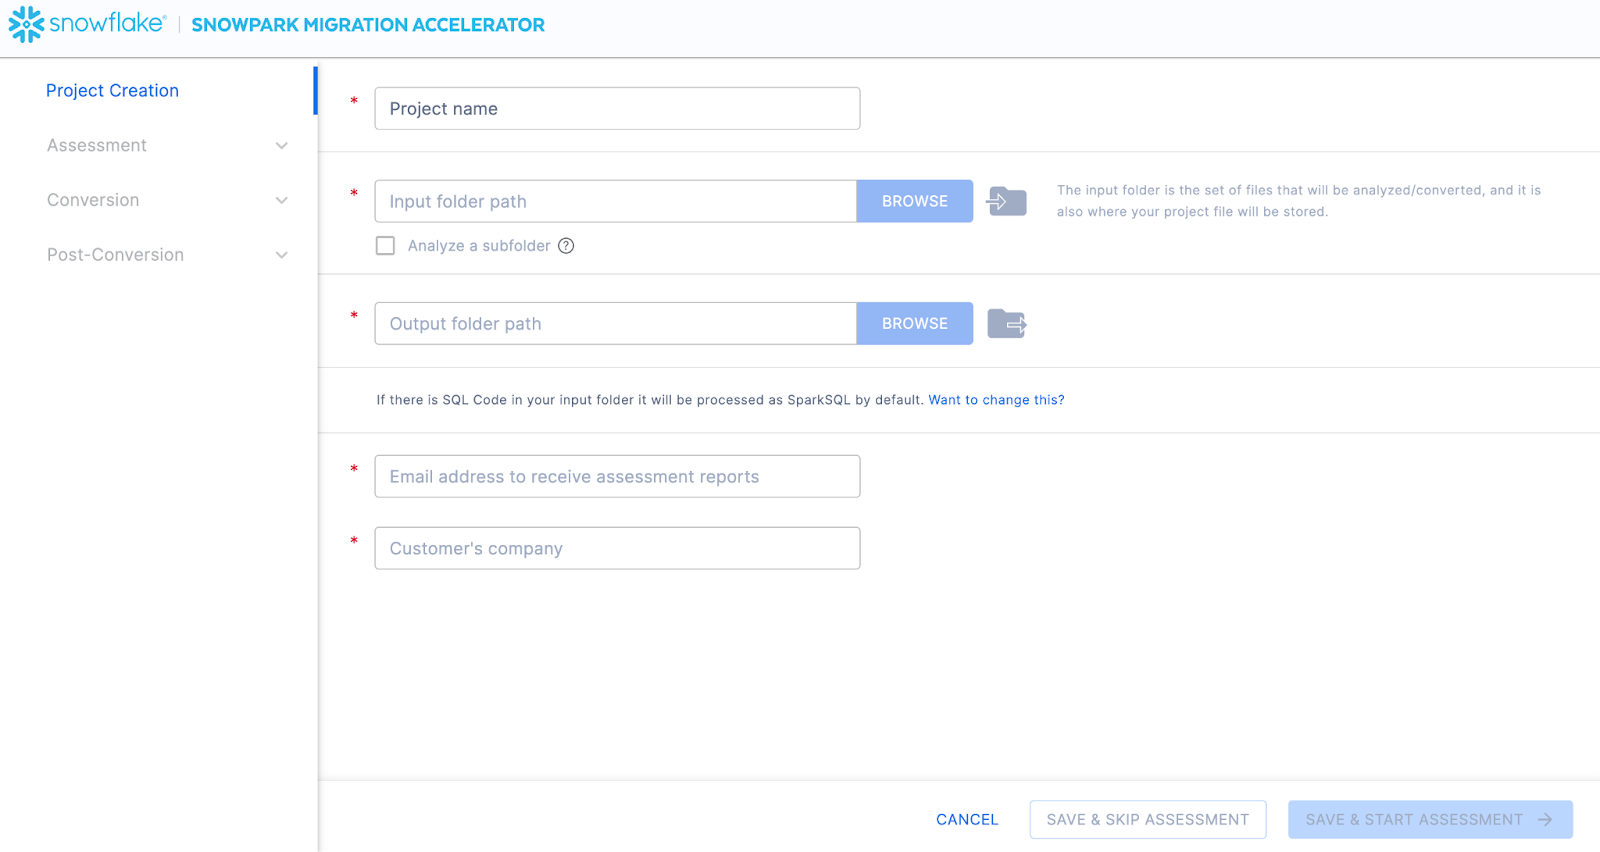
이 화면에서 프로젝트와 관련된 세부 정보를 입력합니다. 모든 필드는 필수 항목입니다. 이 프로젝트의 경우 다음과 유사한 항목을 입력할 수 있습니다.
프로젝트 이름: Spark ADW Lab
Email Address: your.name@your_domain.com
Company name: Your Organization
Input Folder Path: /your/accessible/directory/spark_adw_lab/source_files
Output Folder Path (the SMA will auto generate a directory for the output, but you can modify this): /your/accessible/directory/spark_adw_lab/source_files_output
이 프로젝트 생성 화면에 대한 몇 가지 참고 사항은 다음과 같습니다.
이메일 및 회사 필드는 진행 중인 프로젝트를 추적하는 데 도움이 됩니다. 예를 들어, 대규모 SI에는 SMA를 실행하는 단일 사용자를 대표하는 여러 이메일 주소와 여러 조직이 있을 수 있습니다. 이 정보는 SMA에서 생성한 프로젝트 파일에 저장됩니다.
SQL에 대한 숨겨진 필드가 있습니다. SMA는 SQL을 스캔하고 분석할 수 있지만 SQL을 변환하지는 않습니다. 또한 다음과 같은 경우에만 SQL을 식별할 수 있습니다.
.sql 파일에 있는 SQL
Jupyter Notebook의 SQL 셀에 있는 SQL
SQL that is passed as a single string to a spark.sql statement.
이 SQL 기능은 Snowflake와 호환되지 않는 SQL이 있는 위치를 확인하는 데 도움이 될 수 있지만, SMA의 주요 용도는 아닙니다. Spark SQL 및 HiveQL에 대한 추가 지원이 곧 제공될 예정입니다.
Once you’ve entered all of your project information, for this HoL, we are going to skip the assessment phase. (What… aren’t we building an assessment?) If you do not want to convert any code, running an assessment can be helpful as it will allow you to get the full set of reports generated by the SMA. You can then navigate through those or share them with others in your organization while not creating extra copies of the converted code. However, all of these same assessment reports are also generated during a conversion. So we will skip assessment mode for now and go to conversion.
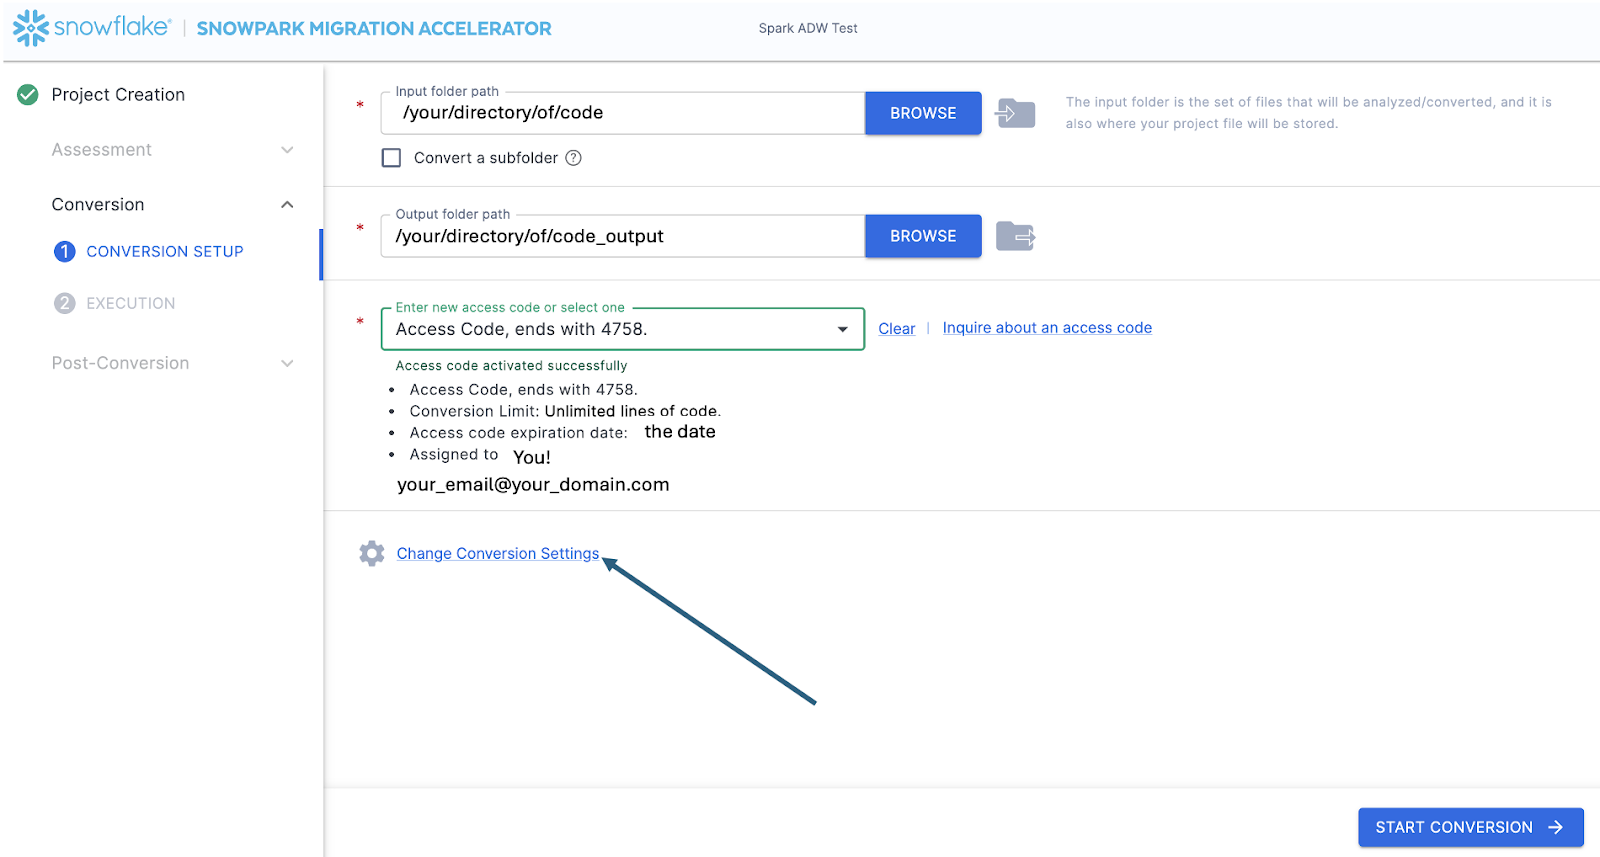
On the Conversion settings page, select Skip Assessment, and then click Continue in the bottom right corner.
“저장”하는 파일은 로컬 프로젝트 파일입니다. 프로젝트 생성 화면에 입력한 모든 정보는 위에서 방금 지정한 디렉터리에 확장명이 ‘.snowma’인 로컬 텍스트 파일로 저장됩니다.
This will take you to the Conversion settings page. From here, you can choose Default Settings to proceed with conversion, or select Customize settings to review and adjust advanced options.
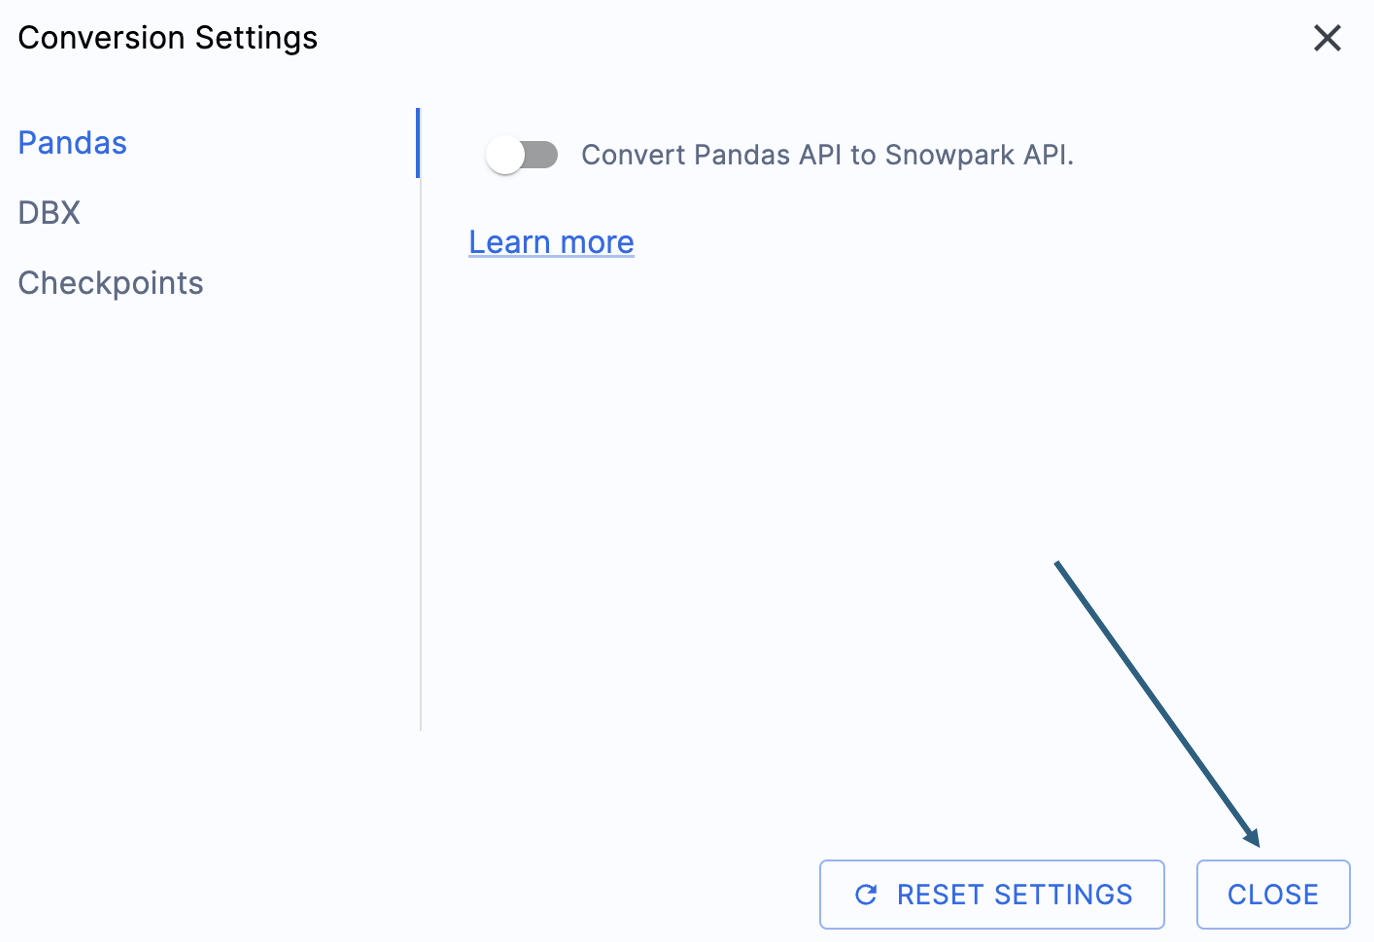
이 실습 랩의 출력을 간소화할 수 있는 한 가지 설정이 있는데, 바로 pandas DataFrame을 Snowpark API로 변환하지 못하게 비활성화하는 것입니다.
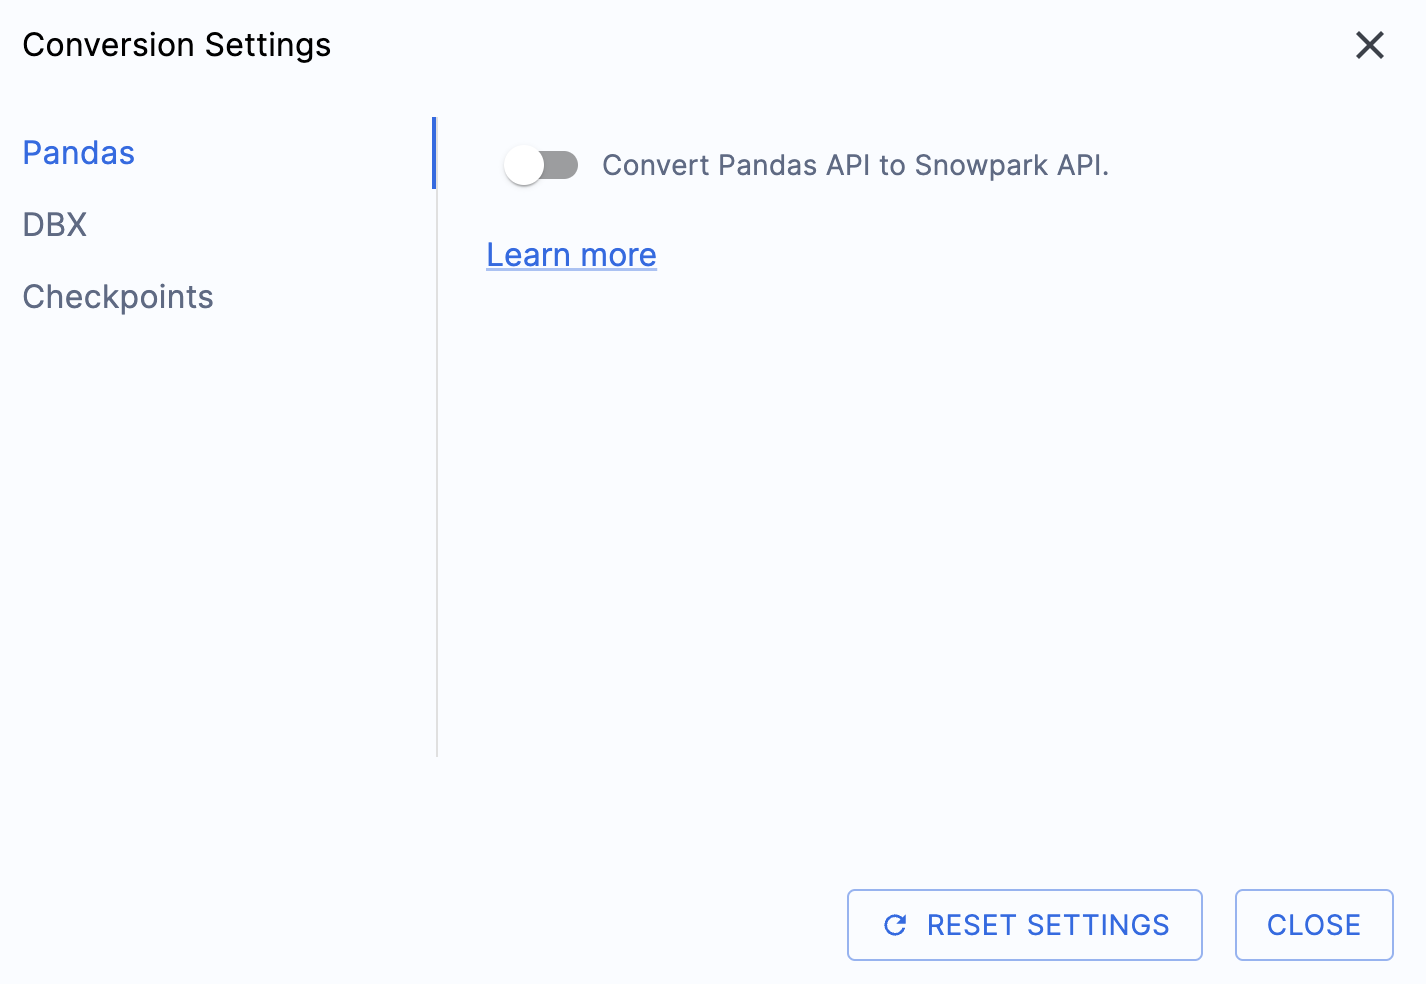
이 설정은 현재 업데이트 중이므로, 이 옵션을 선택 취소하지 않으면 여러 경고가 많이 추가될 것입니다. 대부분의 pandas DataFrame은 pandas modin 구현 시 사용할 수 있으므로, 지금은 간단한 import 호출 변경만으로 충분합니다. 2025년 6월 말까지의 이 문제 관련 내용을 확인하세요. 다른 설정도 살펴볼 수 있지만, 그대로 두겠습니다. 출력 코드가 호환되는 테스트 라이브러리인 Snowpark Checkpoints가 있다는 점에 유의해야 합니다. 이와 관련된 설정이 있지만, 이 랩에서는 변경하지 않겠습니다.
Select “Save settings” to save and close your settings.
To start the conversion, click Continue in the bottom right corner of the application.
The next screen will show the progress of the conversion:
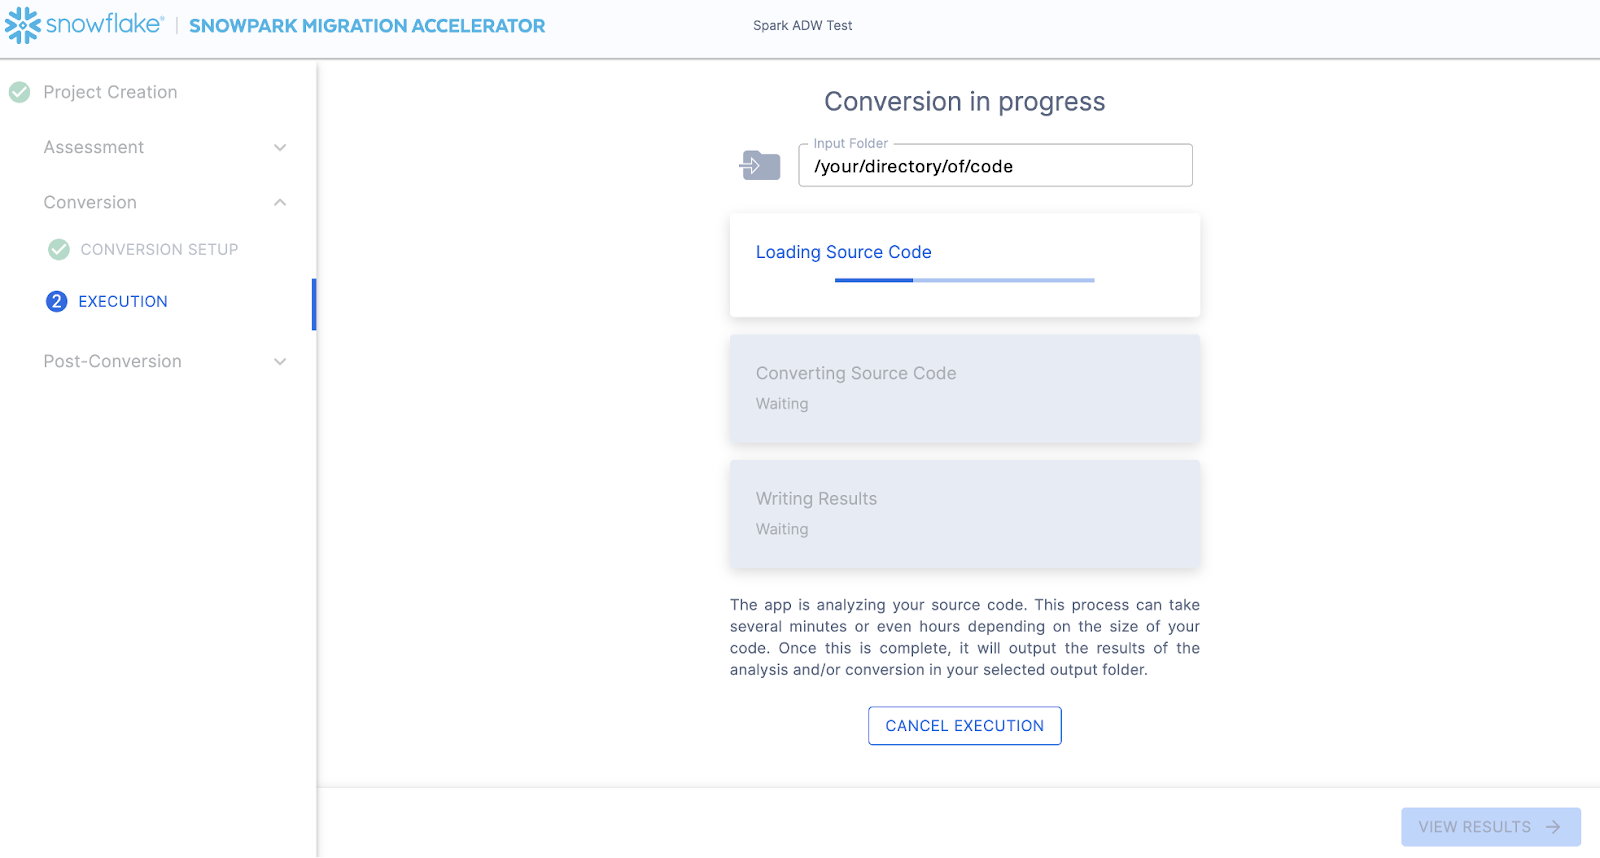
Like SnowConvert, the SMA is building a semantic model of the entire codebase in the input directory. It is building relationships between code elements, sql objects, and other referenced artifacts, and creating the closest output it can to a functional equivalent for Snowflake. This primarily means converting references from the Spark API to the Snowpark API. The SMA’s engineering team is a part of the Snowpark engineering team, so most transformations that take place have been built into the Snowpark API, so the changes may seem minor. But the wealth of assessment information that is generated by the SMA allows a migration project to really get moving forward. An in-depth look at all of the generated assessment information will have to take place elsewhere because the SMA has likely finished this conversion in the time it took to read this paragraph.
When the SMA has finished, the results page will show the… results.
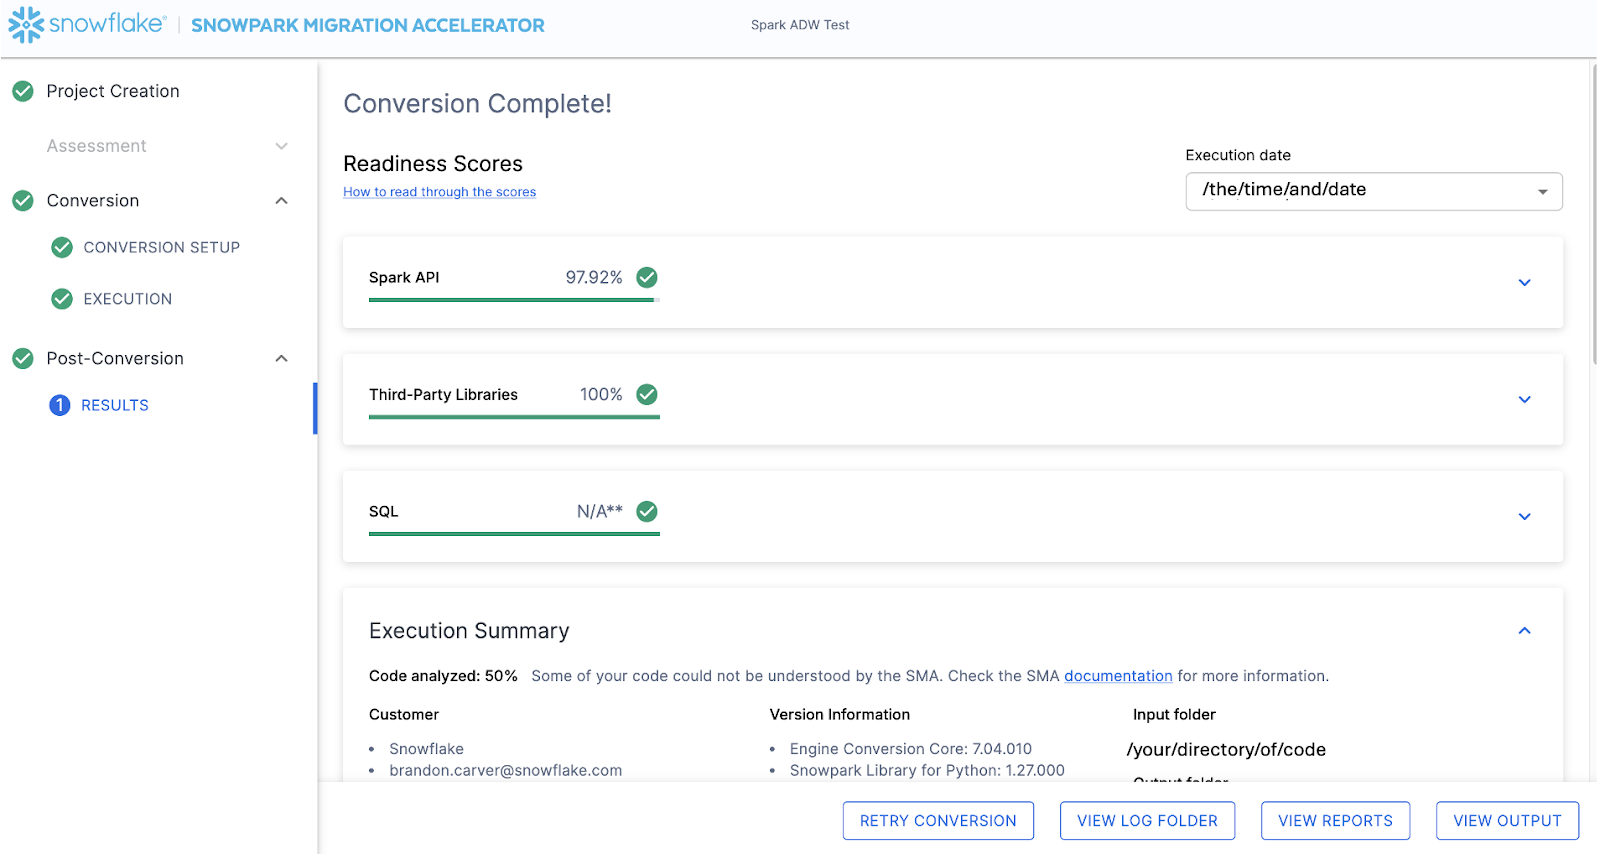
결과 페이지에는 이 코드베이스가 Snowflake에 대해 얼마나 “준비”되었는지를 나타내는 매우 간소화된 메트릭인 “준비도 점수”가 표시됩니다. 결과는 다음에 검토하겠지만, Snowpark Migration Accelerator를 쉽게 실행할 수 있다는 점에 유의하세요. SMA는 단지 “액셀러레이터”에 불과합니다. 해결책도 아니며, 자동화 도구도 아닙니다. SMA는 하나의 데이터 소스에 연결하고 다른 데이터 소스로 출력하는 파이프라인을 완전히 마이그레이션하지 않으므로, SnowConvert에서 수행하는 단순한 DDL의 SQL-SQL 마이그레이션보다 항상 더 많은 주의가 필요합니다. 그러나 Snowflake는 이를 최대한 간소화하기 위해 지속적으로 노력하고 있습니다.
출력 해석
The SMA, even more so than SnowConvert, generates a large amount of assessment information. It can be difficult to parse through the results. There are many different directions you could go depending on what you want to achieve.
Note that this is an extremely simple scenario, so some of the steps we are going to take will look like overkill. (I mean, do we really need to analyze the dependencies present in this project when there are only two files and we could just… look?) The goal is to still walk through what we normally recommend even in this small POC. But let’s be clear… that the scope is clear, and there are only two files. We just need both of them to work as they do in the source.
준비도 점수
With that in mind, let’s take a look at the first part of the output that you will see in the application: the readiness scores. There will be multiple readiness scores and you can expand on each one of them to better understand what is captured by that readiness score.
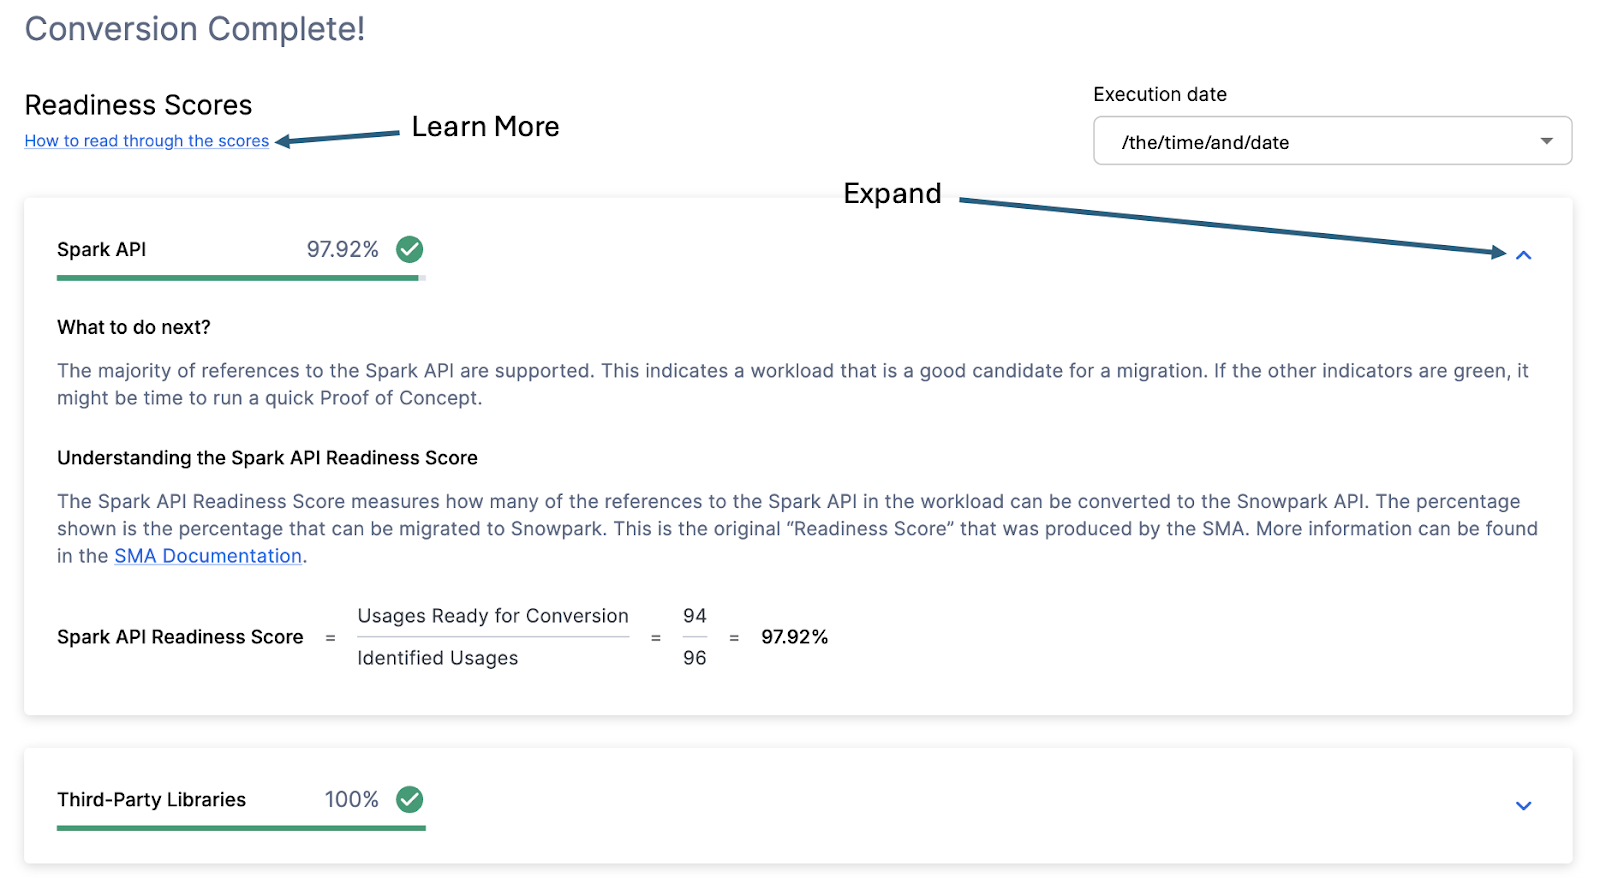
Each readiness score is a very basic calculation of the count of functions or elements in an API that are supported in Snowpark/Snowflake divided by the count of all functions or elements related to that API for this execution. The calculation showing you how the score is calculated is shown when you expand the window. You can also learn more about how to interpret the readiness scores by selecting “How to read through the scores” near the top left corner of this window.
This execution has a Snowpark API Readiness Score of 96.02%. (Please note that yours may be different! These tools are updated on a biweekly basis and there may be a change as compatibility between the two platforms is ever evolving.) This means that 96.02% of the references to the Spark API that the tool identified are supported in Snowflake. “Supported” in this case means that there could be a similar function that already exists or that the SMA has created a functionally equivalent output. The higher this score is, the more likely this code can quickly run in Snowflake.
(Note that this 96.02% of references are either supported directly by the Snowpark API or they are converted by the SMA. Most of them are likely supported directly, but you can find out exactly what was converted and what was passed through by reviewing the SparkUsagesInventory.csv report in the output Reports folder generated by the SMA. We will not walk through that in this lab as we will see what is NOT supported in the Issues.csv file, but you can use this information for reference.)
There are other readiness scores and you may see more than what is shown in the lab as the readiness scores do change over time. This lab won’t walk through each of them, but note that a low score will always be worth investigating.
코드 분석됨
각 준비도 점수 바로 아래에는 처리할 수 없는 코드가 있는지 알려주는 작은 표시기가 있습니다.
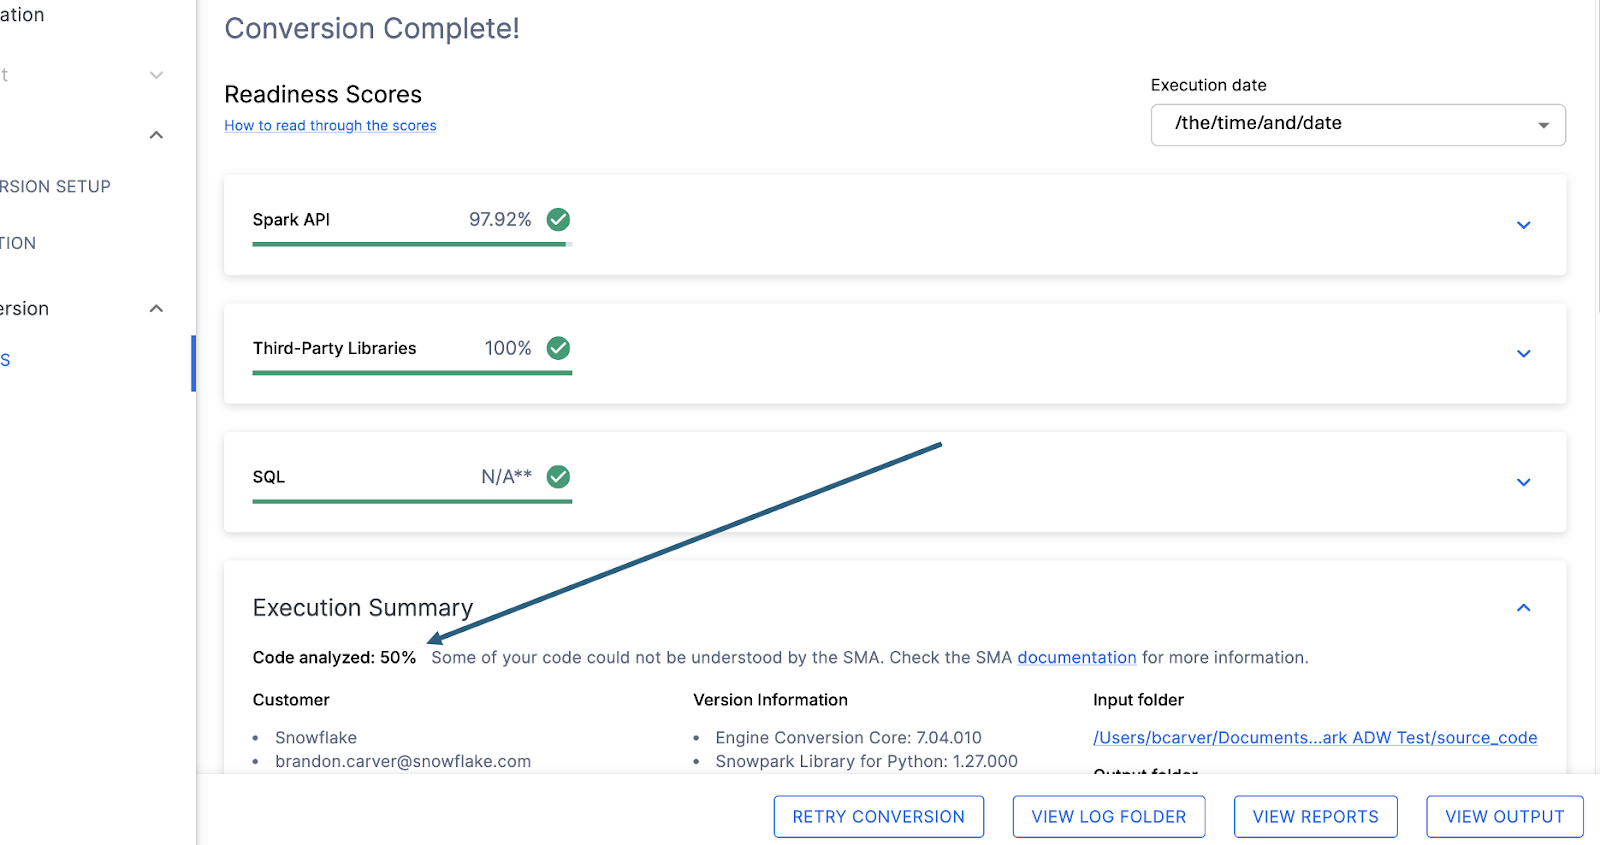
이 숫자는 완전히 구문 분석된 **파일의 백분율**을 나타냅니다. 이 숫자가 100% 미만인 경우는 SMA가 구문 분석하거나 처리할 수 없는 일부 코드가 있는 것입니다. 문제를 해결하기 위해 가장 먼저 살펴봐야 할 곳입니다. 100% 미만인 경우 문제 요약을 보고 구문 분석 오류가 발생한 위치를 확인해야 합니다. SMA의 출력을 검토할 때 가장 먼저 살펴봐야 할 곳입니다. 대량의 코드를 스캔할 수 없는 경우 SMA를 다시 실행하는 것이 가장 합리적일 수 있기 때문입니다.