Snowpark Migration Accelerator: Using SMA with Docker
Using the Linux Command Line Interface (CLI) for Snowpark Migration Accelerator with Docker: A Step-by-Step Guide
Dependencies
The following software must be installed on your computer before proceeding:
Steps
Create the image config file
Create a file named “Dockerfile” (without a file extension). This file will contain the configuration needed to build the Docker image.
FROM ubuntu
COPY snowCli /dockerDestinationFolder
ENV DOTNET_SYSTEM_GLOBALIZATION_INVARIANT=1
RUN apt-get update
RUN apt-get install -y ca-certificates openssl
When using the Ubuntu image to run the Snowpark Migration Accelerator CLI for Linux, you need to add two dependencies to the Dockerfile:
Enable System.Globalization.Invariant setting
Install OpenSSL
These dependencies are required to activate the license and establish a secure HTTPS connection for license validation.
In addition to installing dependencies, the COPY command copies files from your local machine into the Docker image. For example, the snowCLI file (which must be in the same directory as the Dockerfile) will be copied to /dockerDestinationFolder within the Docker image.
Build the image
Start the Docker Desktop application.
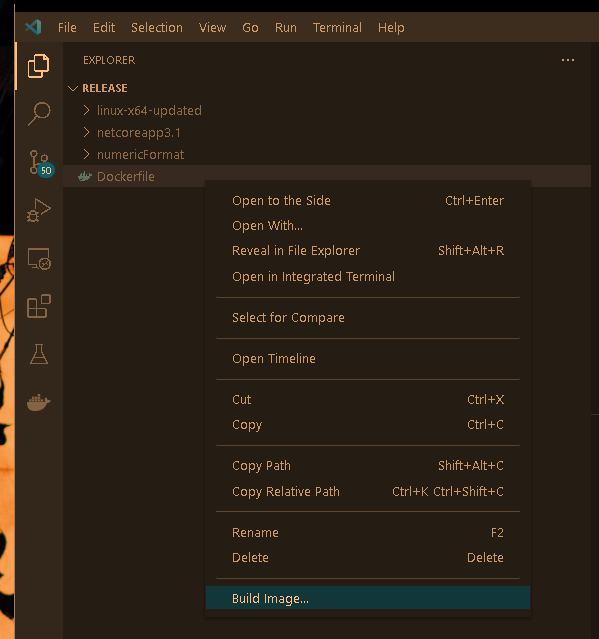
Open Visual Studio Code and locate the “Dockerfile”. If you have the Docker extension installed in Visual Studio Code, it will automatically recognize the Dockerfile as a Docker configuration file. To build the Docker image, right-click on the “Dockerfile” and select “Build image…”

Enter a name for the image when prompted at the top of Visual Studio Code.

Enter any name and press “Enter.” Docker will then create the container by downloading the Ubuntu image, installing required dependencies, and copying the specified files. Wait for the terminal to complete the process. A success message will appear when the image has been built correctly.
> Executing task: docker build --pull --rm -f "Dockerfile" -t release:Ubuntu "." <

[+] Build completed in 2.0 seconds. All 11 tasks finished successfully.
Run the image
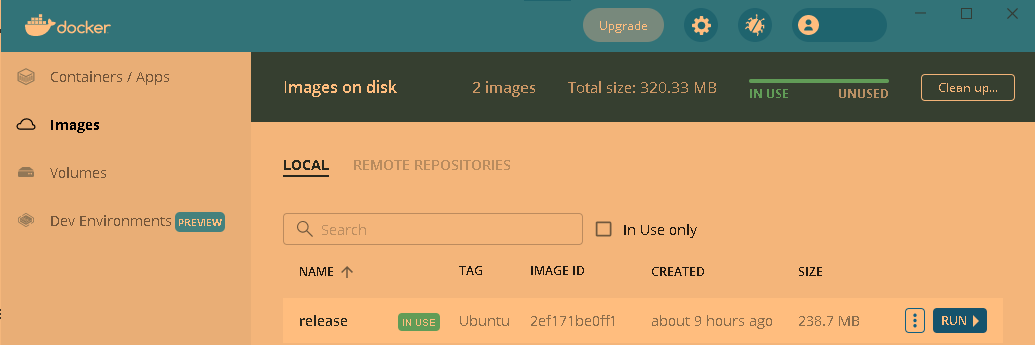
Launch the recently created image by navigating to the Images tab in Docker Desktop and clicking the Run button.

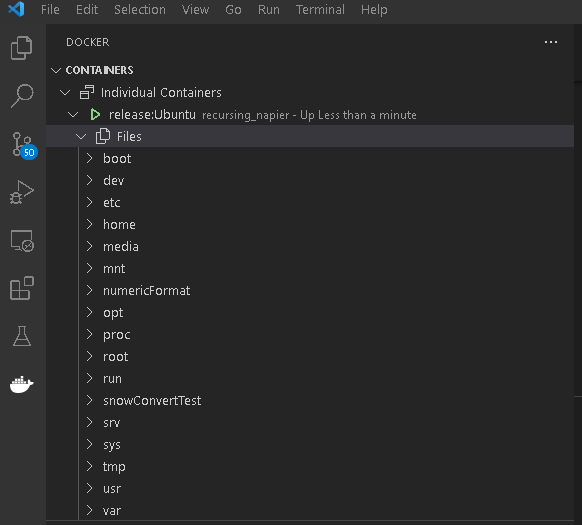
In Visual Studio Code, navigate to the Docker tab. Under the “Containers” section, you will find the recently executed image. Click the arrow next to it to expand and browse through its file directory structure.

Connect to the container
Finally, to access the container’s command line interface, right-click on the running container and select “Attach shell”. This will open a Terminal window where you can execute any command you need.

You will find your personal files in this location. These files were previously selected for copying using the COPY command in the configuration file.