- description:
A walkthrough on using the SMA CLI
Snowpark Migration Accelerator: SMA CLI Walkthrough
The Snowpark Migration Accelerator (SMA) helps developers migrate their Python or Scala Spark code to Snowpark. It analyzes your code and:
- Evaluates compatibility with Snowpark
- Automatically converts compatible Spark API calls to Snowpark API
- Identifies code that cannot be automatically converted
- Creates an inventory of third-party library imports from scripts and notebooks
- Generates an editable compatibility report comparing Spark and Snowpark code
Snowflake has released a Command Line Interface (CLI) for the Snowpark Migration Accelerator (SMA). This guide will demonstrate how to use the CLI both as a standalone tool and within a script.
Using the CLI
You can download the Command Line Interface (CLI) from the Download and Access section. Select the version that matches your operating system. You can store the CLI in any accessible location on your machine or container.
Note
NOTE: While this walkthrough uses screenshots from a Mac computer, the process is similar for Windows and Linux users.
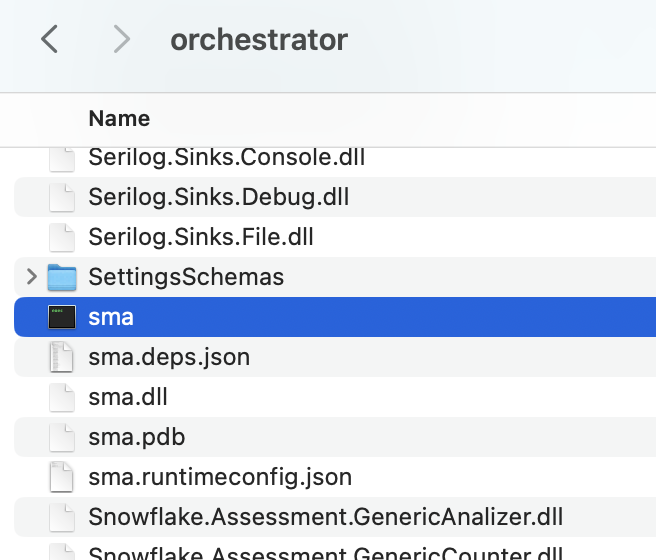
After downloading the package file (.zip or .tar format), extract its contents. The Command Line Interface (CLI) tool is located in the “orchestrator” folder within the extracted files.
Open a terminal or command prompt in the installation folder and verify the CLI installation by running the following command to check its version:
./sma –version
You will see results that look like this:

The SMA Command Line Interface (CLI) is a local application that runs on your computer, similar to the SMA desktop application. To analyze your code files using the SMA CLI, these files must be stored on your local machine where the CLI can access them. The CLI supports the same file types as the regular SMA application. For a complete list of supported file types, refer to the supported filetypes in the SMA documentation.
Note
NOTE: To test the CLI functionality, you can use the sample codebase provided in the Assessment section or refer to the Conversion walkthroughs in the SMA documentation.
The SMA documentation contains a complete list of CLI arguments. Let’s explore the most important ones in this section.
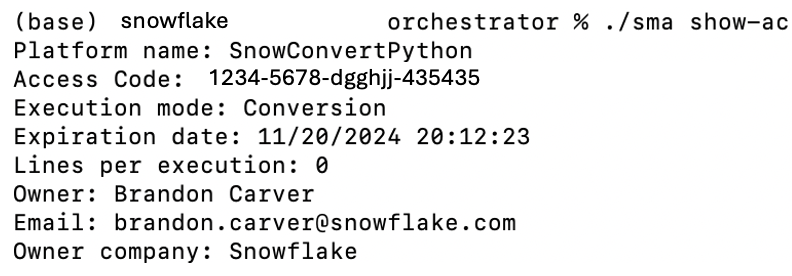
The SMA CLI runs in Conversion mode by default, rather than Assessment mode. To run the CLI in assessment mode, use the -a argument. For conversion operations, you’ll need a valid access code. To verify if you have a valid access code, use the following command:
To run a conversion, you need to provide:
- Input directory (required)
- Output directory (required)
If you haven’t created a project file before, you’ll also need to provide:
- User email
- Organization name
- Project name
Once you’ve set up these parameters for the first time, you only need to specify the input and output directories for future conversions.
This screen displays a summary of your execution settings and prompts you to confirm whether you want to proceed.
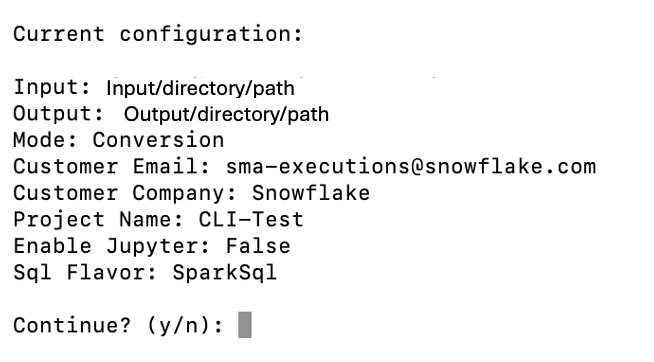
To skip the confirmation prompt, add the –yes or -y parameter. This is particularly important when running the CLI from automated scripts.
The tool provides detailed progress information during its execution.
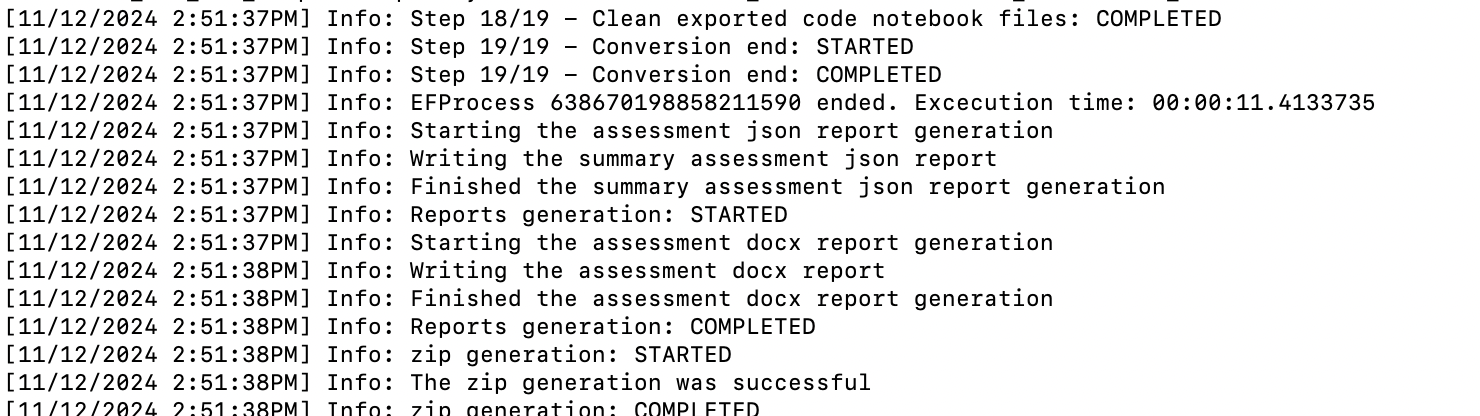
While the tool is running, it will continuously print output to the screen. When the process is complete, you will see the prompt again. The tool generates detailed output that includes all processes, issues, and completed or failed steps. You don’t need to read through all of this information while it’s running, as you can review it later in the Logs output folder.
Viewing the Output
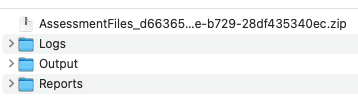
The SMA CLI produces the same output as the SMA application. When you run the tool, it creates three folders in your specified output directory:
For detailed guidance on working with code that has been converted by the Snowpark Migration Accelerator (SMA), refer to the conversion walkthrough.
Using the Workspace Estimator
The SMA CLI includes a Workspace Estimator verb (we or workspace-estimator) that connects to a Databricks workspace, extracts metadata such as clusters, jobs, and runs, and optionally uploads the results to Snowflake for analysis.
Command hierarchy
The Workspace Estimator currently supports Databricks workspaces through the dbx subcommand. Running sma we dbx without a subcommand displays help listing the available subcommands:
sma we dbx run– Runs both extraction and upload in a single invocation.sma we dbx extract– Extracts workspace metadata to a local.zipfile only.sma we dbx upload– Uploads a previously extracted.zipfile to Snowflake.
Authentication
A Databricks Personal Access Token (PAT) is required for extraction. You can supply it in one of two ways:
- Pass it directly with
-t/--token. - Set the
SMA_DBX_TOKENenvironment variable. If--tokenis omitted, the CLI defaults to this variable.
Running extraction and upload together
When you provide all required options to sma we dbx run, the CLI extracts workspace metadata and uploads the resulting .zip file in a single step.
The following table lists the available options for sma we dbx run:
| Option | Short | Required | Default | Description |
|---|---|---|---|---|
--workspace-url | -w | Yes | – | Databricks workspace URL (e.g. https://adb-1234.azuredatabricks.net). |
--token | -t | No | SMA_DBX_TOKEN env var | Databricks Personal Access Token (PAT). |
--output-dir | -o | No | Current directory | Directory where the extraction .zip file will be written. |
--workspace-name | -n | Yes | – | Logical name for the workspace. Cannot be empty or whitespace. |
--lookback-days | -l | No | 30 | Number of days to look back for cluster events (15, 30, or 60). |
--log-level | – | No | Information | Minimum log level for diagnostic output (Trace, Debug, Information, Warning, Error, Critical). |
--company-name | -c | Yes | – | Company name for this estimation. Cannot be empty or whitespace. |
--email | -e | Yes | – | Email of the person performing the estimation. Must be a valid email address. |
Running extraction only
To extract workspace metadata without uploading, use the extract subcommand. This produces a .zip file in the specified output directory.
The extract subcommand accepts the same options listed in the run table above except --company-name and --email, which are only required for upload.
Uploading a previously extracted file
If you have already extracted workspace metadata to a .zip file, you can upload it separately using the upload subcommand.
The following table lists the available options for sma we dbx upload:
| Option | Short | Required | Default | Description |
|---|---|---|---|---|
--input-zip | -i | Yes | – | Path to an existing .zip file to upload. The file must have a .zip extension. |
--company-name | -c | Yes | – | Company name for this estimation. Cannot be empty or whitespace. |
--email | -e | Yes | – | Email of the person performing the estimation. Must be a valid email address. |
--workspace-name | -n | Yes | – | Logical name for the workspace. Cannot be empty or whitespace. |
--log-level | – | No | Information | Minimum log level for diagnostic output (Trace, Debug, Information, Warning, Error, Critical). |
Running the CLI Programmatically
Coming soon! The SMA team will provide a script that enables you to run the SMA Command Line Interface (CLI) automatically across multiple directories.
Try out the Command Line Interface (CLI) today. If you need help or have questions, contact the Snowpark Migration Accelerator team at sma-support@snowflake.com.