SnowConvert AI: Data validation
SnowConvert AI, as part of the end-to-end migration experience, provides the capability to validate your migrated data to ensure that both the structure of the data and the data itself match the original source. This data validation feature is available for SQL Server databases.
Data validation modes
To ensure that your data is successfully migrated to Snowflake, the data validation employs two distinct validation levels: schema validation and metrics validation.
Schema validation
Schema validation confirms that the basic structure of your migrated table is preserved in Snowflake. It validates the following table attributes:
Table name
Column names
Ordinal position of each column
Data types
Character maximum length for text columns
Numeric precision and scale for numeric columns
Row Count
Metrics validation
Metrics validation confirms that the data itself matches the original source. Metrics validation compares aggregate metrics between each original table and the corresponding new Snowflake table. Although the specific metrics can vary by column data type, metrics validation evaluates the following items:
Minimum value
Maximum value
Average
Nulls count
Distinct count
Standard deviation
Variance
Validate migrated data
Warning
For accurate validation and to avoid false negatives, don’t alter the migrated data during the validation process.
For SQL Server migrations, validation includes an optional step within the process. This step validates the data after you use SnowConvert AI to move it.
Prerequisites
This feature requires a version of Python that meets the following requirements to be installed and available in your PATH:
Greater than or equal to 3.10.
Lower than or equal to 3.13.
To verify that a supported Python version is available in your PATH:
In your terminal (or Command Prompt on Windows), run
python --version.Confirm that the Python version meets the requirements that are mentioned earlier.
Complete the following steps to validate your migrated data:
In SnowConvert AI, open Validate data in one of the following ways:
Complete the data migration process, and then select Go to data validation.
In your project, select Data validation.
On the Connect to source database page, complete the fields with the connection information for your source database, select Test connection, and then select Continue.
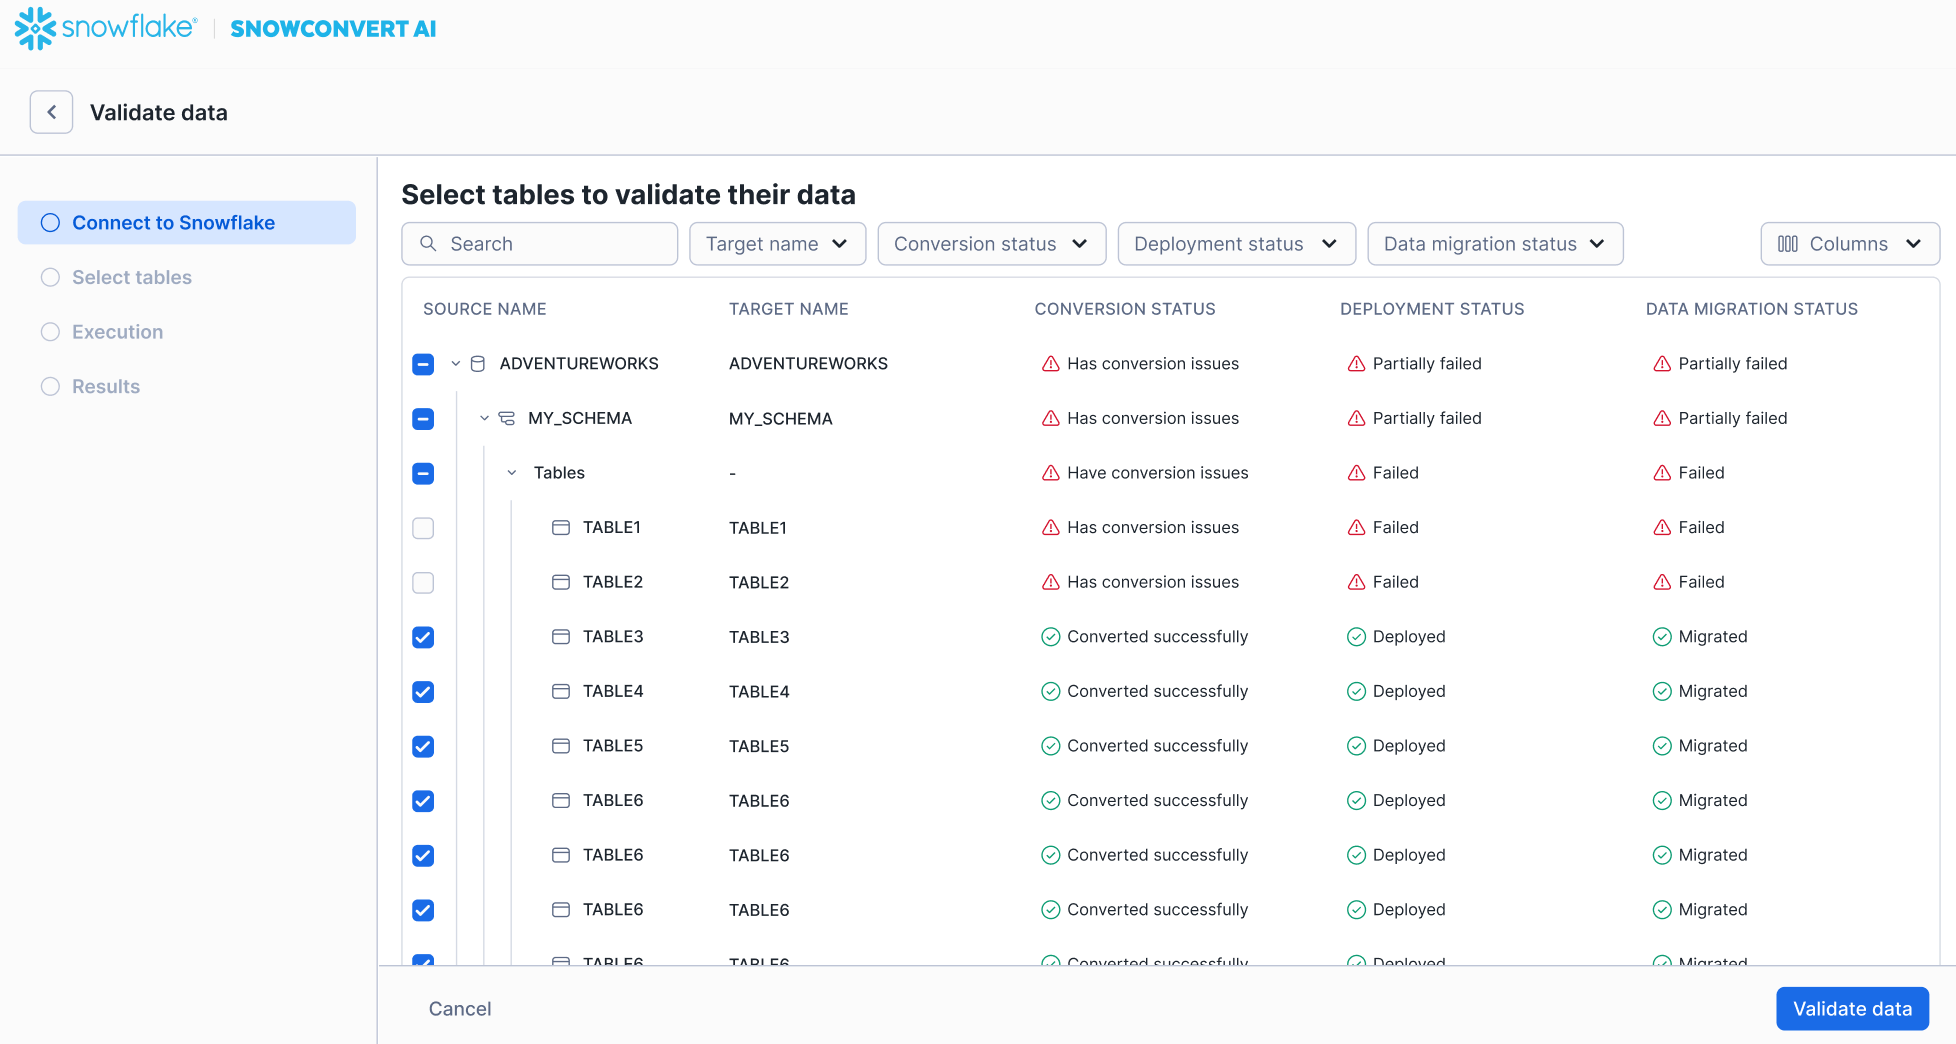
Select the objects that you want to validate.
The following image is an example of the page:

Select Validate data.
The validation process starts.
When validation completes successfully and no differences are found, SnowConvert AI displays a message confirming that no differences were found.
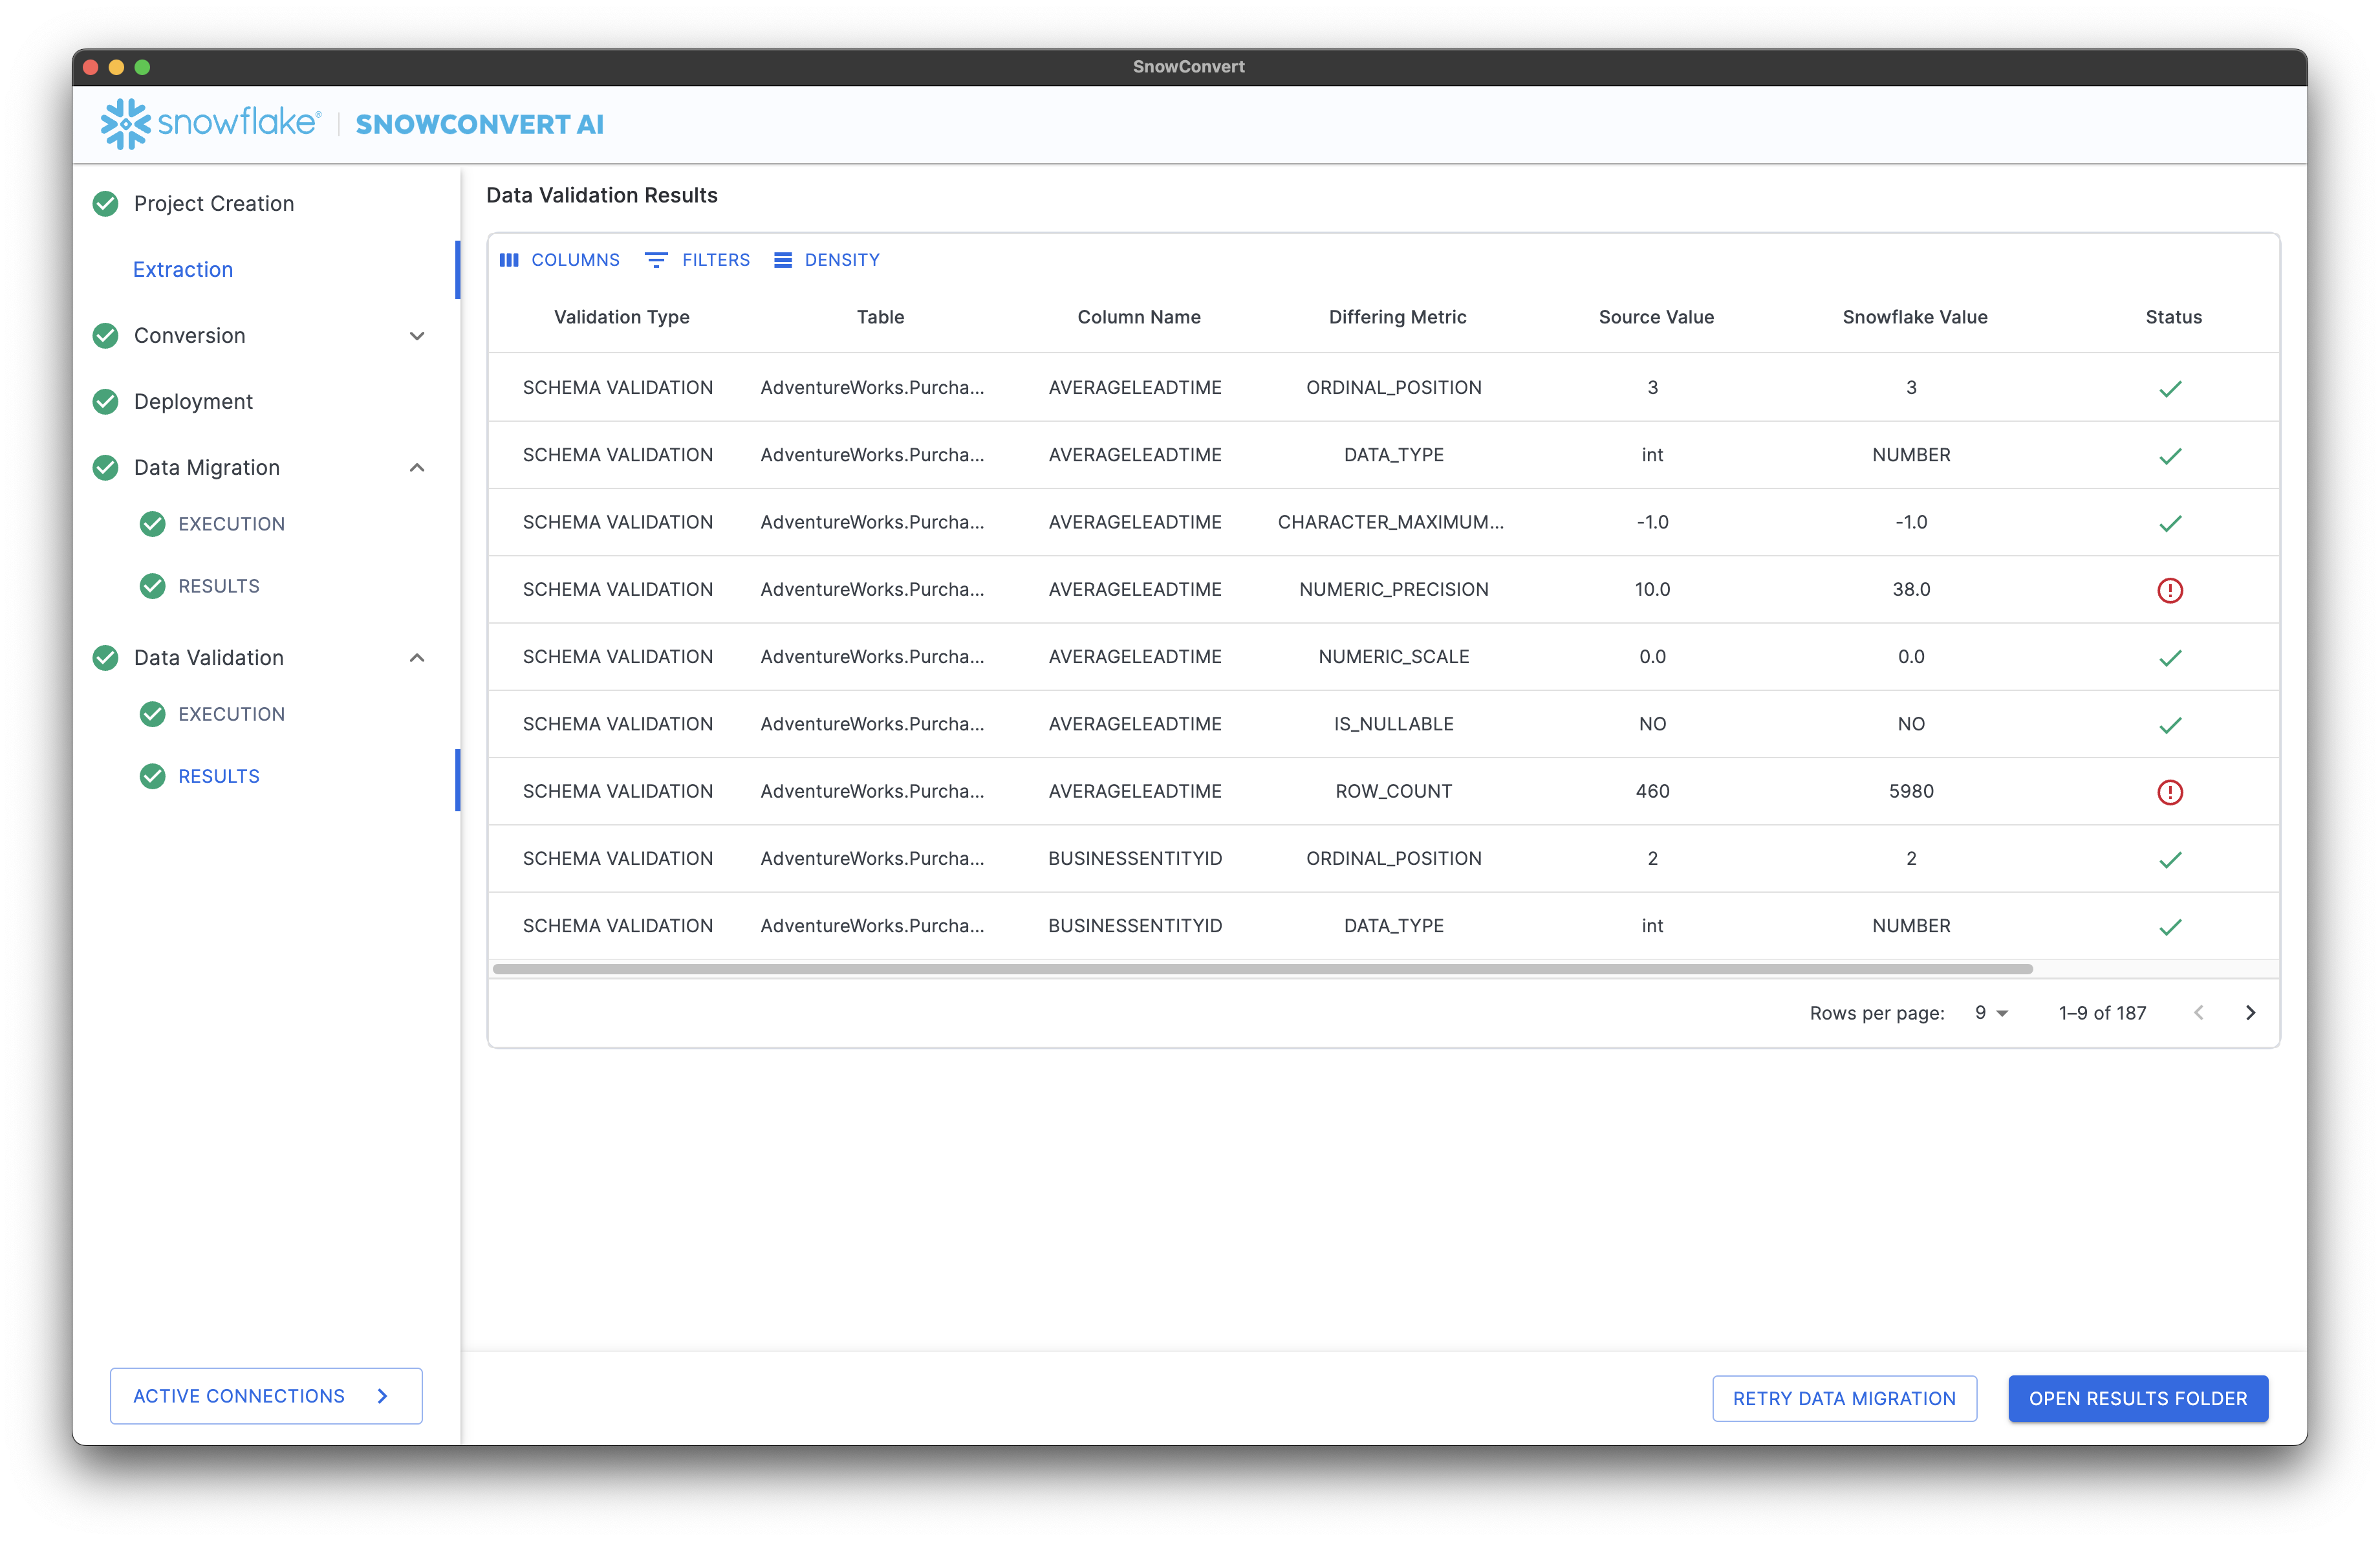
If differences are found in the migrated data, SnowConvert AI generates a report and displays a summary of the discrepancies in the tables.
The following image is an example of a validation report:

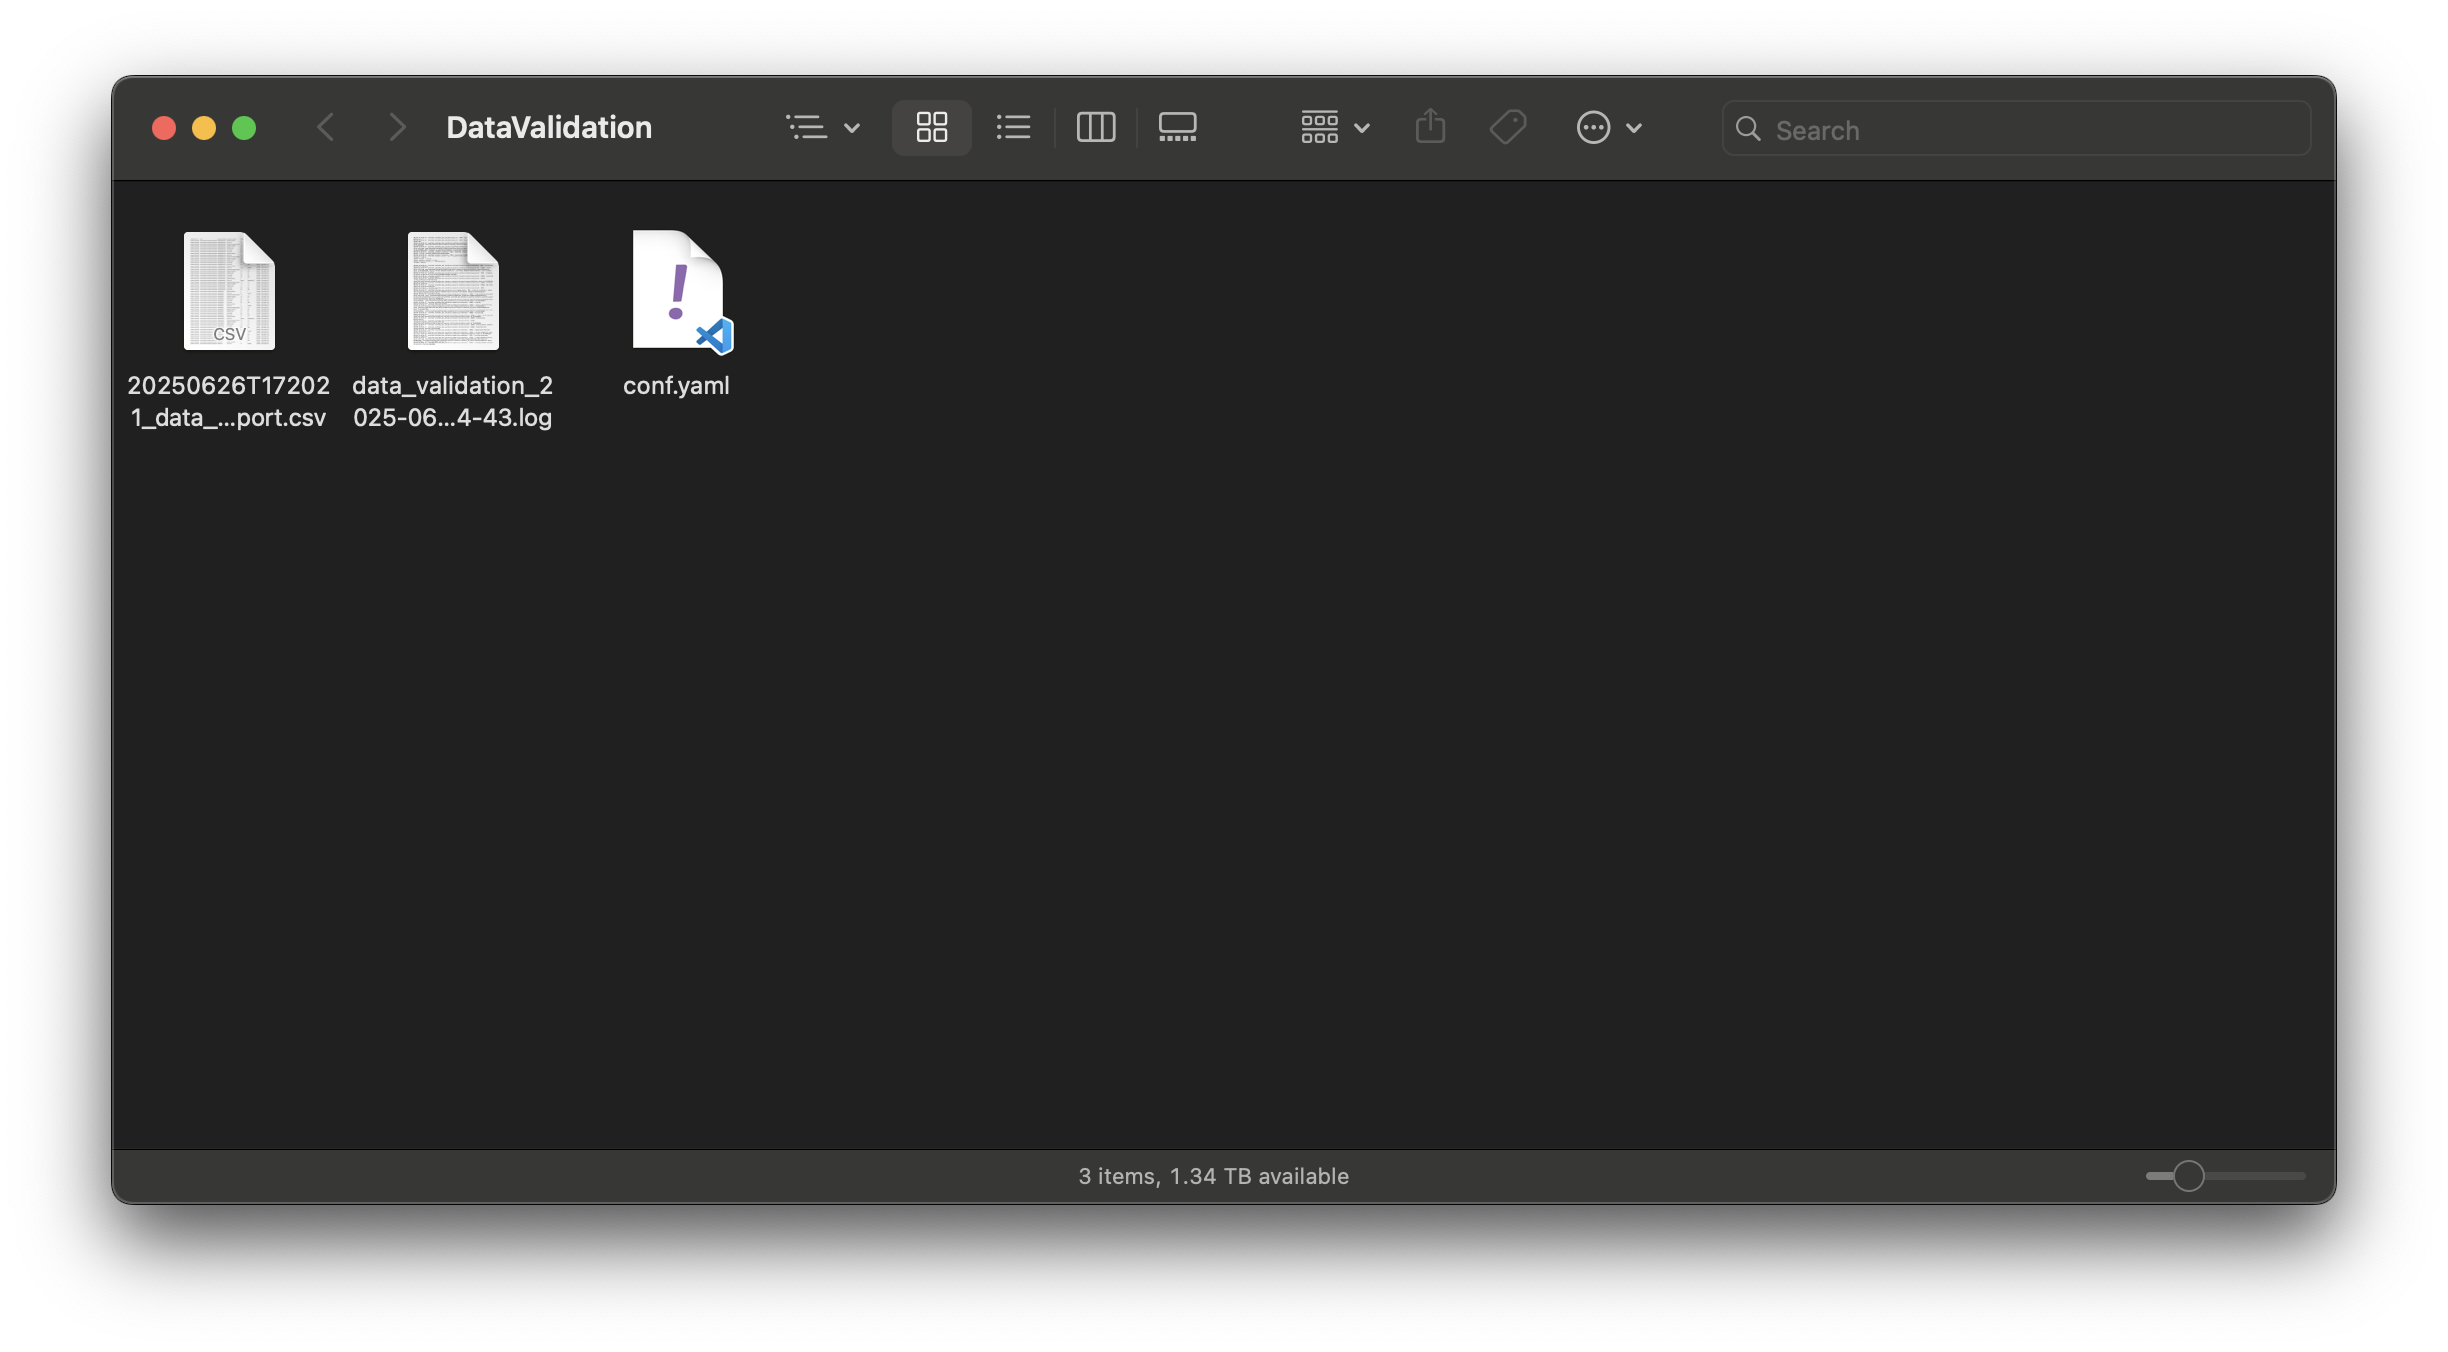
Also, a CSV file report is generated so you can visualize and share it.
The validation results are classified into three categories:
Category
Description

Values match exactly between the source database and Snowflake.

Snowflake table has minor differences that don’t affect the data, such as higher numeric precision.

Values don’t match between the original database and the Snowflake database.
Finally, you can open the reports folder to access the generated CSV reports:
