SnowConvert AI: Project Creation
SnowConvert AI manages migrations by using SnowConvert AI projects. A SnowConvert AI project contains metadata about migrating a data set into Snowflake, such as the source database platform, input files, and output location. You can save and reuse these settings for multiple conversion runs.
To create a new project, complete the following steps:
Open SnowConvert AI, and then select New Project.
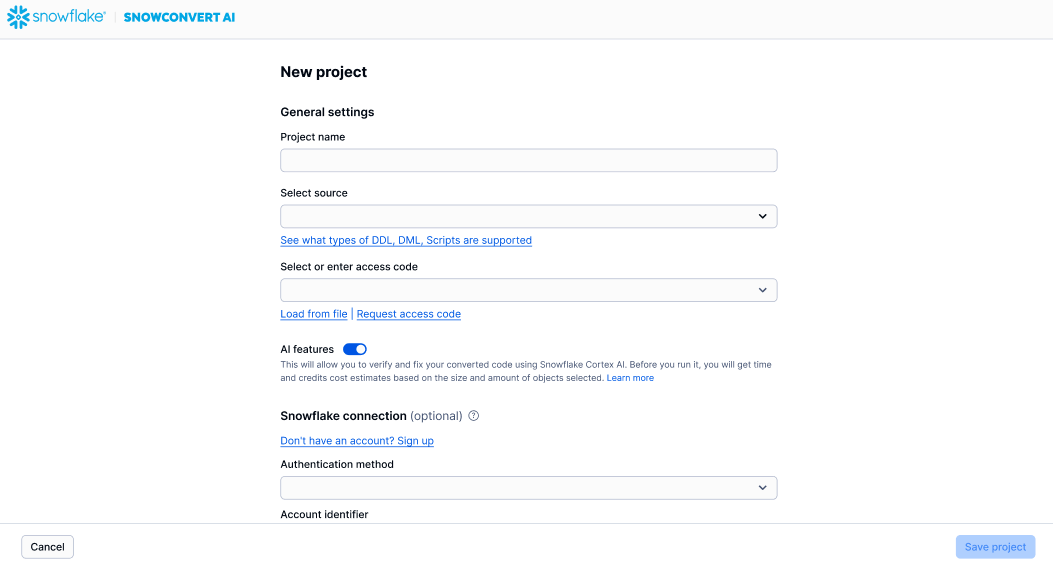
The New Project page appears:

Enter the following information:
Project name: The name of the project.
Select source: The type of the source database system; for example, SQL Server, Oracle, and so on.
Select or enter access code: Enter the access code that you obtained previously. If you don’t have an access code, select the Request access code link. For more information, see SnowConvert AI - How to get an access code.
To use Snowflake Cortex to help verify and fix migration objects, turn on AI features.
If you don’t want to use Snowflake Cortex for the migration, turn off AI features.
For more information about Snowflake Cortex, see Snowflake AI and ML.
For Snowflake connection, optionally enter the information required to connect to your Snowflake account.
Select Save Project.
After creating a project, you can proceed to the extraction process to extract database objects from your source system to prepare them for the conversion process.