SnowConvert AI: Data migration
SnowConvert AI, as part of the end-to-end migration experience, provides the capability to migrate your actual data from source tables to Snowflake after the database structure is deployed. This data migration feature ensures that your data is transferred efficiently and accurately to complete the data migration process. This data migration feature is available for SQL Server and Amazon Redshift databases.
Data migration process overview
The data migration process varies depending on your source database platform.
Amazon Redshift to Snowflake
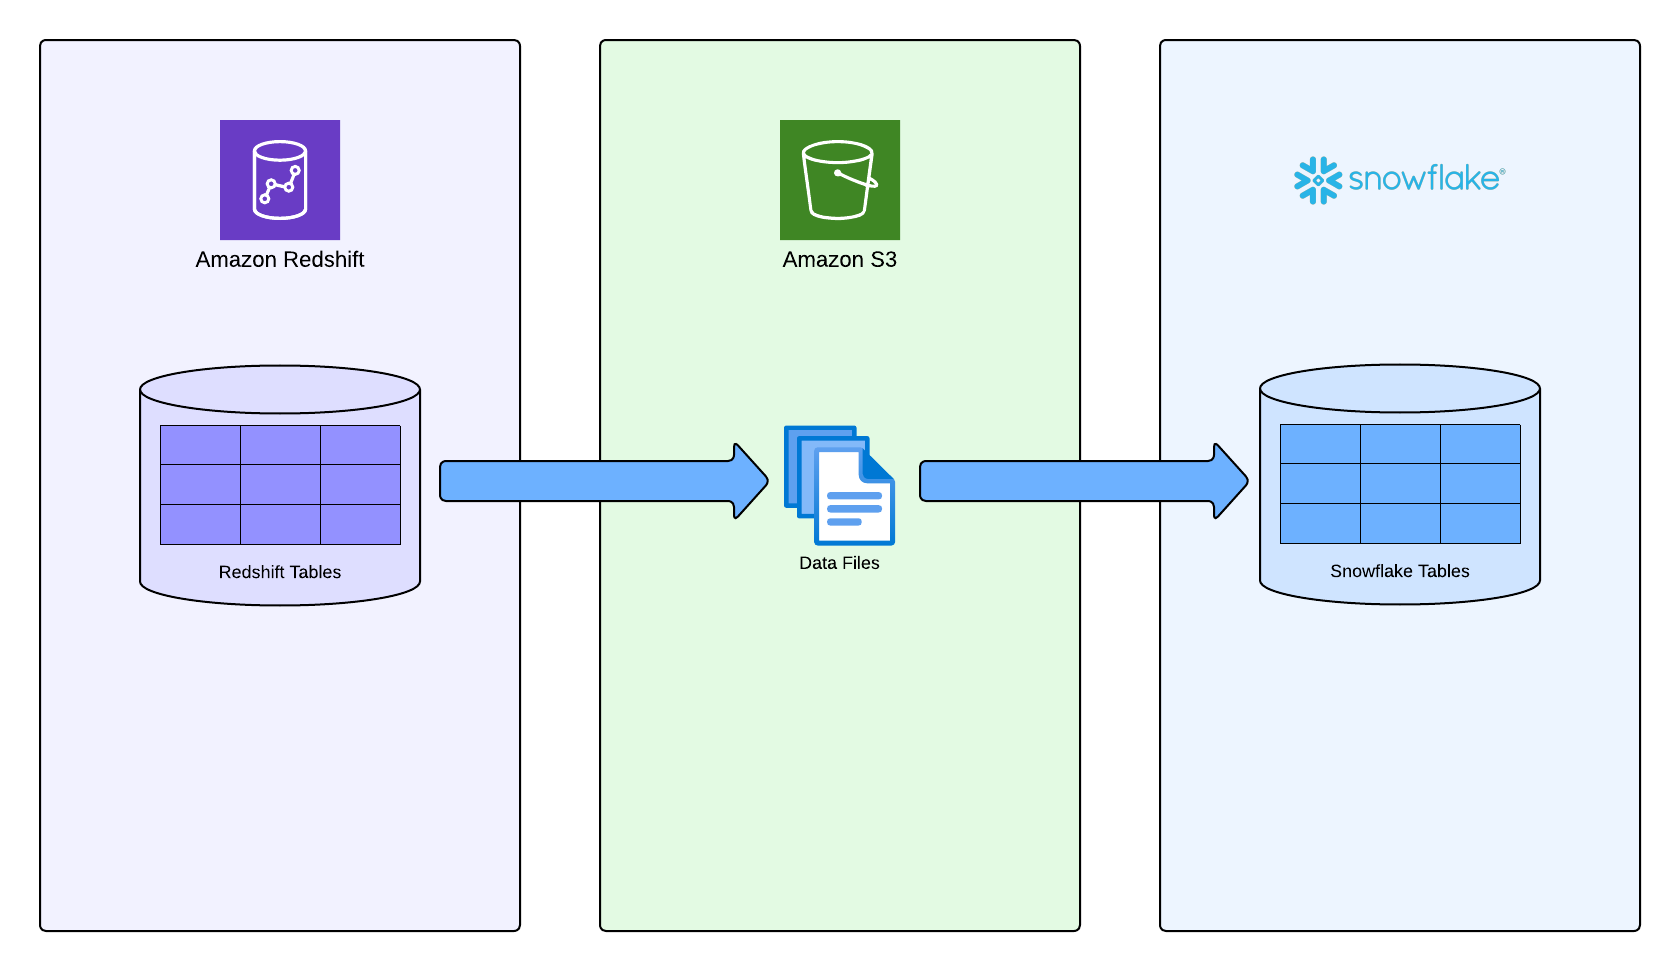
SnowConvert AI migrates data from Redshift tables by unloading it to PARQUET files in an S3 bucket, then copying the data directly from those files to the deployed tables in Snowflake.
SQL Server to Snowflake
Data migration from SQL Server utilizes optimized data transfer methods to move your table data efficiently to the corresponding Snowflake tables.
Prerequisites
Ensure that you meet the following general prerequisites:
You completed the deployment process with database structure in Snowflake.
You have active connections to both a source database and Snowflake account.
You have sufficient permissions for data operations on both source and target systems.
In addition, ensure that the prerequisites are complete for your source database platform:
Prerequisites for Amazon Redshift sources
Before executing data migration from Redshift, ensure that you meet the following prerequisites:
S3 bucket requirements
An S3 bucket in AWS in the same region as your Redshift cluster.
Empty bucket path; the process fails if files exist in the specified path.
IAM role for Redshift
Create an IAM role associated with your Redshift cluster that can unload data to your S3 bucket:
{
  "Version": "2012-10-17",
  "Statement": [
    {
      "Sid": "VisualEditor0",
      "Effect": "Allow",
      "Action": [
        "s3:PutObject",
        "s3:GetObject",
        "s3:GetBucketLocation",
        "s3:ListBucket"
      ],
      "Resource": [
        "arn:aws:s3:::<your_bucket_name>/*",
        "arn:aws:s3:::<your_bucket_name>"
      ]
    }
  ]
}
IAM user for S3 access
Create an IAM user with permissions to read and delete objects from your S3 bucket:
{
  "Version": "2012-10-17",
  "Statement": [
    {
      "Effect": "Allow",
      "Action": [
        "s3:PutObject",
        "s3:GetObject",
        "s3:GetObjectVersion",
        "s3:DeleteObject",
        "s3:DeleteObjectVersion",
        "s3:ListBucket",
        "s3:GetBucketLocation"
      ],
      "Resource": [
        "arn:aws:s3:::<your_bucket_name>/*",
        "arn:aws:s3:::<your_bucket_name>"
      ]
    }
  ]
}
Warning
If you don’t provide s3:DeleteObject and s3:DeleteObjectVersion permissions, the temporary data files won’t be deleted from the S3 bucket even if the migration succeeds.
Prerequisites for SQL Server sources
Valid connection to your SQL Server source database.
Appropriate permissions to read data from source tables.
Network connectivity between the migration tool and both source and target systems.
Migrate your data
Complete the end-to-end data migration process by transferring your actual data to the deployed database structure in Snowflake:
Migrate Amazon Redshift data
In SnowConvert AI, open the project, and then select Migrate data.
On the Connect to source database page, complete the fields with the connection information for your source database, and then select Continue.
On the Connect to Snowflake page, complete the fields with your connection information, and then select Continue.
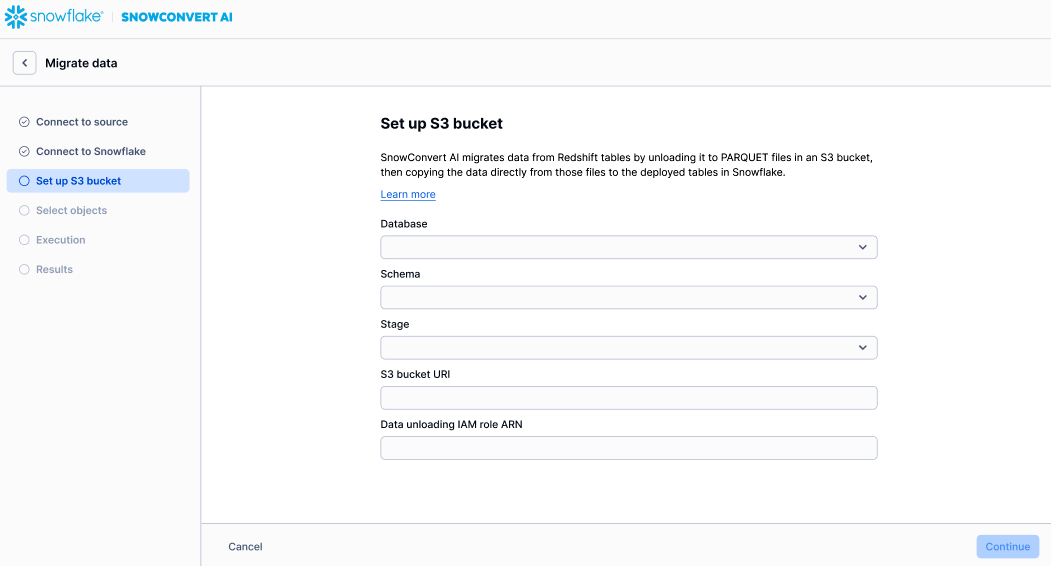
On the Set up S3 bucket page, specify the following information:
Database: Select the database that contains the tables that you want to migrate.
Schema: Select the schema that contains the tables that you want to migrate.
Stage: Select the stage where data files will be stored.
S3 bucket URI: Enter the Uniform Resource Identifier for the Amazon S3 bucket that contains the source data. The URL must end with
/.Data unloading IAM role ARN: Enter the Amazon Resource Name (ARN) for the IAM role that you used to unload the data to Amazon S3.
The following image is an example of the page:
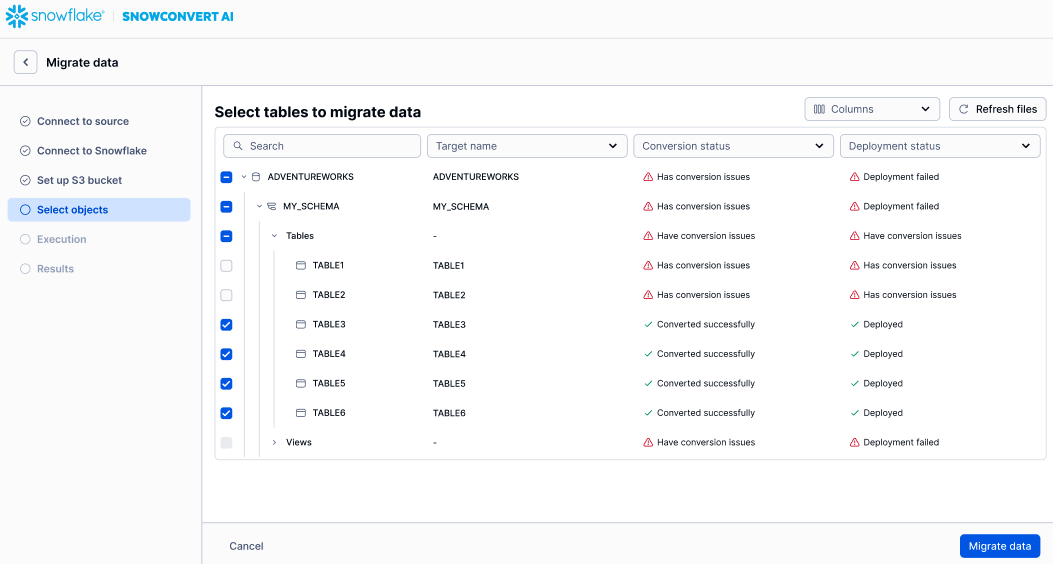
On the Select tables to migrate data page, select the tables that you want to migrate.
The following image is an example of the page:
Select Migrate data.
When the migration completes successfully, the Results page appears.
If the results don’t look correct, you can select Retry data migration to run the data migration process again.
When the results look correct on the Results page, select Go to data validation to start the validation process.
Migrate SQL Server data
In SnowConvert AI, open the project, and then select Migrate data.
On the Connect to source database page, complete the fields with the connection information for your source database, and then select Continue.
On the Connect to Snowflake page, complete the fields with your connection information, and then select Continue.
On the Select tables to migrate data page, select the tables that you want to migrate.
The following image is an example of the page:
Select Migrate data.
When the migration completes successfully, the Results page appears.
If the results don’t look correct, you can select Retry data migration to run the data migration process again.
When the results look correct on the Results page, select Go to data validation to start the validation process.