Develop and run code in Snowflake Notebooks
This topic describes how to write and run SQL, Python, and Markdown code in Snowflake Notebooks.
Notebook cell basics
This section introduces some basic cell operations. When you create a notebook, three example cells are displayed. You can modify those cells or add new ones.
Create a new cell
Snowflake Notebooks support three types of cells: SQL, Python, and Markdown. To create a new cell, you can either hover over an existing cell or scroll to the bottom of the notebook, then select one of the buttons for the cell type you want to add.

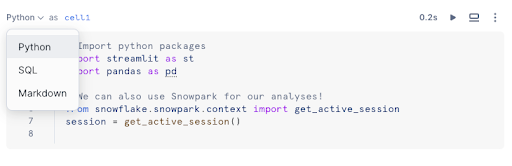
Change the language of an existing cell by using one of the following methods:
-
Select the language dropdown menu and then select a different language.
-
Use keyboard shortcuts.
Edit a cell
To prevent editing conflicts, only one user can edit a cell at a time. If another user attempts to edit an active cell, a notification will be displayed. The cell will become available for editing after 60 seconds of inactivity.
Move cells
You can move a cell either by dragging and dropping the cell using your mouse or by using the actions menu:
- (Option 1) Hover your mouse over the existing cell you want to move. Select the
 (drag and drop) icon on the left side of the cell
and move the cell to its new location.
(drag and drop) icon on the left side of the cell
and move the cell to its new location. - (Option 2) Select the vertical ellipsis
 (actions) menu. Then select the appropriate action.
Note
To just move the focus between cells, use the Up and Down arrows.
Delete a cell
To delete a cell, complete the following steps in a notebook:
- Select the vertical ellipsis (more actions) menu.
- Select Delete.
- Select Delete again to confirm.
You can also use a keyboard shortcut to delete a cell.
For considerations when using Python and SQL cells, see Considerations for running notebooks.
Run cells in Snowflake Notebooks
To run Python and SQL cells in Snowflake Notebooks, you can:
-
Run a single cell: Choose this option when making frequent code updates.
- Press
CMD+returnon a Mac keyboard, orCTRL+Enteron a Windows keyboard. - Select
 , or Run this cell only.
- Press
-
Run all cells in a notebook in sequential order: Choose this option before presenting or sharing a notebook to ensure that the recipients see the most current information. This option executes all SQL and Python code cells in the notebook from top to bottom. If an error occurs in any cell, execution will halt and subsequent cells will not run. This behavior also applies to scheduled notebooks. For example, if you run a notebook that has 10 cells, and in cell 2 there is a SQL syntax error, the notebook will stop running after cell 2.
- Press
CMD+shift+returnon a Mac keyboard, orCTRL+Shift+Enteron a Windows keyboard. - Select Run all.
- Press
-
Run a cell and advance to the next cell: Choose this option to run a cell and move on to the next cell more quickly.
- Press
shift+returnon a Mac keyboard, orShift+Enteron a Windows keyboard. - Select the vertical ellipsis (more actions) for a cell, and choose Run cell and advance.
- Press
-
Run all above: Choose this option when running a cell that references the results of earlier cells.
- Select the vertical ellipsis (more actions) for a cell, and choose Run all above.
- Select the vertical ellipsis
-
Run all below: Choose this option when running a cell that later cells depend on. This option runs the current cell and all following cells.
- Select the vertical ellipsis (more actions) for a cell, and choose Run all below.
- Select the vertical ellipsis
When one cell is running, other run requests are queued and will be executed once the actively running cell finishes.
Collapse and expand cells
You can control how much of the notebook is visible by selecting one of the cell display options at the top of the notebook:
- Select the vertical ellipsis (more actions) menu.
- Select Show/hide all and choose the appropriate option:
- Show all: Displays both code and results for each cell.
- Show code only: Hides the results and displays only the code cells.
- Show results only: Hides the code and displays only the output.
- Hide all: Collapses both code and results for all cells.
These options are helpful when:
- You want to focus on reading code or reviewing results.
- You are presenting or sharing your notebook.
- You need to navigate large notebooks more efficiently.
Duplicate cells
Duplicating a cell can help with the following:
- Testing variations of a query or function.
- Debugging without overwriting the working version.
- Comparing different outputs side by side.
- Reusing code or modifying an existing cell without losing the original.
To duplicate a notebook cell:
-
From the cell to duplicate, select the vertical ellipsis
(more actions) menu. -
Select Duplicate.
A copy of the cell appears immediately below the original.
Cell minimap
The cell minimap appears in the right sidebar of the notebook and provides a compact, draggable list of all cells in the notebook. Each entry in the minimap corresponds to a code or text cell and reflects the order in which the cells appear.
- Current cell: The selected cell is highlighted in the minimap.
- Reordering: Drag and drop items in the minimap to quickly change the order of cells in the notebook.
- Navigation: Click a cell name in the minimap to jump directly to that cell.
This feature is useful for navigating large notebooks and reorganizing content more efficiently.
Running notebooks with parameters
When you use the EXECUTE NOTEBOOK command to run a notebook, you can pass arguments to the notebook.
In a Python cell in the notebook, you can access these arguments by using the sys.argv variable, which is a built-in Python list that holds command-line arguments.
Passing arguments to notebooks allows you to customize notebook behavior. You can:
- Personalize or customize notebook execution.
- Reuse the same notebook for multiple inputs.
- Support automation or task scheduling.
Examples
In a Python cell in the notebook, you can access the arguments by using the sys.argv variable.
View all arguments passed to the notebook
Print the full list of arguments passed to the notebook.
If the notebook is executed with this command:
The output will be:
Print each argument
Loop through and print each argument individually.
The output will be:
Access a specific argument
Access the second argument.
The output will be:
Parse an argument containing comma-separated values
If an argument contains a comma-separated list of values, you can split it into individual values.
The output will be:
You can also loop through the values:
Extract an argument containing a key-value pair
If an argument includes a key-value pair (for example, key=value), extract the value.
The output will be:
Alternate syntax for a single string
You can set a session variable to the value of an argument and pass the session variable to the notebook.
View results from a parameterized run
To view the result of a notebook run that was triggered using EXECUTE NOTEBOOK:
-
Sign in to Snowsight.
-
In the navigation menu, select Projects » Notebooks.
-
Select the Calendar icon.
-
Select View run history.
-
Find the notebook execution and open the result.
A read-only notebook opens containing the result of that run.
Notes
sys.argvcontains only the strings passed via EXECUTE NOTEBOOK.- Only strings are supported. If another data type (such as an integer) is passed, it will be interpreted as NULL. For more information, see EXECUTE NOTEBOOK.
Inspect cell status
The status of the cell run is indicated by the colors displayed by the cell. This status color is displayed in two places, the left wall of the cell and in the right cell navigation map.
Cell status color:
- Blue dot: The cell was modified but hasn’t run yet.
- Red: The cell ran in the current session and an error occurred.
- Green: The cell ran in the current session without errors.
- Moving green: The cell is currently running.
- Gray: The cell has run in a previous session and the results shown are from the previous session. Cell results from the previous interactive session are kept for 7 days. Interactive session means the user runs the notebook in an interactive manner in Snowsight rather than those that were run by a schedule or the EXECUTE NOTEBOOK SQL command.
- Blinking gray: The cell is waiting to be run after you select Run All.
Note
Markdown cells do not show any status.
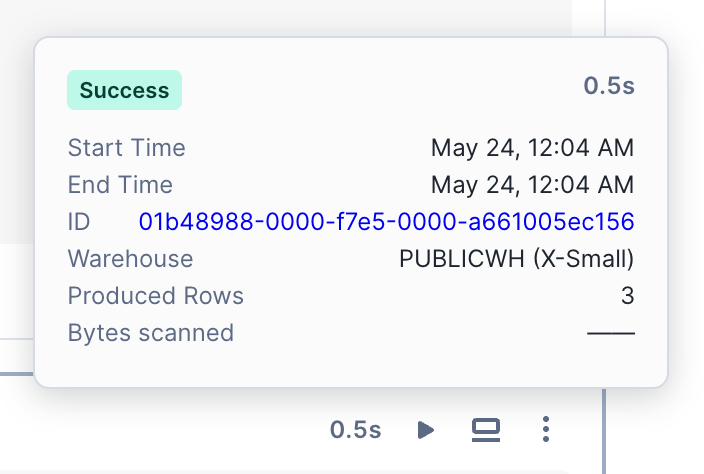
After a cell finishes running, the time it took to run is displayed at the top of the cell. Select this text to view the run details, including start and end times and total elapsed time.
SQL cells contain additional information, such as the warehouse used to run the query, rows returned, and a hyperlink to the query ID page.
Stop a running cell
To stop the execution of any code cells that are currently running, select Stop on the top right of the cell. You can also select Stop on the top right of the Notebooks page. While cells are running, Run all becomes Stop.
This stops the execution of the cell that is currently running and all subsequent cells that have been scheduled to run.
Keyboard shortcuts
Snowflake Notebooks support various keyboard shortcuts to help accelerate your development process.
You can also see the list of keyboard shortcuts by selecting the keyboard icon at the bottom right corner, and then selecting Keyboard shortcuts.
| Task | MacOS | Windows |
|---|---|---|
| Run all cells | CMD + Shift + Return | CTRL + Shift + Enter |
| Run the selected cell | CMD + Return | CTRL + Enter |
| Run the selected cell and advance to the next cell | Shift + Return | Shift + Enter |
| Move between cells | Up and Down arrows | Up and Down arrows |
| Stop all cells | ii | ii |
| Find within the cell | CMD + f | CTRL + f |
| Move cell up | CMD + SHIFT + Up arrow | CTRL + SHIFT + Up arrow |
| Move cell down | CMD + SHIFT + Down arrow | CTRL + SHIFT + Down arrow |
| Add a cell above the currently selected cell | a | a |
| Add a cell below the currently selected cell | b | b |
| Delete the currently selected cell | dd or DELETE | dd or DELETE |
| Convert a SQL or Python cell into a Markdown cell | m | m |
Convert a cell into a code cell:
| y | y |
| Show keyboard shortcuts | Shift + ? | Shift + ? |
In addition, you can use the same keyboard shortcuts that you use for worksheets. See Perform tasks with keyboard shortcuts.
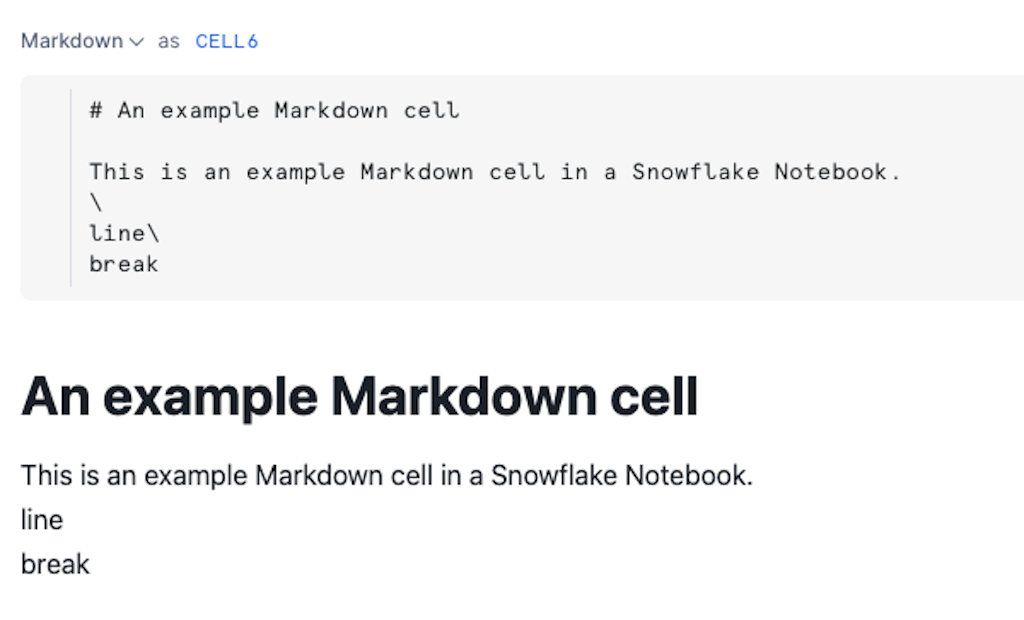
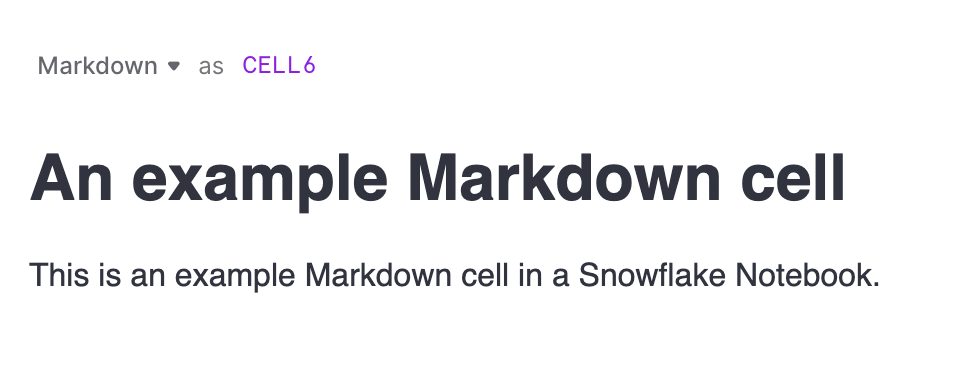
Format text with Markdown
To include Markdown in your notebook, add a Markdown cell:
- Use a keyboard shortcut and select Markdown, or select + Markdown.
- Select the Edit markdown pencil icon or double-click the cell, and start writing Markdown.
You can type valid Markdown to format a text cell. As you type, the formatted text appears below the Markdown syntax.
To view only the formatted text, select the Done editing checkmark icon.
Note
Markdown cells currently do not support rendering of HTML.
Markdown basics
This section describes basic Markdown syntax to get you started.
Headers
| Heading level | Markdown syntax | Example |
|---|---|---|
| Top level |  | |
| 2nd-level |  | |
| 3rd-level | 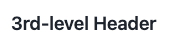 |
Inline text formatting
| Text format | Markdown syntax | Example |
|---|---|---|
| Italics |  | |
| Bold |  | |
| Link |  |
Lists
| List type | Markdown syntax | Example |
|---|---|---|
| Ordered list | 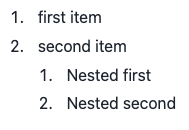 | |
| Unordered list | 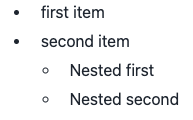 |
Code formatting
| Language | Markdown syntax | Example |
|---|---|---|
| Python |  |
For a notebook that demonstrates these Markdown examples, see the Markdown cells section of the visual data stories notebook.
Understanding cell outputs
When you run a Python cell, the notebook displays the following types of output from the cell are displayed in the results:
-
Any results written to the console, such as logs, errors, and warnings and output from print() statements.
-
DataFrames are automatically printed with Streamlit’s interactive table display,
st.dataframe().- The supported DataFrame display types include pandas DataFrame, Snowpark DataFrames, and Snowpark Tables.
- For Snowpark, printed DataFrames are evaluated eagerly without the need to run the
.show()command. If you prefer not to evaluate the DataFrame eagerly, for example when running the notebook in non-interactive mode, Snowflake recommends removing the DataFrame print statements to speed up the overall runtime of your Snowpark code.
-
Visualizations are rendered in outputs. To learn more about visualizing your data, see Visualize data in Snowflake Notebooks.
Additionally, you can access the results of your SQL query in Python and vice versa. See Reference cells and variables in Snowflake Notebooks.
Cell output limits
Only 10,000 rows or 8 MB of DataFrame output is shown as cell results, whichever is lower. However, the entire DataFrame is still available in the notebook session for use. For example, even though the entire DataFrame isn’t rendered, you can still perform data transformation tasks.
For each cell, only 20 MB of output is allowed. If the size of the cell output exceeds 20 MB, the output will be dropped. Consider splitting the content into multiple cells if that happens.
Reference cells and variables in Snowflake Notebooks
You can reference the previous cell results in a notebook cell. For example, to reference the result of a SQL cell or the value of a Python variable, see the following tables:
Note
The cell name of the reference is case-sensitive and must exactly match the name of the referenced cell.
Referencing SQL output in Python cells:
| Reference cell type | Current cell type | Reference syntax | Example |
|---|---|---|---|
| SQL | Python | cell1 | Convert a SQL results table to a Snowpark DataFrame. If you have the following in a SQL cell called You can reference the cell to access the SQL result: Convert the result to a pandas DataFrame: |
Referencing variables in SQL code:
Important
In SQL code, you can only reference Python variables of type string. You cannot reference a Snowpark DataFrame, pandas DataFrame or
other Python native DataFrame format.
| Reference cell type | Current cell type | Reference syntax | Example |
|---|---|---|---|
| SQL | SQL | {{cell2}} | For example, in a SQL cell named |
| Python | SQL | {{variable}} | For example, in a Python cell named Using Python variable as a value You can reference the value of the variable Using Python variable as an identifier If the Python variable represents a SQL identifier like a column or table name: If the Python variable represents a SQL identifier, such as a column or table name ( Make sure to differentiate between variables used as values (with quotes) and as identifiers (without quotes). Note: Referencing Python DataFrames is not supported. |
Considerations for running notebooks
-
Notebooks run using caller’s rights. For additional considerations, see Changing the session context for a notebook.
-
You can import Python libraries to use in a notebook. For details, see Import Python packages to use in notebooks.
-
When referencing objects in SQL cells, you must use fully qualified object names, unless you are referencing object names in a specified database or schema. See Changing the session context for a notebook.
-
Notebook drafts are saved every three seconds.
-
You can use Git integration to maintain notebook versions.
-
You can configure an idle timeout setting to automatically shut down the notebook session once the setting is met. For information, see Idle time and reconnection.
-
Notebook cell results are only visible to the user who ran the notebook and are cached across sessions. Reopening a notebook displays past results from the last time the user ran the notebook using Snowsight.
-
BEGIN … END (Snowflake Scripting) is not supported in SQL cells. Instead, use the Session.sql().collect() method in a Python cell to run the scripting block. Chain the
sqlcall with a call tocollectto immediately execute the SQL query.The following code runs a Snowflake scripting block using the
session.sql().collect()method: