Clean rooms UI tour
This topic introduces you to the main pages and elements of the clean rooms UI, and how to use them for common tasks.
The clean rooms UI might look slightly different for you than shown here because the clean rooms UI is updated periodically, and also the clean rooms UI looks different for users on an account that isn’t upgraded to use Snowflake authentication. Additionally, some pages require that you have a specific clean rooms role to be able to access. If you don’t have the appropriate role to access a page, the page might be disabled or not appear in your clean rooms UI. Using the ACCOUNTADMIN role gives you access to all the pages described here.
To follow along in your browser, sign in to the clean rooms UI.
Clean rooms inventory page
The landing page that you see after you sign in is the clean rooms inventory page. Here you can see all the clean rooms that you created, joined, or are invited to join, but haven’t yet joined.
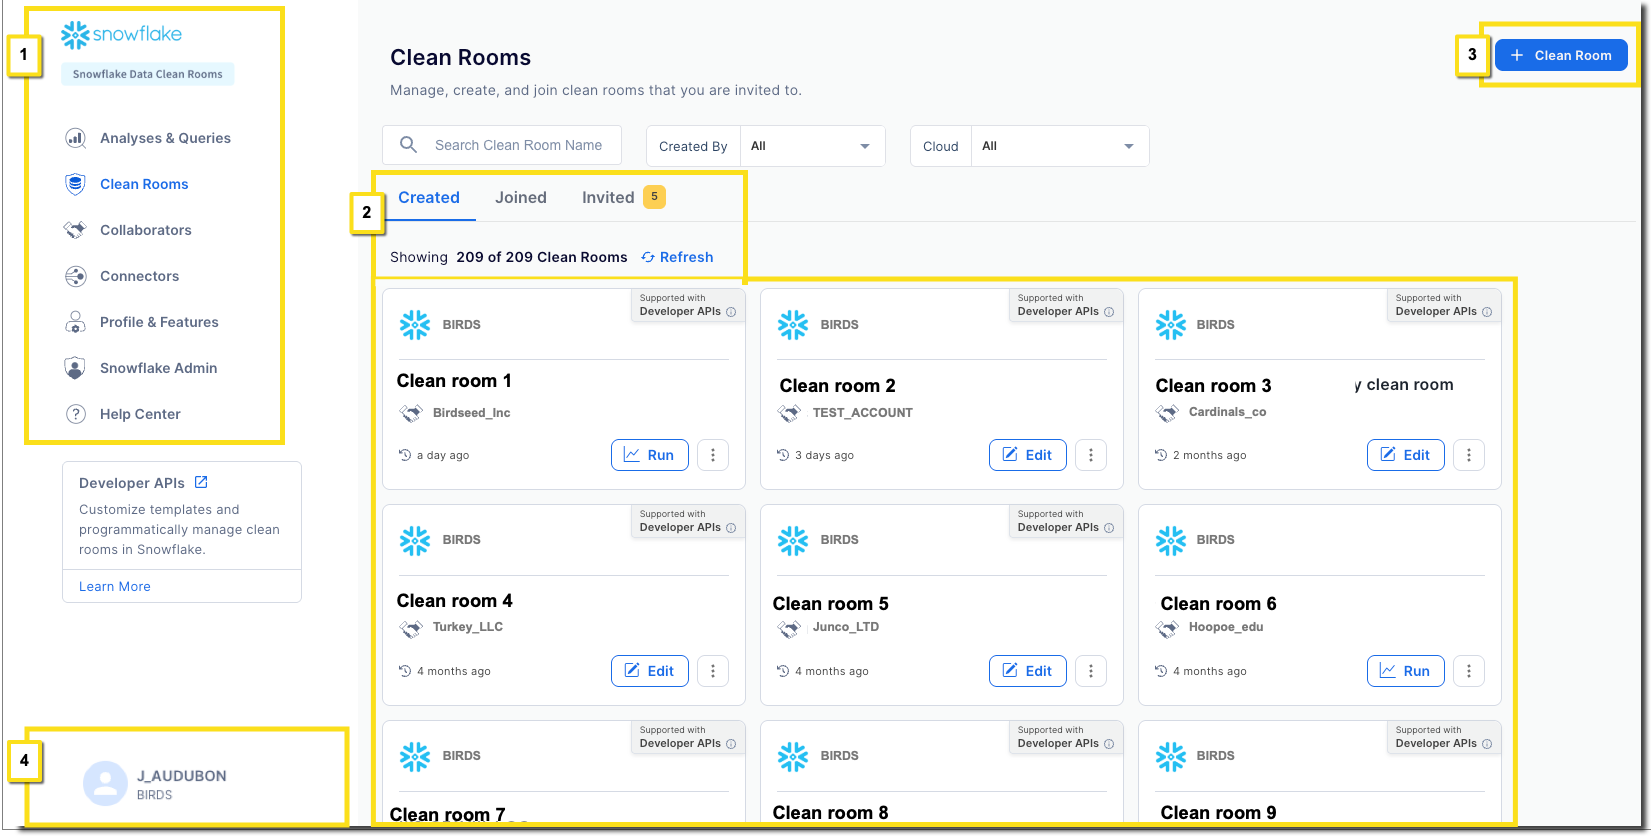
- 1) Navigation bar:
Use the navigation bar to go to the other clean rooms pages, described elsewhere in this topic.
- 2) Clean room list:
Clean rooms are grouped into those you have created, those you have joined (installed) as a consumer, and those you are invited to join as a consumer. You can filter the list in the current view by entering a full or partial string in the filter textbox above the list.
Each tile shows the clean room name, the collaborators, when the clean room was created or last edited, and a button that initiates a primary action for that clean room as described below.
Clean rooms are grouped into the following tabs:
-
Created tab: Shows clean rooms that you created by using the UI or the API. Clean rooms created by using the API are labeled as Supported with Developer APIs.
- Edit a clean room you have created by selecting Edit, or
 » Edit in a clean room tile.
 - If a tile shows a Run button in the Created list, the clean room is enabled for provider-run analyses.
- To delete a clean room, select » Delete.
- Edit a clean room you have created by selecting Edit, or
-
Joined tab: Shows clean rooms that you have joined (installed as a consumer) using either the UI or the API. After you join a clean room, you must configure it to link in your own datasets, set your join and column policies, and provide any other values required for the particular analyses or templates in the clean room.
After you configure the joined clean room, you can run analyses in joined clean rooms by selecting the Run button, or edit your values, reset the clean room to original values, or leave (uninstall) the clean room by using the
(More) list
options. For more information, see Install (join) a clean room or Delete a clean room that you created. -
Invited tab: Shows clean rooms that you are invited to join as a consumer. To join the clean room, select the Join button. Joining (installing) a clean room can take several minutes. After it is joined, the clean room is moved from the Invited view to the Joined view. You must then configure the clean room so that you can run any analyses in that clean room.
Important
If a clean room has been created using the API (it’s labeled Supported with Developer APIs), the clean room can be used in the UI only if it is explicitly designed for UI use. Otherwise, clean rooms that you create by using the API are usable only in the API.
To see any templates available for you to use in the UI, select Run. UI templates are listed in the Select Analysis / Query list; templates listed in the Developer API Templates section can be run only using the API.
-
- 3) Clean room creation button:
Select this button to create a new clean room. For more information, see Create a new clean room.
- 4) Account information:
Use this widget to see information about the Snowflake privacy policy, basic account information, or to sign out of this account in the clean rooms UI. For more detailed profile information, open the Profile & Features page.
Analysis & Queries list page
This page shows the history of analyses run by this account in the clean rooms UI. Analyses run using the API are not shown here. You can also use this page to run a new analysis of a specified type in an existing clean room.
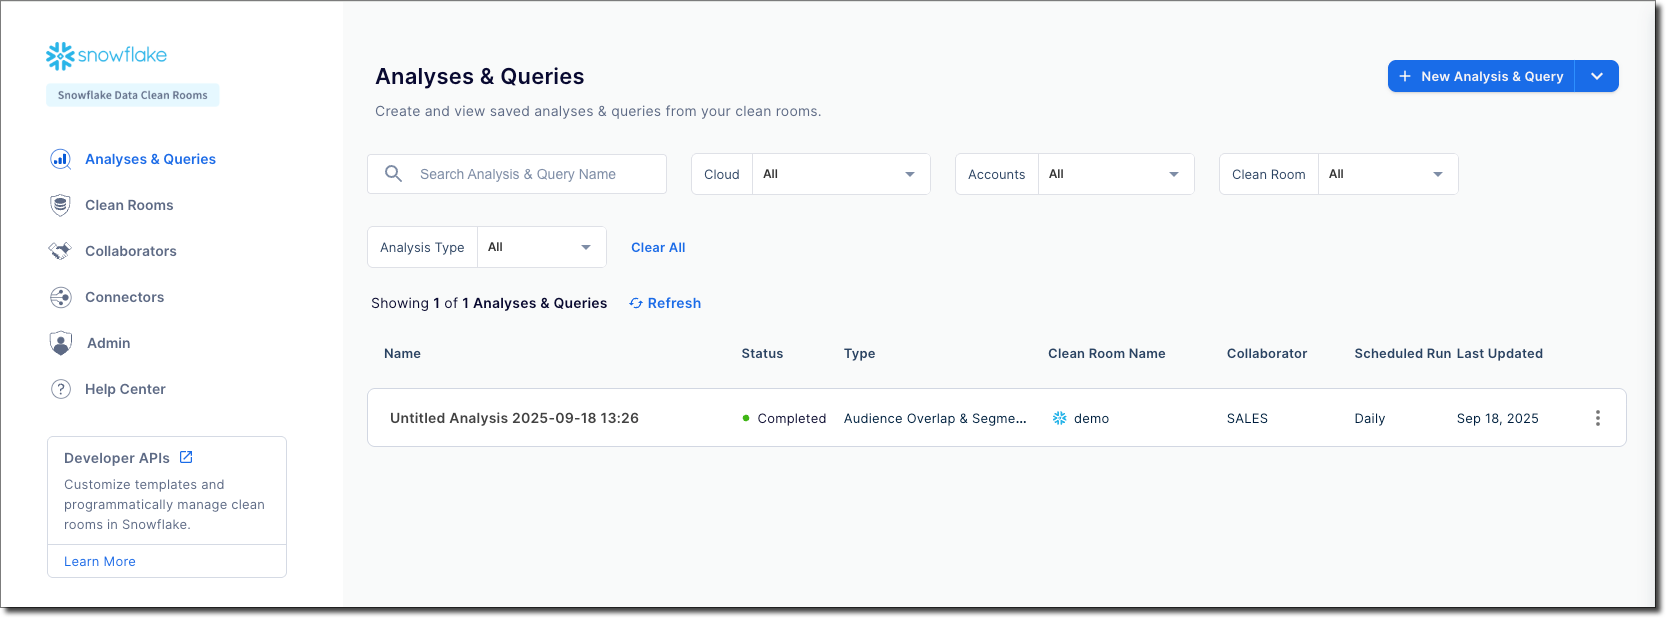
To see the results of a given analysis, select the analysis from the list and examine the results as described in the analysis results page. Each element in the list shows the analysis name, status, and which clean room the analysis was run from.
You can run a new analysis of a given type by selecting New Analysis & Query. Select the type of analysis you want to run to see a list of clean rooms that are configured for that analysis type, and then configure and run the analysis.
Analysis results page
The analysis results page shows the configuration and results of a single analysis. The following image shows the results of an untitled Overlap & Segmentation analysis that is scheduled to run every day.
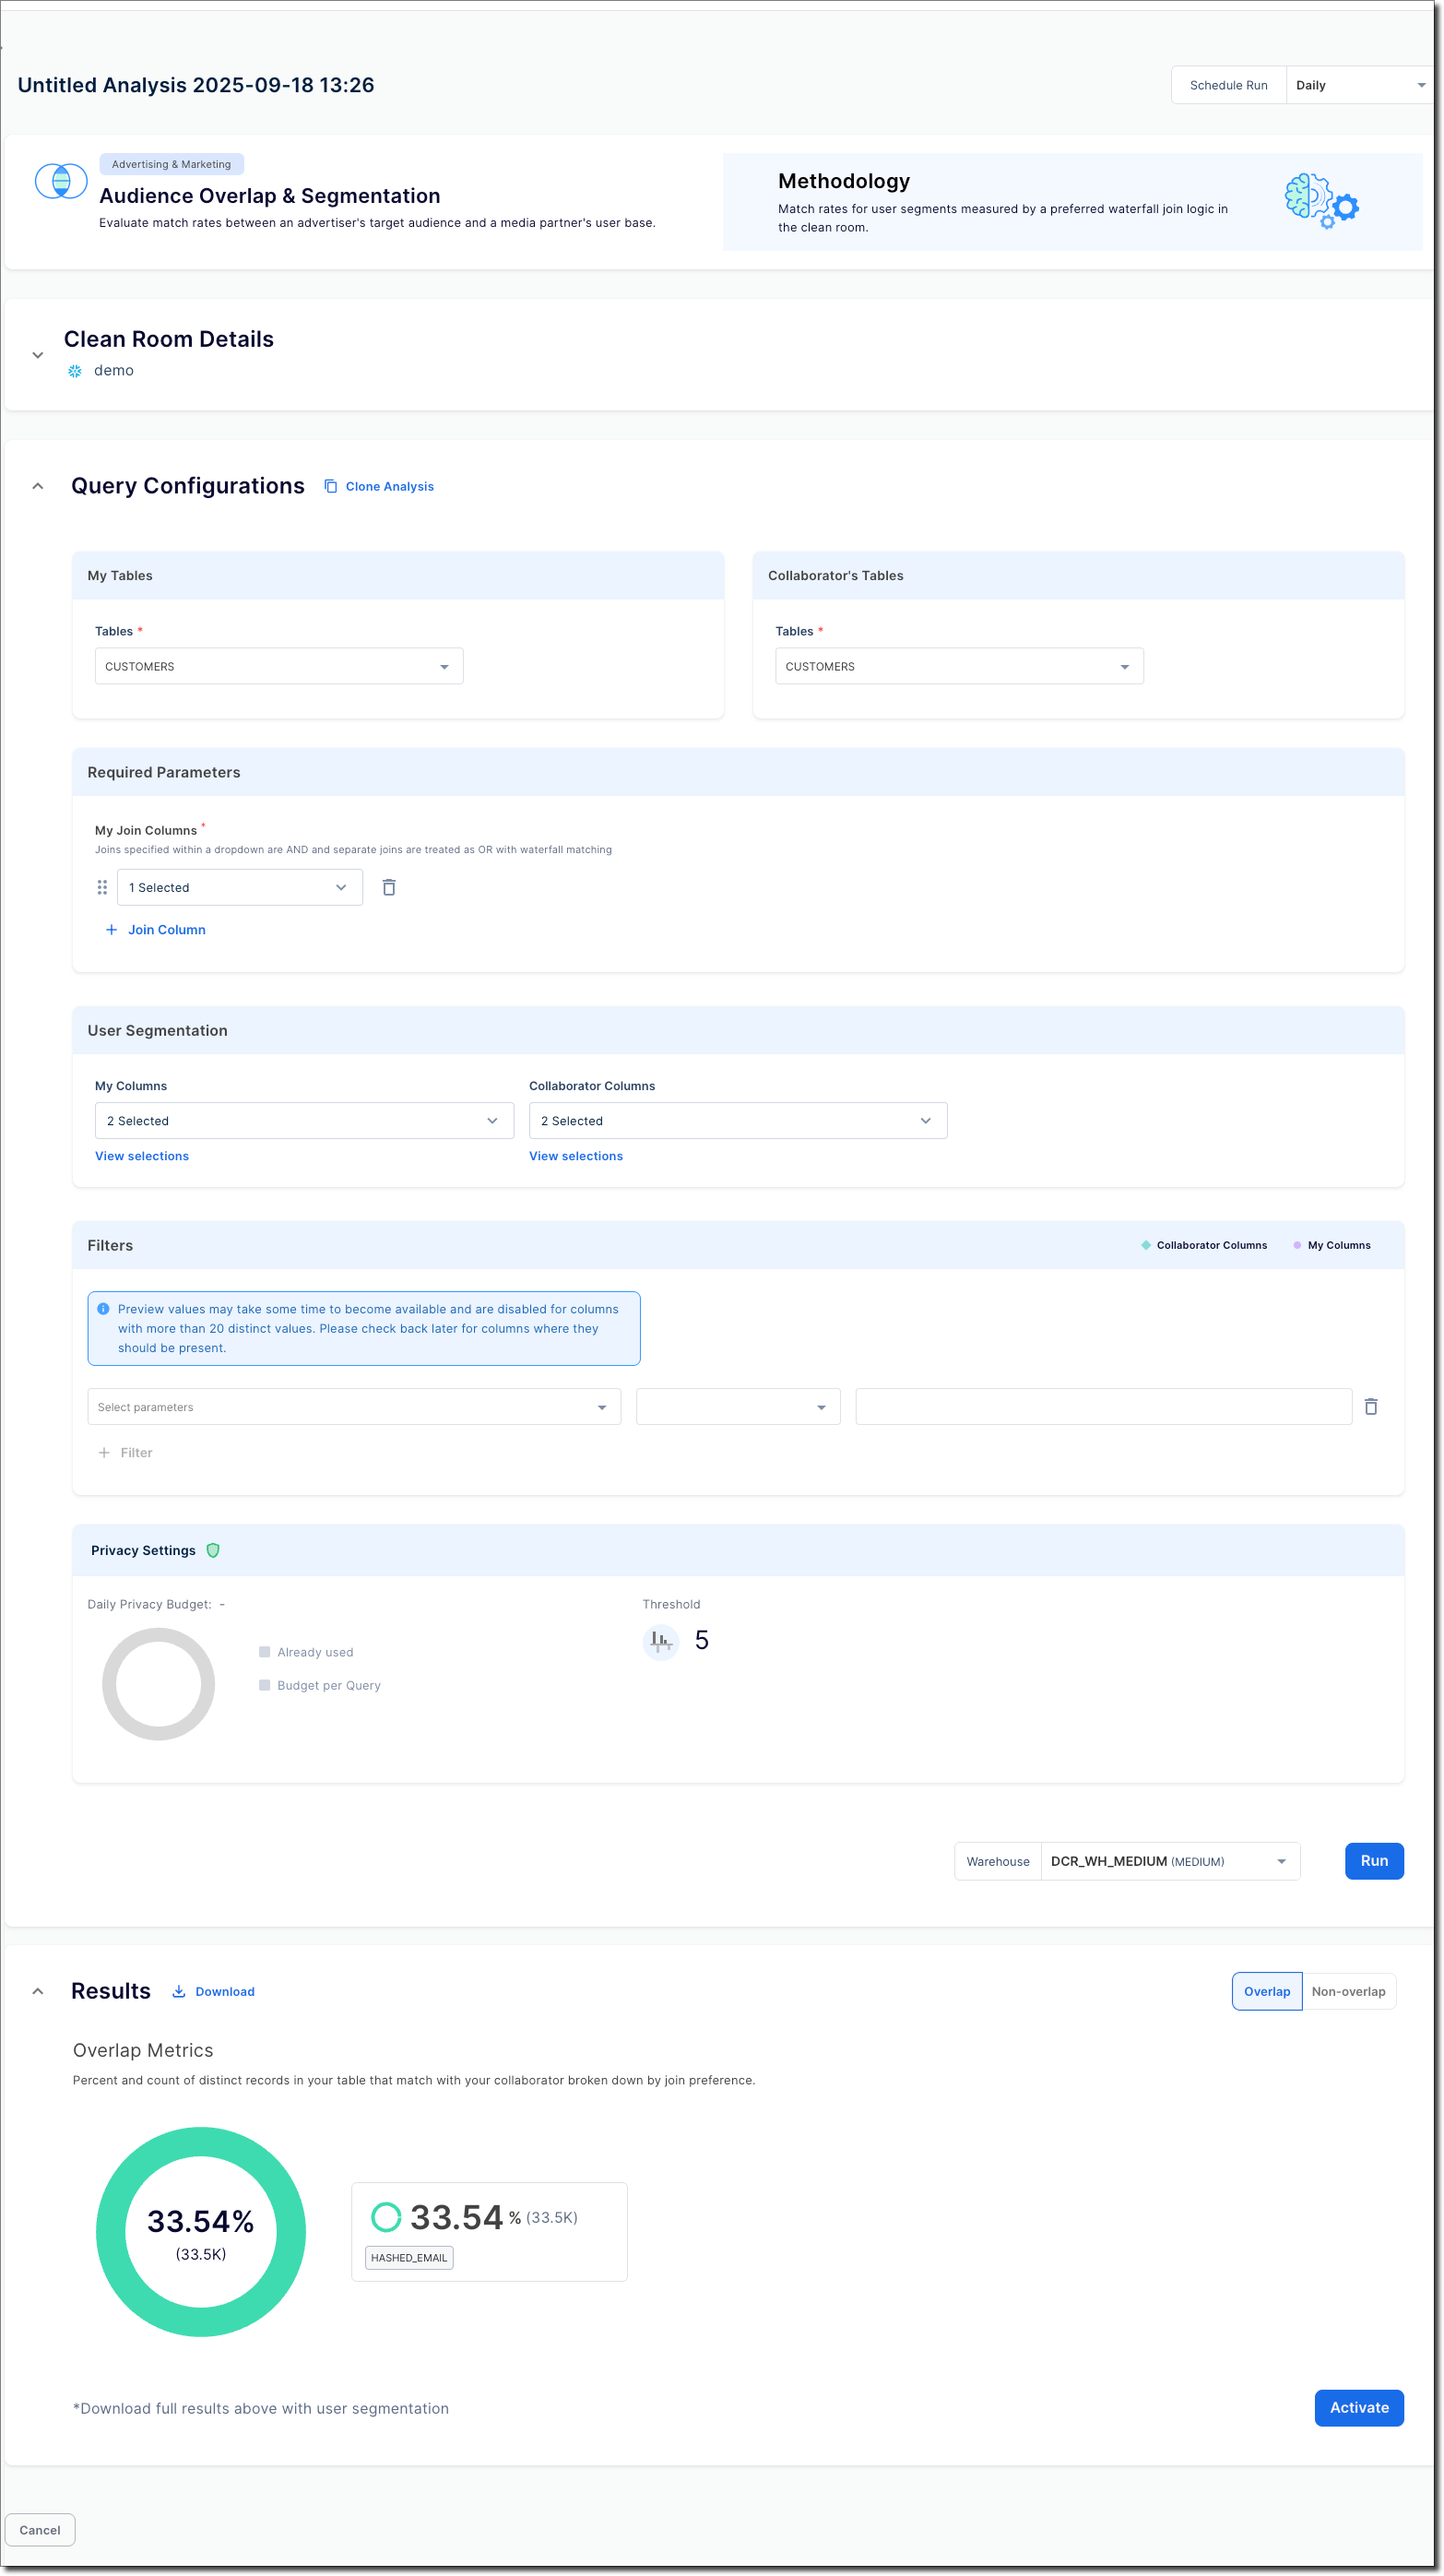
The analysis results are shown in the Results section of the page; you might need to scroll down to see them. Some analyses show a simplified graph of results, with full tabular results downloadable by selecting Download. If activation is enabled for the analysis, select Activate and walk through the activation flow to specify who should get the full results.
The page also shows the details of the analysis in the Query Configurations section. You can modify these values, and then select Run to run the analysis again.
This page is included in a list of all your analyses in the Analysis & Queries list page.
To change or disable the schedule of a repeating query run, change the Schedule Run selector on the page to your desired run schedule, or Off to turn off repeating run.
Profile & Features page
This page is used to manage the company name and logo displayed to collaborators, as well as managing the list of third-party identity providers, data providers, and activation providers.
Use this page to manage the list of third-party provider connectors that are enabled for this account; you don’t configure connectors or assign them to specific clean rooms here. You configure connectors in the Connectors page, and you enable connectors within individual clean rooms during a clean room creation or editing flow.
The identity, data, and activation provider connector lists on this page show only connectors enabled for this account. To enable a new connector, select Edit, then select the connector that you want to enable. After you enable a connector here, you must configure it in the Connectors page.
You need the SAMOOHA_BY_SNOWFLAKE.MANAGE_DCR_PROFILE_AND_FEATURES application role to access this page.
Snowflake Admin page
This page is where you perform the following administrative tasks:
- See your account identifiers.
- See the account cloud and region.
- See and manage the service user that is used by the UI to perform clean room actions.
- See and manage account-wide features, such as Cross-Cloud Auto-Fulfillment, external and Iceberg tables, and scheduled repeating analyses.
- Register data objects for use in clean rooms.
You need the ACCOUNTADMIN role to access this page.
Collaborators page
Use this page to manage the list of consumers who can be invited to join a clean room using the clean rooms UI. (Clean rooms API users can invite anyone with a Snowflake account.) Only collaborators listed here can be invited by a clean room provider in the UI.
This page has separate sections for managing collaborators with a Snowflake account and managing collaborations without a Snowflake account. (Collaborators without a Snowflake account use a managed account.)
You need the SAMOOHA_BY_SNOWFLAKE.MANAGE_DCR_COLLABORATORS application role to access this page.
Connectors page
This page is used to configure any identity, data, or activation connector enabled in the Profile & Features page. See the on how to configure a provider in the clean rooms, see the documentation in the section under Third-party connectors.
You need the SAMOOHA_BY_SNOWFLAKE.MANAGE_DCR_CONNECTORS application role to access this page.