Snowpark Migration Accelerator: Conversion Setup
When you first launch the Snowpark Migration Accelerator (SMA), you need to either create a new project or open an existing one. Each project can store multiple SMA executions for both Assessment and Conversion phases. After completing the Assessment phase, you will need to configure your project for the Conversion phase.
Conversion Setup Page
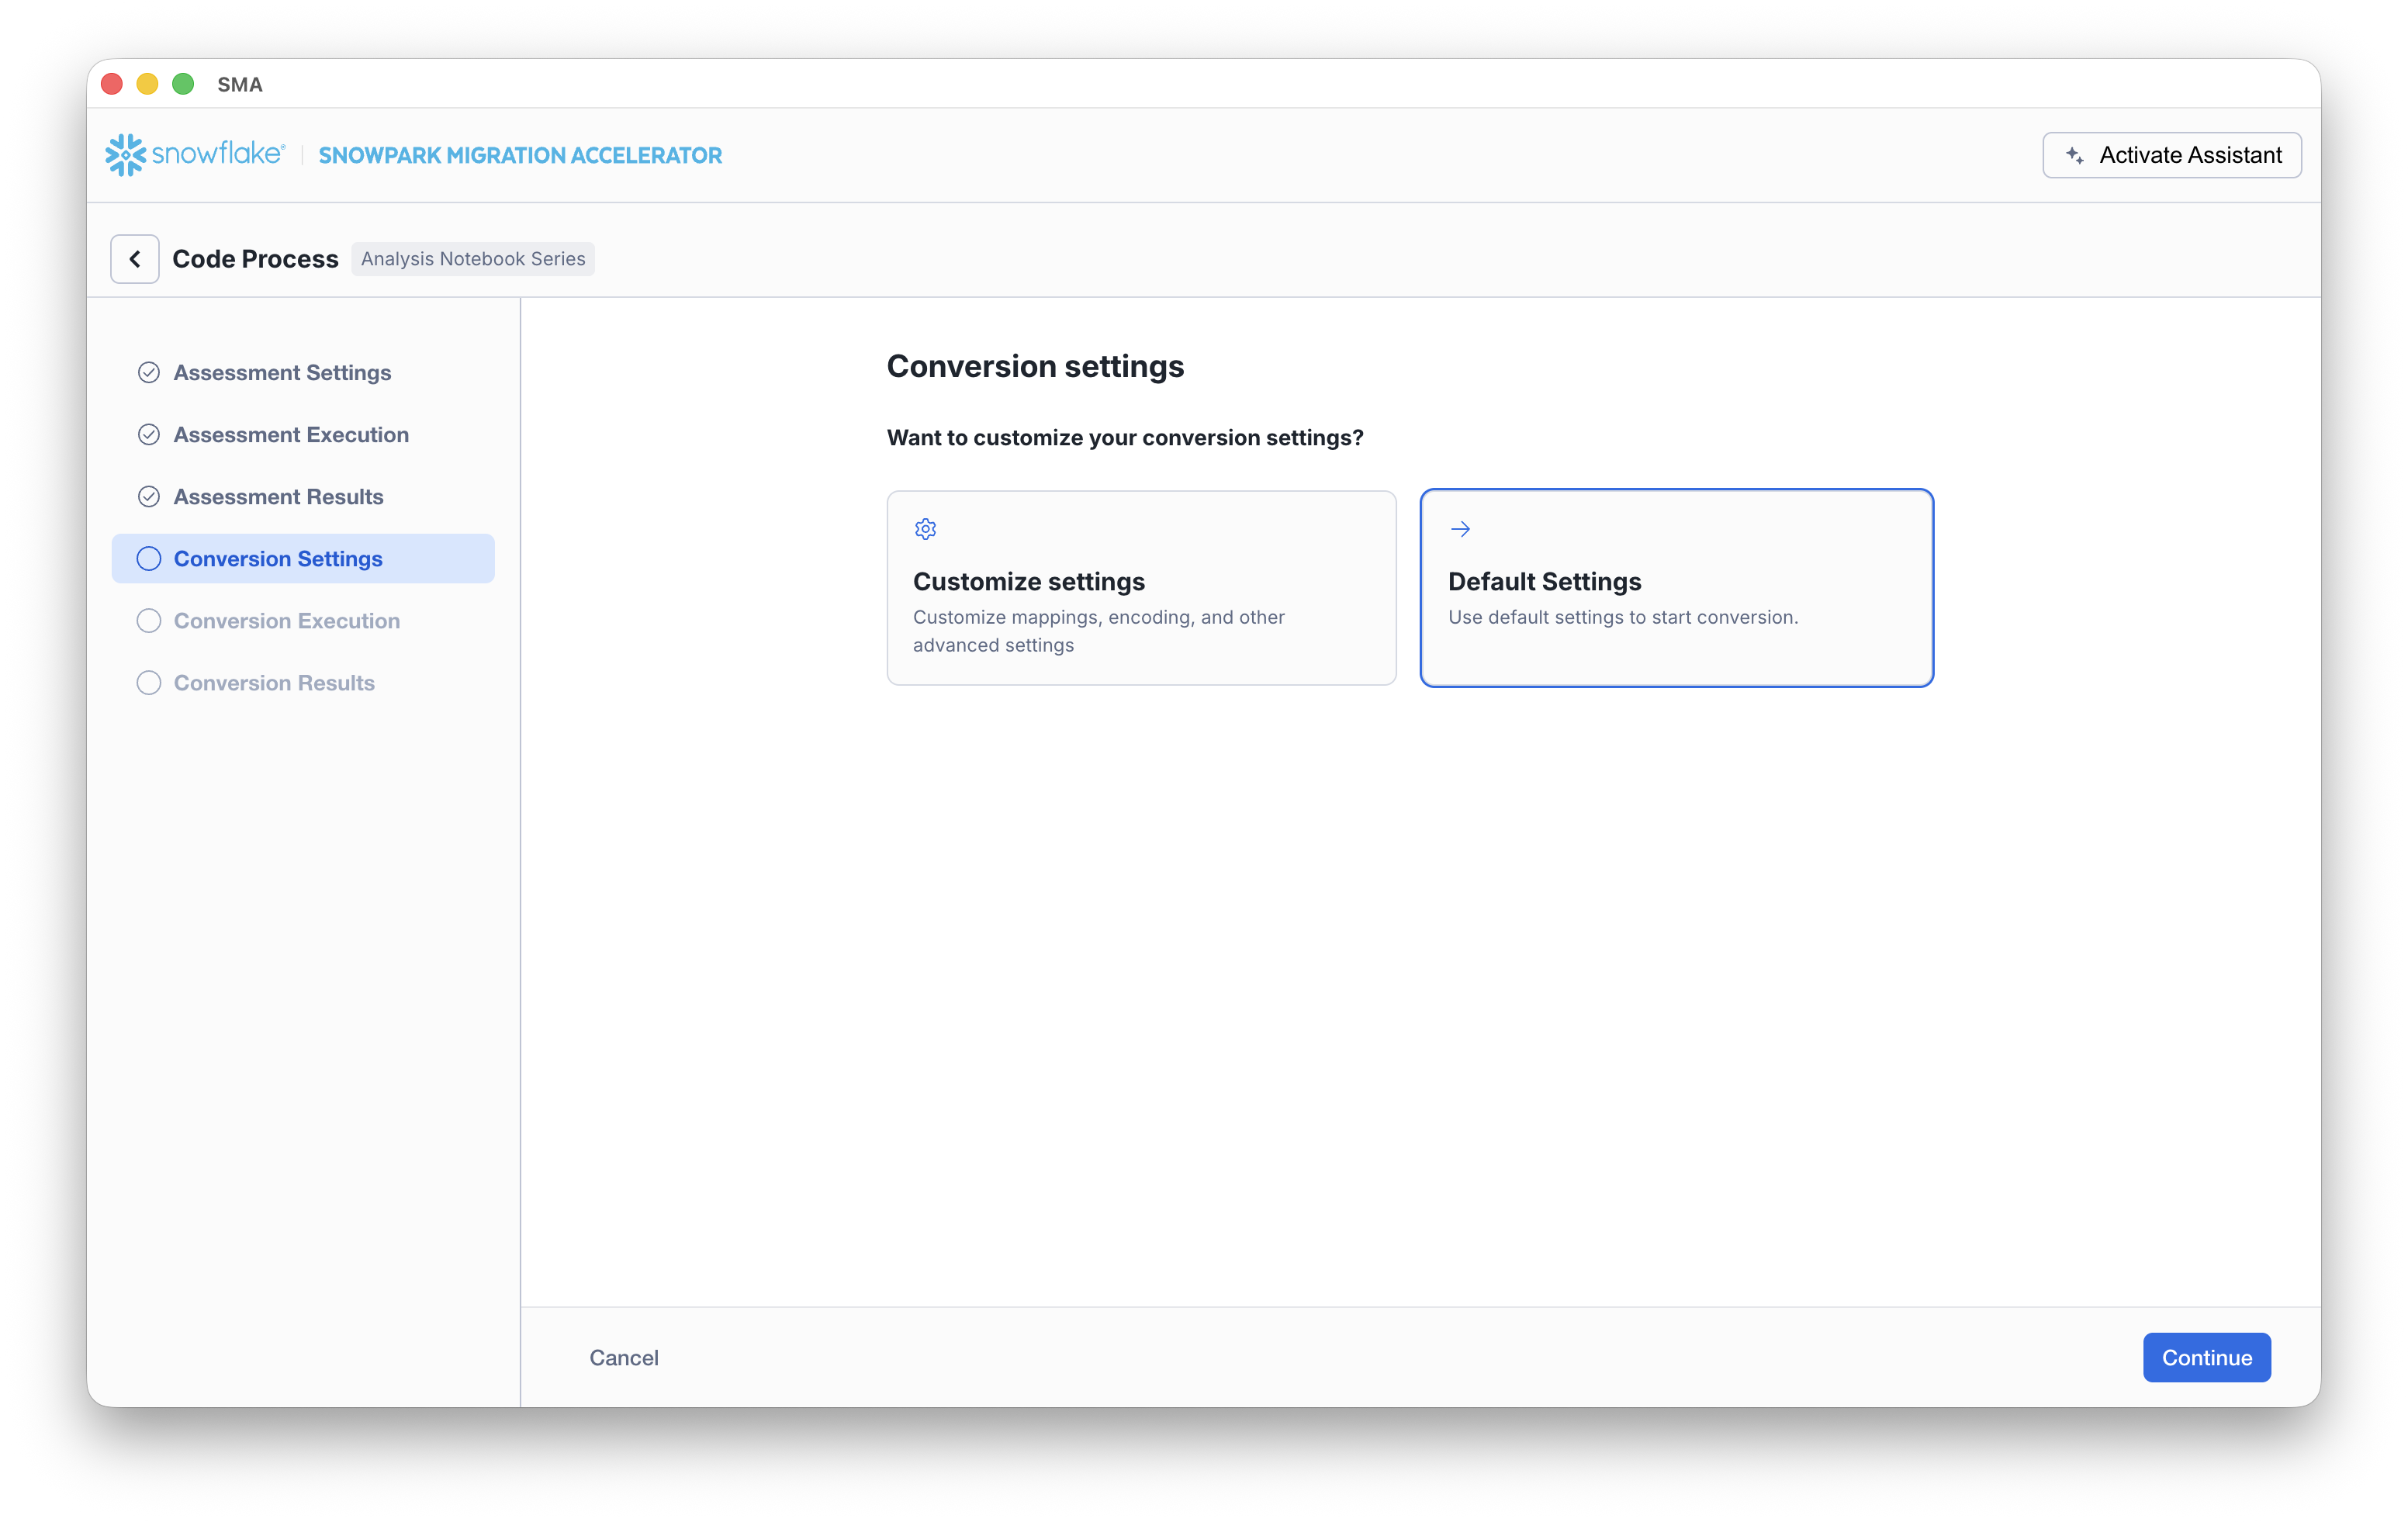
During the conversion process, you have several configuration options available, although most default settings should work well for most cases.
On the Conversion settings page, choose whether to run the conversion using Default Settings or to select Customize settings to configure advanced options.
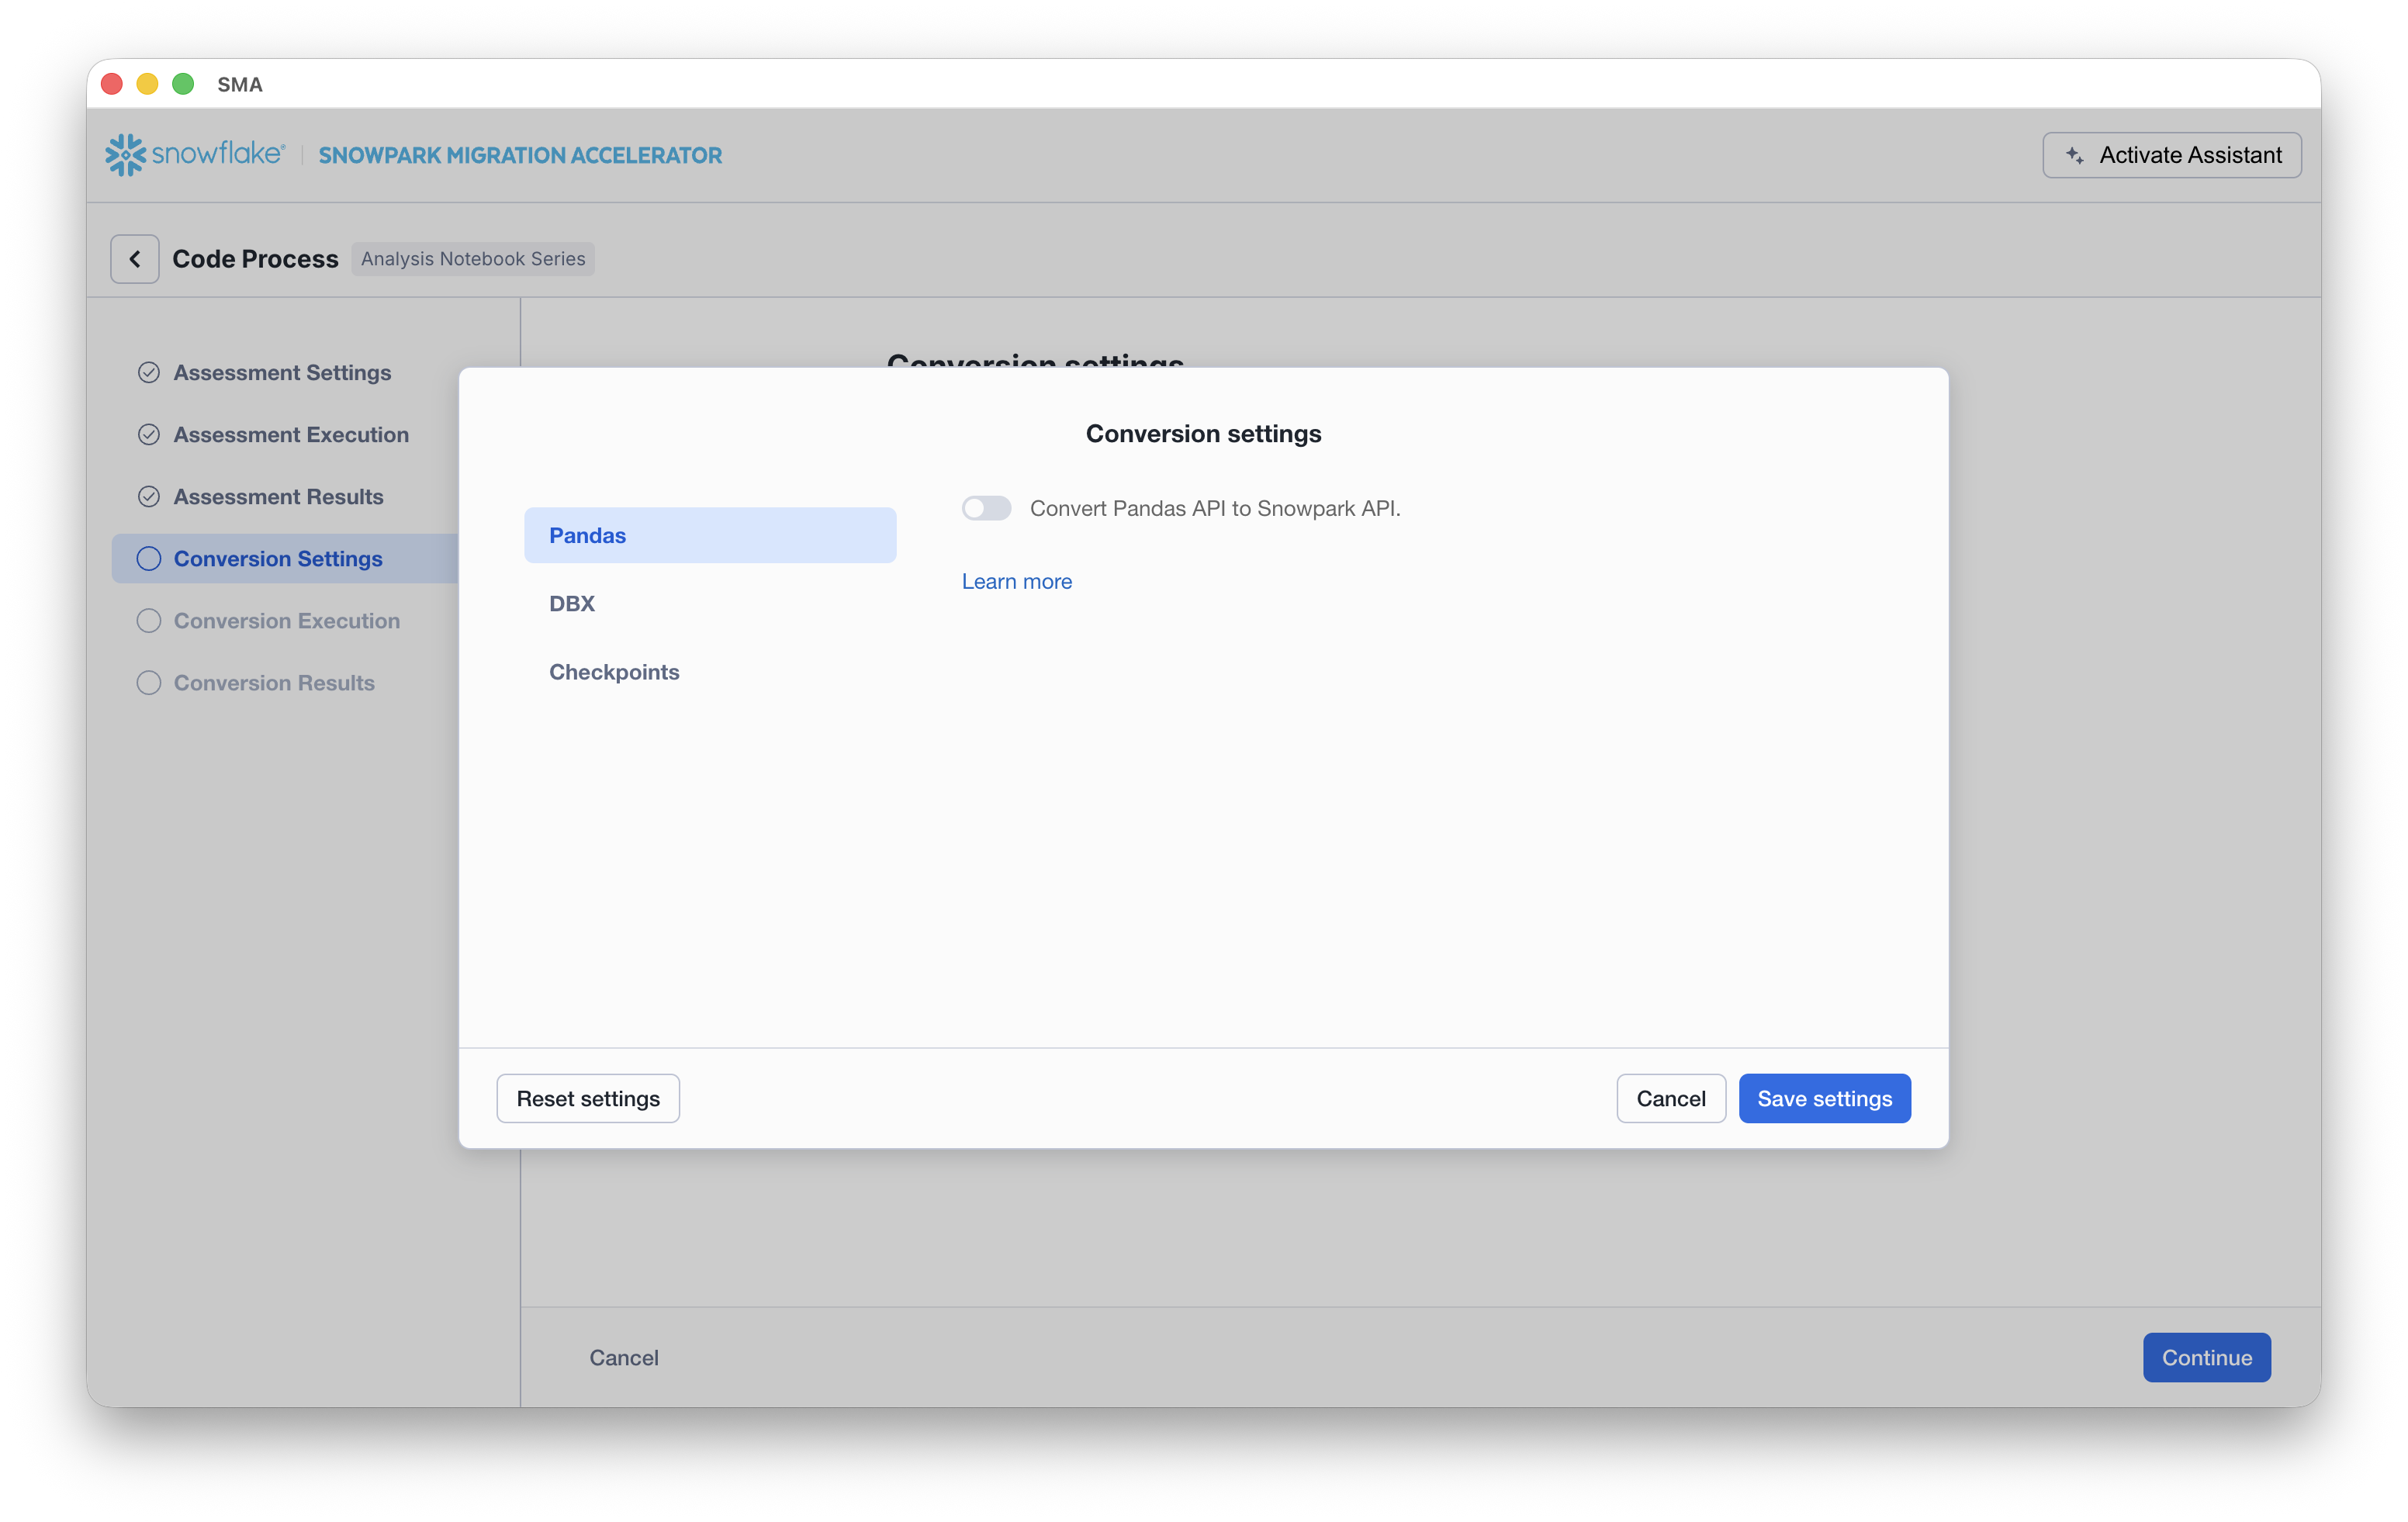
If you select Customize settings, SMA opens a Conversion settings dialog where you can review and update settings and then click Save settings.
Conversion Settings
With the following settings from the user interface, you can more finely control how the SMA performs conversion.
Pandas
Convert Pandas API to Snowpark API - Specifies to automatically convert Pandas code to the Snowpark equivalent Pandas API (Snowpark Pandas). When enabled, the tool transforms any Pandas operations it finds in your code into their Snowpark counterparts.
DBX
Convert DBX notebooks to Snowflake notebooks - Specifies to convert the .dbc into Jupyter files in a new folder with the .dbc name.
Note
When exporting notebooks, consider exporting them as Databricks, rather than Jupyter. When Jupyter files contain different sources than Python, SMA behavior may be unexpected.
Checkpoints
Identify and collect checkpoints - Activates the feature.
Collect checkpoints as active - Specifies to execute the collected checkpoint in VS Code when running the workload.
Collect user-defined functions returning data frame type - Specifies to validate that dataframes should be collected if the user has their own functions that return DataFrames.
Mode - Specifies the mode type to validate (Schema or DataFrame).
Sample - Specifies the sampling percentage of each DataFrame to validate.
Relevant PySpark functions to collect - Specifies the PySpark packages to collect (by default, all of them are checked). You can also add more packages by adding the package’s full name.
Setup Complete
Once your setup is complete, click the Continue button. This action will initiate the SMA Conversion processes. A progress screen will display the current status of your conversion.
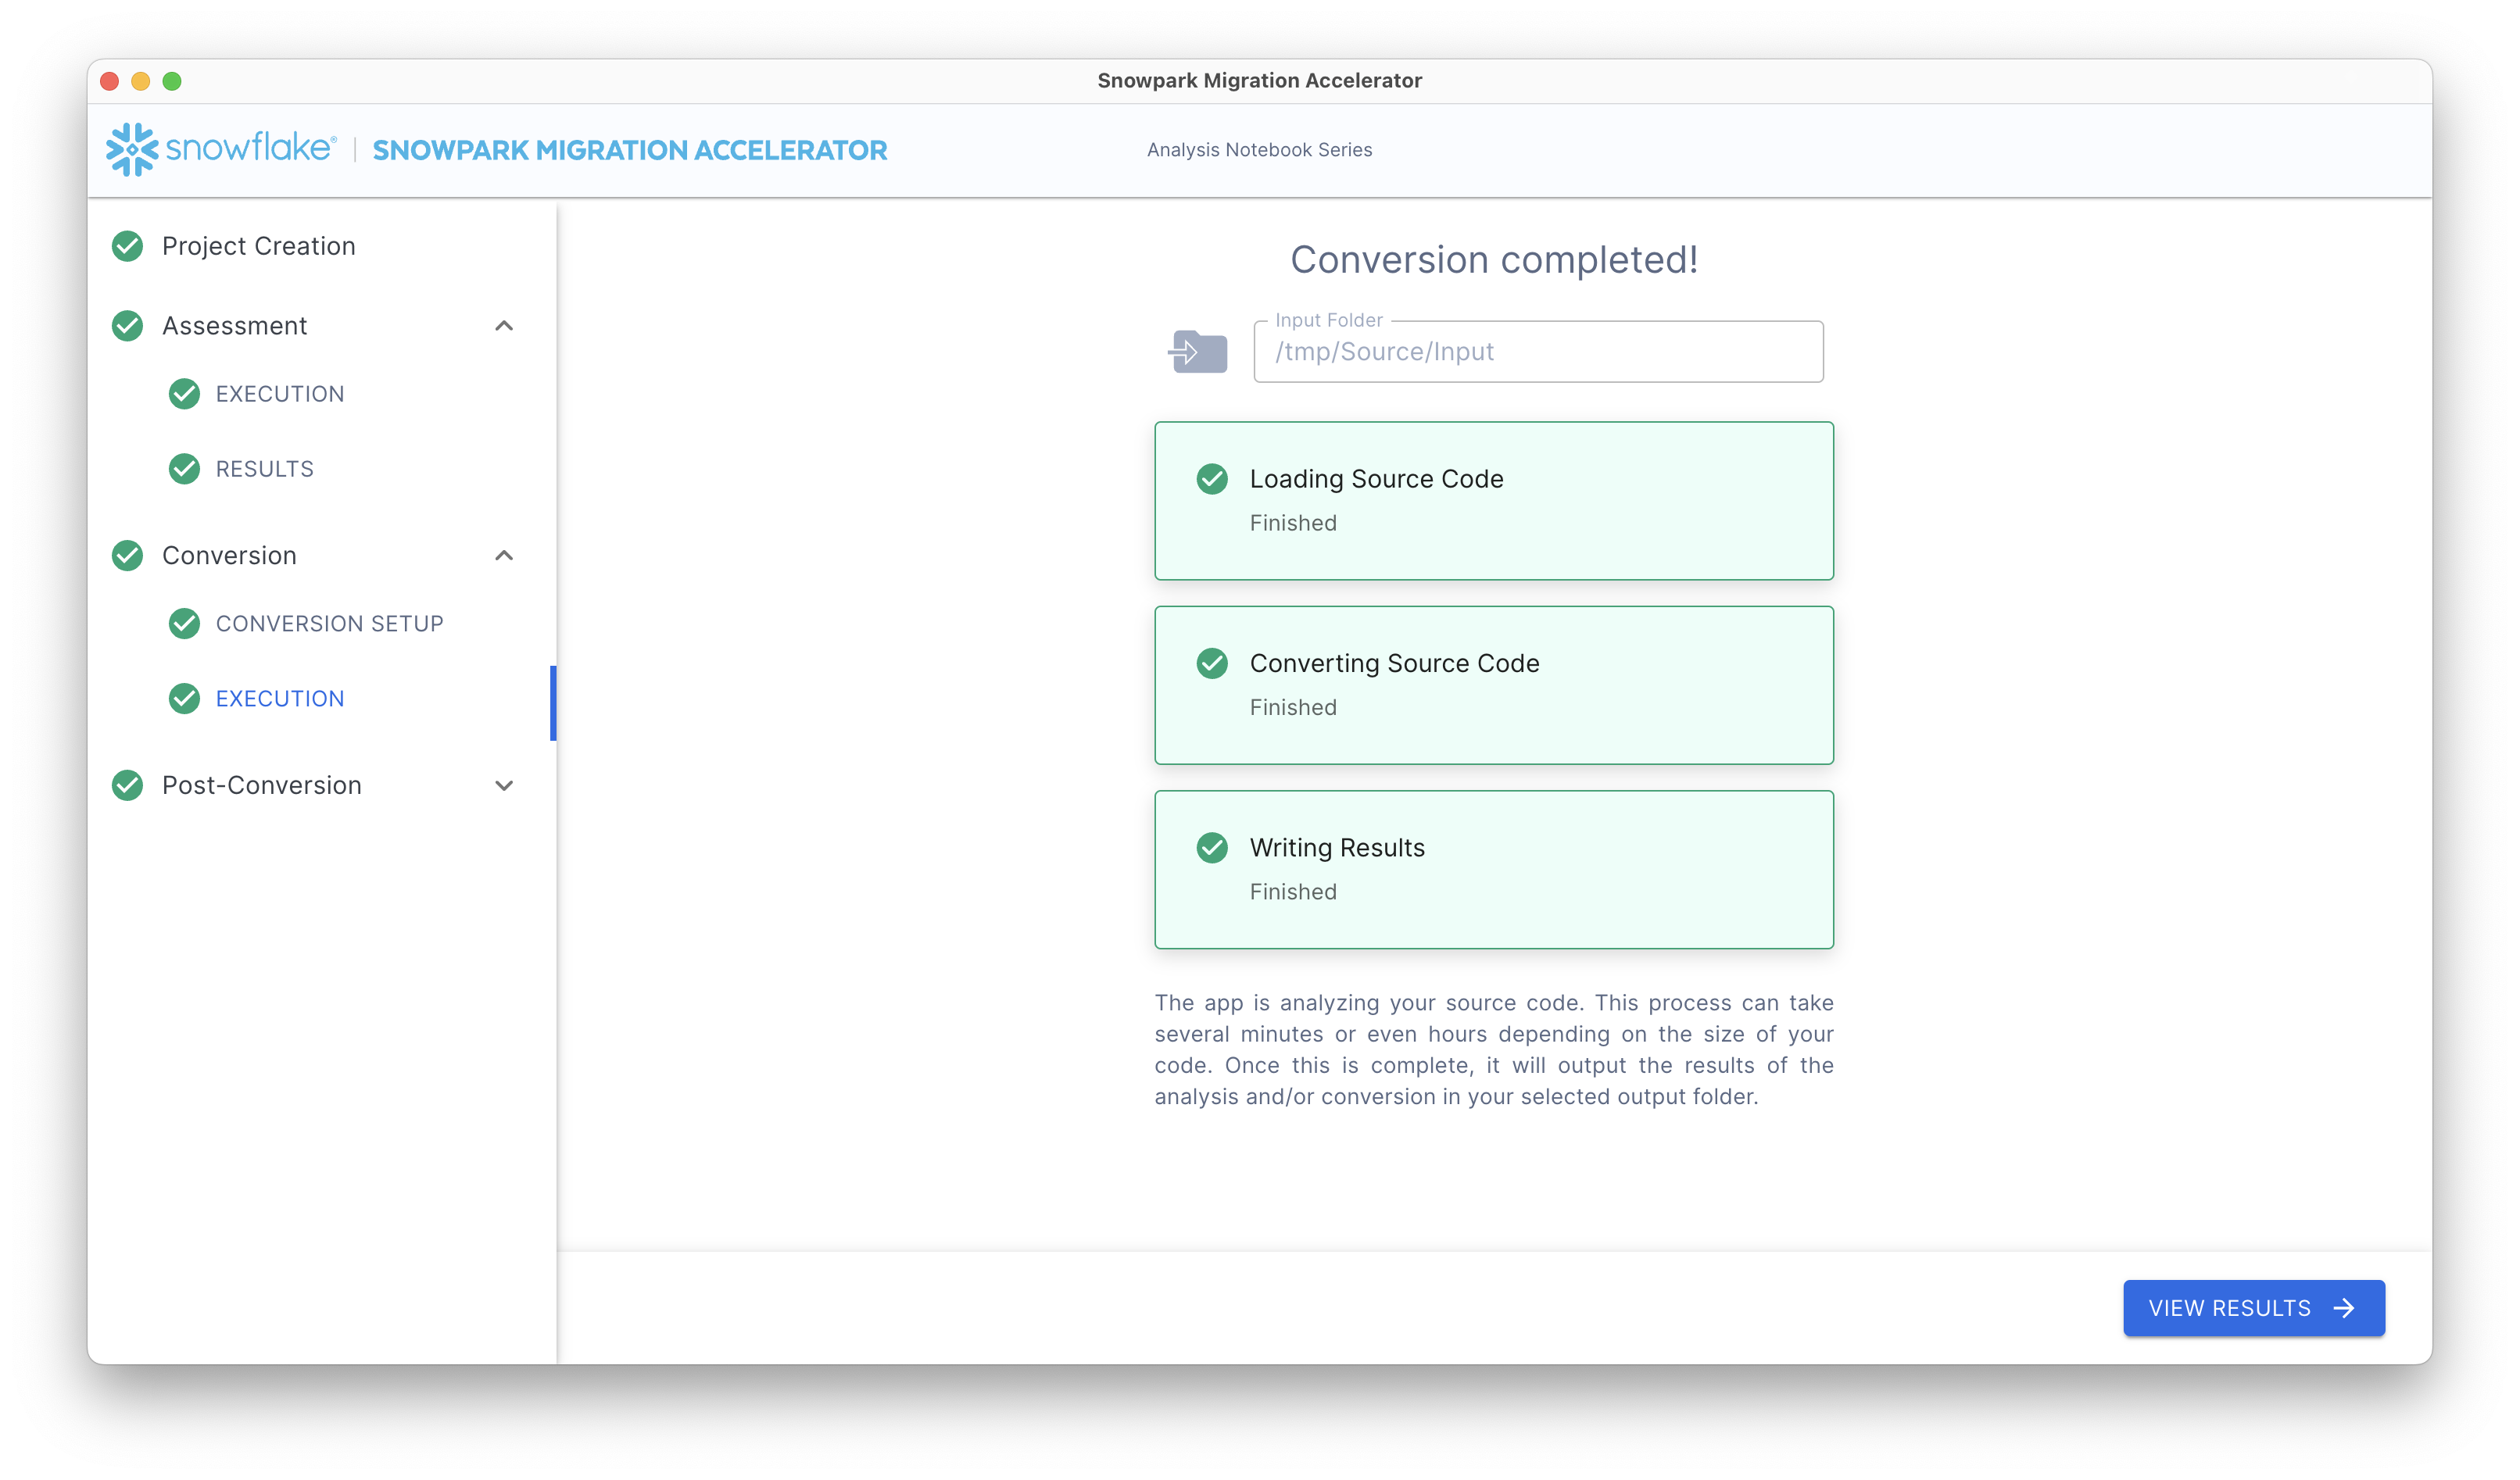
After the conversion finishes, SMA automatically displays the Conversion Results screen.